Do you think IIT Guwahati certified course can help you in your career?
Introduction
ReadyAPI is an all-in-one automated API testing platform designed to provide smooth functioning of testing workflow. It helps manage, create and execute functional, performance, and security tests. The UI is user-friendly, and one can work on it without prior scripting knowledge.
In this article, we will discuss the Load Scheduler and Assertions in Ready API.
Targets in Ready API
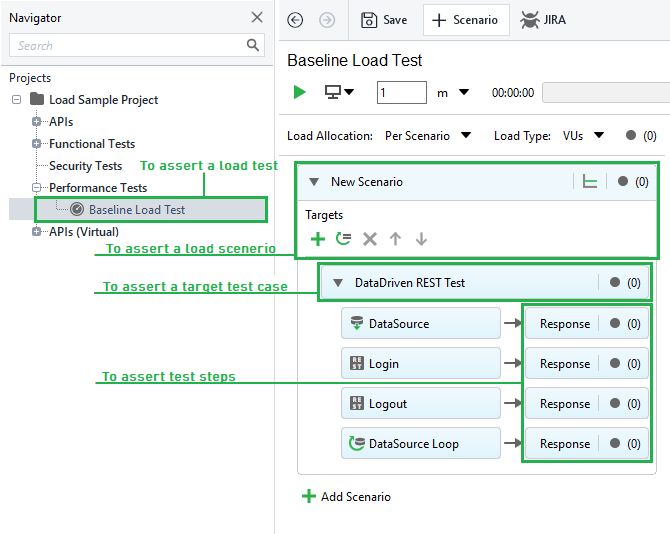
Targets in Ready API are discrete components of a test scenario executed one after another. You can include a target loop if you need to repeat targets in a cycle.
Test Warm-up in Ready API
The server might take some time to respond reliably once the test starts. The load test's initial five seconds typically don't yield accurate results and can impact your overall statistics. Consequently, it is wise to include a warm-up period in your test during which requests are made, but no data is gathered. To configure the warm-up time for your tests, open the Load Test Editor and enter the test start delay into the warm-up time field.
Test Duration in Ready API
The test duration and the total number of functional tests that have been run can be limited in ReadyAPI. Although limiting test duration is more typical, ReadyAPI allows us to run a specific number of requests if necessary.
Load Scheduler
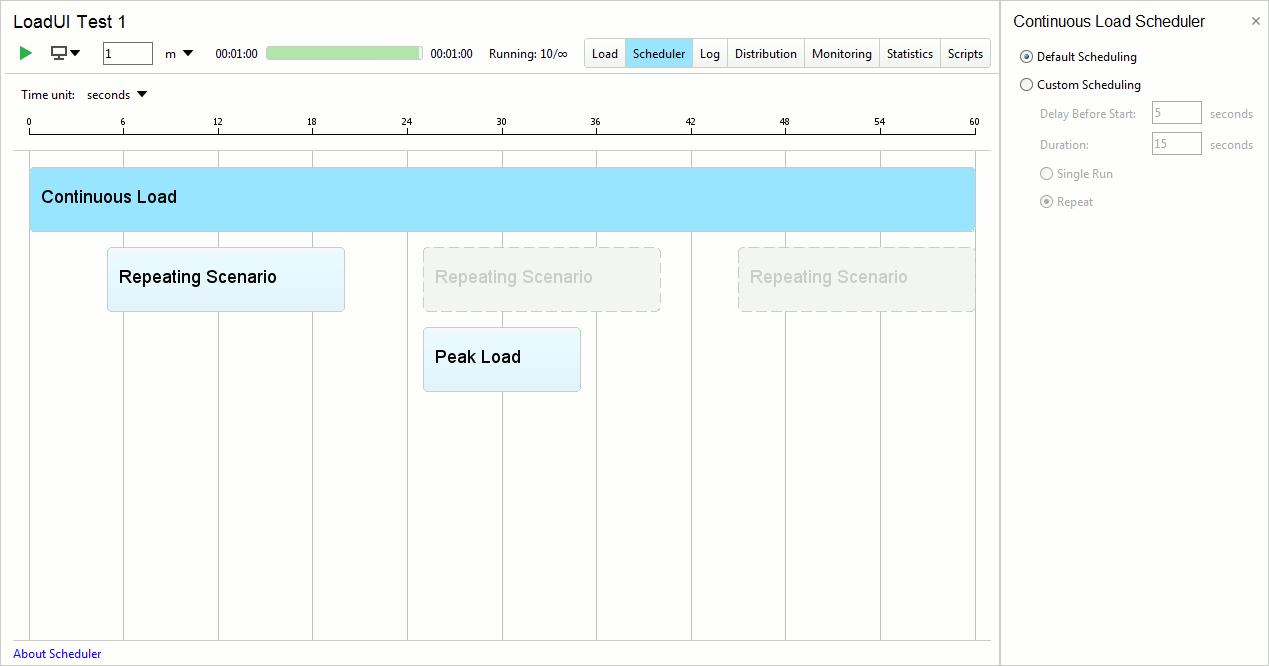
Once the test has begun, the server might take some time to reliably respond. Additionally, while the entire test is still running, you might want to stop a scenario after a particular time. As an illustration, you might want to simulate a brief peak load that begins with some delay after the test launch. You can do it in ReadyAPI by using the Scheduler page.
Note that the scheduler does not change other settings; it simply starts and finishes the scenario at the scheduled time. For instance, when you use distributed testing, the scenario executes on the designated agents at the scheduled time. You must copy the scenario and configure it according to your specifications if you want to run it on various agents at various times.
Use the scenario schedule editor shown below when you need to select the desired scenario in the test timeline to scheule a scenario.
Option
Description
Default Scheduling
(Default) When this option is enabled, ReadyAPI executes this scenario throughout the entire test run without scheduling.
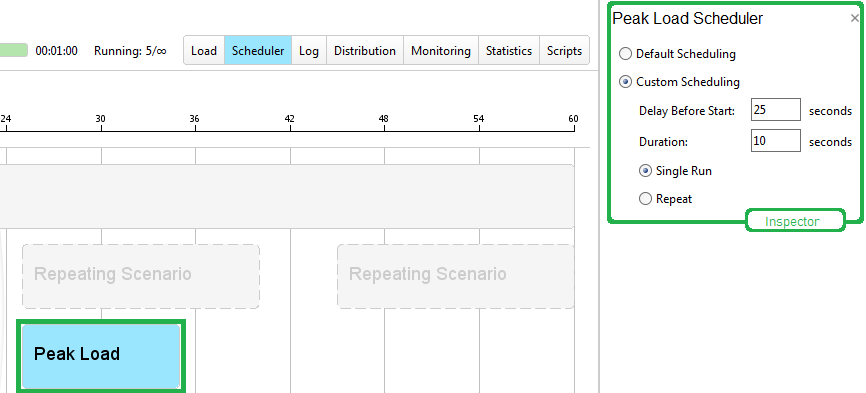
Custom Scheduling
This scenario runs following the specified schedule settings if you enable this option.
Delay Before Start
Specifies the start time for the test scenario.
Duration
Specifies how long the scenario run will last.
Single Run
The scenario only runs once during the test if this option is enabled.
Repeat
When this option is selected, the scenario is iterated upon. The Start At option also specifies a time interval between each scenario run in this case.
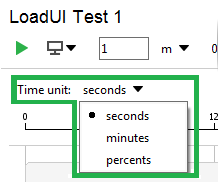
You can choose an appropriate time unit from the Time unit drop-down list for the scheduler.
You can set the following time units:
⏲️Seconds
⏲️Minutes
⏲️Percent (Percentage of total load test time)
Assertions
To determine how well your server handles the load during a test, use test assertions. You can create an assertion for every metric that was collected during the test run. Without a ReadyAPI Performance license, only the most fundamental assertions are accessible.
Choosing how to prove server performance may be challenging, especially given that test results may differ between test runs. External factors like network problems, disc activity, database backups, and other factors may have an impact on tests. It is advised to employ the following methods:
1️⃣For your load test, create a "safety net" to help you identify when serious problems arise. Create a TimeTaken - Median assertion for the test step with the 900 Maximum value, for instance, if the step typically takes 300 ms. This would give plenty of time before the assertion is triggered.
2️⃣Create "quality of service" assertions to track the occurrence of numerous minor problems. Set the low assertion level to 400 ms, but you must set the tolerance level (which determines how many times an assertion can fail before the test fails) to a high value (100).
1️⃣Select the object you want to assert. For instance, to assert a load test, click it in the project tree.
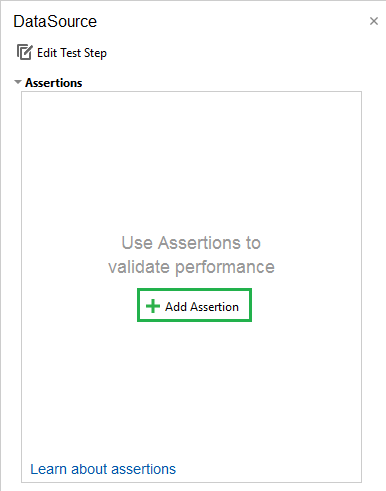
2️⃣The load test inspector will appear on the right. Click on Add Assertion.
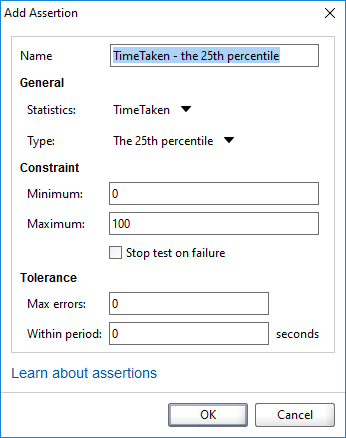
3️⃣The Add Assertion dialog will appear. In this dialog, specify the values given in the table below.
Group
Option
Description
Comment
Name
Name of assertion
This name has no effect on the asserted value.
General
Statistics
Statistics to assert
List of available assertions like Max, Min, Queued, etc.
Type
Statistics metric to assert
For a list of available assertions Average, BPS, Count, etc.
Constraint
Minimum
The minimum assertion value
The assertion will become active if the measured metric drops below this point.
Maximum
The maximum assertion value
The assertion will hold true when the measured metric rises above this point.
Stop test on failure
If selected, the test terminates when the assertion triggers
Tolerance
Max errors
The maximum number of errors that can happen before the assertion triggers during the period defined by the Within Period option
0 indicates no limit.
Within period
The amount of time Max Errors errors must occur for the assertion to be made
0 indicates no limit.
We hope you have understood everything about load schedulers and test assertions in Ready API. 🙌
Frequently Asked Questions
What is a ready API tool?
ReadyAPI is a no-code API testing platform aimed at simplifying your testing procedures.
What are TestSteps?
Test Steps are the building blocks of a ReadyAPI test case. Each Test Step represents a single API call, and the sequence of Test Steps defines the order in which the calls are made.
How many different kinds of API are there?
APIs are classified into four types often used in web-based applications: public, partner, private, and composite.
What are the uses of Load Schedulers in Ready API?
Load Schedulers in Ready API help us postpone a scenario run from the test start and stop a scenario after some time.
How many time units are there in the load scheduler?
There are three time units in the load scheduler - second, minute, and percent.
Conclusion
In the article “Load Schedulers and test assertions in Ready API”, we learned Targets in Ready API, Test Warm-up, Test Duration, Load Scheduler, Assertions, and how to create assertions. You can refer to similar articles for further information


 9+ registered

