Do you think IIT Guwahati certified course can help you in your career?
Introduction
Maven is a tool that helps us manage software projects. Through the command line, we can execute various commands. These commands are part of Maven plugins. They can perform various tasks such as compiling, packaging, running tests, etc.
In this article, we will talk about the Exec plugin. Let's get started!
What is the Exec Maven Plugin?
The Exec Maven Plugin is a Maven plugin provided by the MojoHaus project. It is a collection of plugins for Maven. One of the plugins they provide is the Exec Plugin. It helps us execute Java and other programs using Maven.
Goals
This plugin provides 3 goals.
exec:exec -> This goal helps execute external programs. They may or may not be Java programs.
exec:java -> In this, we specify a particular class in our project, and it is executed. The project's dependencies are available for the class to use.
exec:help -> It displays information about this plugin.
Using the Plugin
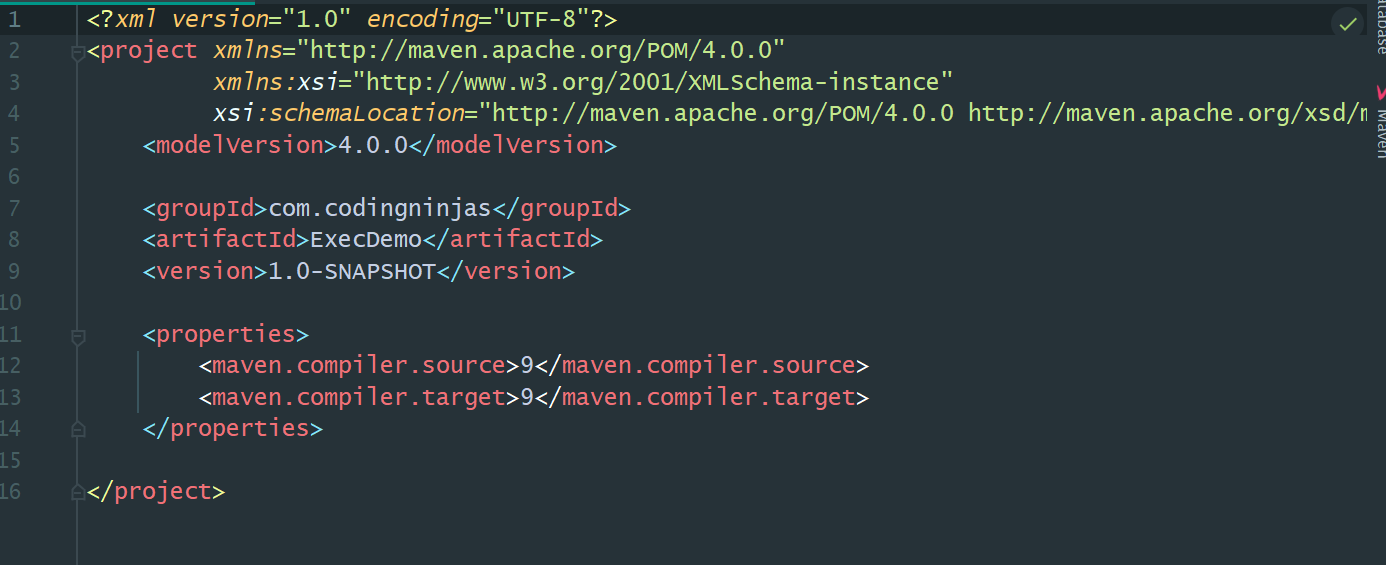
We will demonstrate the use of this plugin using a sample project. We have already created a Maven project for this. The pom.xml looks like this.
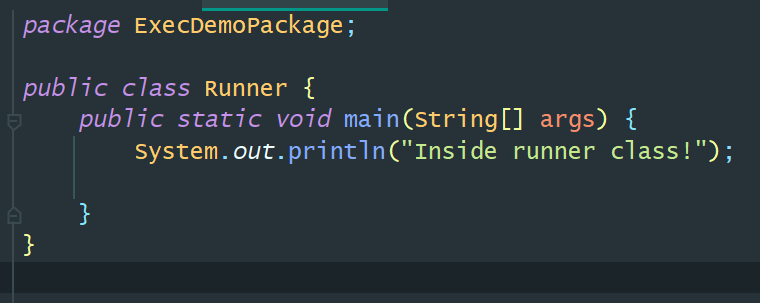
The project contains a single package, ExecDemoPackage, which has a single class called Runner. The Runner class has a main method like this.
We will execute this code using Maven.
Add to pom.xml
The first thing we need to do is add the plugin to our pom.xml file. We need to add the following code to our pom.xml
We will need to configure the code more depending on which goal we plan to use. Make sure you load the changes made to Maven into your project. Depending on your IDE, this may be done automatically, or you may have to do this yourself. Eclipse does this automatically. IntelliJ will show a prompt that you have to click.
You should replace ExecDemoPackage.Runner with the name of the class you wish to execute. Make sure to include the package name, as we have.
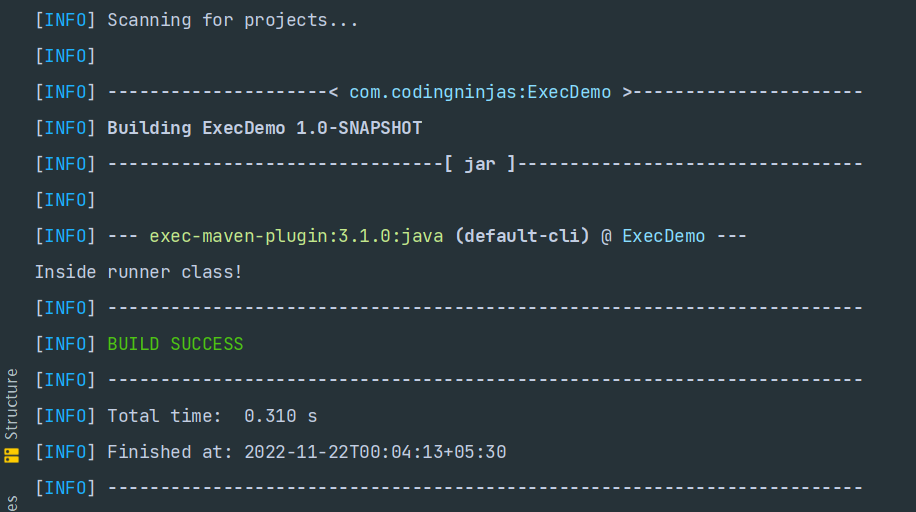
Now, let's try to run the plugin goal. Type
mvn exec:java
As you can see, our class has been run.
exec:exec
We will achieve the same result using the exec:exec command instead. exec:exec runs any executable from the command line directly.
We must provide the following parameters for this command in the pom.xml file.
<executable> - This is the name of the executable we want to run. For example, it can be bash, sh, python, java, or even mvn.
<arguments> - These are the list of arguments that will be passed to the executable above. Each argument is defined by its own <argument> tag.
One important thing to remember is to provide the classpath if we are running java using exec:exec. The classpath is a parameter in the JVM (Java Virtual Machine). It contains the location of classes and packages that the user has created. If a class we create is not in the classpath, Java will not be able to find it, and our code won't run.
When we generally build a Java project, our IDE handles adding to the classpath for us. Here we are going to be running java using the command line. So, we need to provide java the classpath. We can do this by adding a -classpath property.
The exec plugin makes our work easier for us. We don't have to calculate the classpath ourselves. There is a built-in tag <classpath/> that we can use. It will automatically generate the classpath for us.
If all that sounds confusing, don't worry. The following example will make it clear.
We will attempt to run our Runner class using exec:exec.
Our command on the command line should look like this:
The <classpath/> tag will generate our project's classpath, including dependencies, and supply it to the command line. Let's save the pom.xml file and run exec:exec.
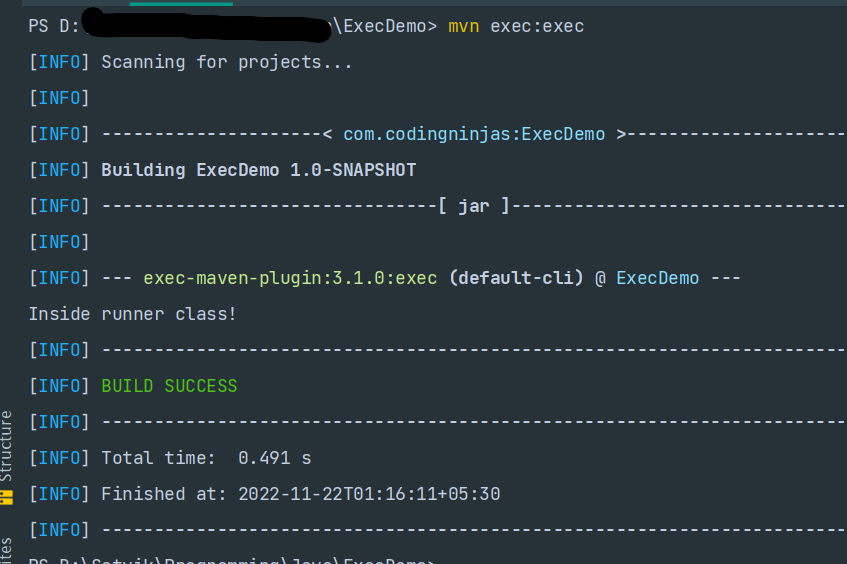
In the terminal type:
mvn exec:exec
We can see our build runs successfully. Instead of the <arguments> tag, we can also use the <commandlineArgs> tag.
We can also pass optional parameters to both goals. They are the following.
<addOutputToClasspath> - This is a boolean parameter. If this is true, the project's output directory is also added to the classpath. This is true by default.
<addResourcesToClasspath> - This is a boolean parameter. This adds project resource dire
ctories to the classpath. The default value is false.
<async> - This is a boolean. It should be set to true if the child process is asynchronous. The build execution will occur parallelly in that case.
<asyncDestroyOnShutdown> - This is a boolean. It should be set to true if we want to destroy the asynchronous child process if the JVM shuts down. If false, the child process will continue even if the JVM shuts down. This is true by default.
<classpathScope> - Compiling, testing, and running may have different classpaths. This is used to define which classpath scope we are currently passing. It defaults to "runtime".
<environmentVariables>- These are the environment variables we want to pass to the program. For example, if we want to pass the PORT variable:
<environmentScript> - If we want to generate environment variables dynamically, we can specify a script to run using this parameter.
<executableDependency> - Our executable might be a part of a plugin dependency. In this case, we specify which dependency the executable is in.
<longClasspath>- This is a boolean. If set to true, the classpath and the main class will be written to a manifest file. A jar file will also be created, and maven will run the jar file instead.
<longModulepath> - This is a boolean. It is the same as <longClasspath> but for modulepath instead of the classpath. The modulepath contains locations of modules in the same way the classpath contains locations of classes. This will be written into an @arg file.
<outputFile> - Specifies if the output should be written to a particular file instead of the terminal.
<quietLogs> - This is a boolean. It tells Maven to print debug-level output instead of the default info-level output.
<skip> - Boolean that tells Maven to skip execution.
<sourceRoot> - If we want to add a particular folder to the folders that contain the code to be compiled, we can use this parameter.
<additionalClassPathElements> - additional elements that we want to add to the classpath.
<classpathFilenameExclusions> - The list of files we want to exclude from the classpath.
Frequently Asked Questions
Can I include the exec plugin in a build phase?
Yes, any Maven build plugin can be included in a build phase. We will have to add the <execution> parameter to the plugin's configuration in the pom.xml and specify the details.
What's the difference between PATH and classpath?
The Path variable contains locations of executables in the OS, such as java, bash, etc. When we install software that can execute commands (such as Python, GCC), we generally have to add them to PATH. The classpath is part of JVM. It contains locations of classes and packages to execute.
Why should I use exec:exec to run Java when exec:java exists?
exec:java runs the Java code in the same JVM as Maven. We might want to run it in a different JVM. E.g., if we want Maven and our program to have a different classpath, we need different JVMs. For this, we would use exec:exec.
This blog has explored the Maven Exec Plugin. We have seen the goals in it, and the difference between them. We ran Java code using both goals. Ultimately, we saw the list of optional parameters for the goals.
We hope you leave this article with a broader knowledge of Java, Maven, and software project management. We recommend that you explore our different articles on these topics as well, such as:


 9+ registered

