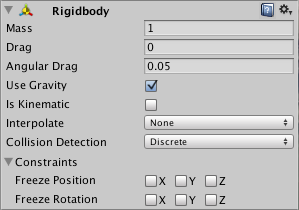
RigidBody.AddForce()
The Rigidbody's force is increased by using the RigidBody.AddForce() function. Force is applied constantly along the force vector's direction. Changing the ForceMode mode changes the kind of force to Acceleration, Impulse, or Velocity Change.
At the moment of the call, the results of the forces applied using this function are collected. The physics system applies the effects during the following simulation run (after FixedUpdate, or when the script explicitly calls the Physics.Simulate method).
Because this function has multiple modes, the physics system merely gathers the resulting velocity change rather than the force values passed. Assuming deltaTime (DT) equals the simulation step length (Time.fixedDeltaTime) and mass equal the mass of the Rigidbody to which the force is applied, the velocity change is computed as follows for all modes:
- ForceMode.Force: Interprets the input as force (measured in Newtons) and changes the velocity by the value of force * DT / mass. The effect depends on the simulation step length and the body's mass.
- ForceMode.Acceleration: parameter is interpreted as acceleration (measured in meters per second squared), and the velocity is changed by the magnitude of force * DT. The simulation step duration determines the effect but not by the body's mass.
- ForceMode.Impulse: The parameter is interpreted as an impulse (measured in Newtons per second), and the value of force/mass changes the velocity. The effect is affected by the body's mass but not by the simulation step duration.
-
ForceMode.VelocityChange: The parameter is interpreted as a direct velocity change (measured in meters per second), and the force value changes the velocity. The impact is independent of body mass or simulation step length.
Only an active Rigidbody may be subjected to force.AddForce has no impact if a GameObject is inactive. Furthermore, the Rigidbody cannot be kinematic. When a force is applied, the Rigidbody's state is set to awake by default unless the force is Vector3.zero.
Example
The following script will apply a continuous force to our object in the x-direction.
using System.Collections;
using System.Collections.Generic;
using UnityEngine;

public class ForceController: MonoBehaviour
{
    Rigidbody rb;

    void Start()
    {
        rb = GetComponent<Rigidbody>();
    }

    void FixedUpdate()
    {
        rb.AddForce(new Vector3(1f, 0f, 0f), ForceMode.Force);
    }
}
We've finished with the blog; let's move to faqs.
Frequently Asked Questions
How does AddForce work in Unity?
Unity describes AddForce as "adding a force to the rigid body." This force is then applied to the GameObject. This is useful for projectile shooting, vehicle launch, pushing away things in an explosion, or moving characters.AddForce, in a nutshell, provides velocity to your GameObjects.
What is AddForce in Unity?
It gives the Rigidbody more force. Force is applied regularly along the force vector's direction. Only an active Rigidbody may be subjected to force.AddForce has no impact if a GameObject is inactive.
How do you remove all forces from Rigidbody Unity?
if you want to remove all forces, use rigidbody.velocity = Vector3. zero
How do I reset my Rigidbody?
You do that by resetting the velocity and the angular velocity to Vector3(0, 0, 0);.
What is the ForceMode.Impulse Method?
ForceMode.Impulse parameter is interpreted as an impulse (measured in Newtons per second), and the value of force/mass changes the velocity.
Conclusion
This article extensively discussed the Moving RigidBody and RigidBody.addForce() method and its use.
After reading about Moving RigidBody, are you not feeling excited to read/explore more articles on the topic of Unity? Don't worry; Coding Ninjas has you covered. To learn, see the introduction to game development, Introduction to Unity, and Creating animations in Unity.
To learn more about DSA, Competitive Programming, System Design, JavaScript, etc, refer to our Guided Path on Coding Ninjas Studio. If you wish to put your coding skills to the test, check out the mock test series and enter the contests hosted by Coding Ninjas Studio! However, if you have just begun your learning process and are looking for questions asked by tech giants such as Amazon, Facebook, and Microsoft, among others, you should look at the interview experiences and interview bundle for placement preparations.
Nonetheless, you may want to consider our paid courses to give your career a competitive advantage!
Please vote for the blogs if you find them valuable and exciting!
Happy Learning!


