


Introduction
MySQL is the most widely used open-source database in the world. Despite its vast capabilities, MySQL is simple to set up and operate. The instructions below will help you get MySQL up and running in a few simple steps.
Installing MySQL on Windows
MySQL Installer is the most convenient way to install and configure MySQL Server on Windows. This setup wizard makes it possible to ease the installation and configuration of MySQL products for Microsoft Windows.
Below are the steps to download and setup MySQL on windows :
-
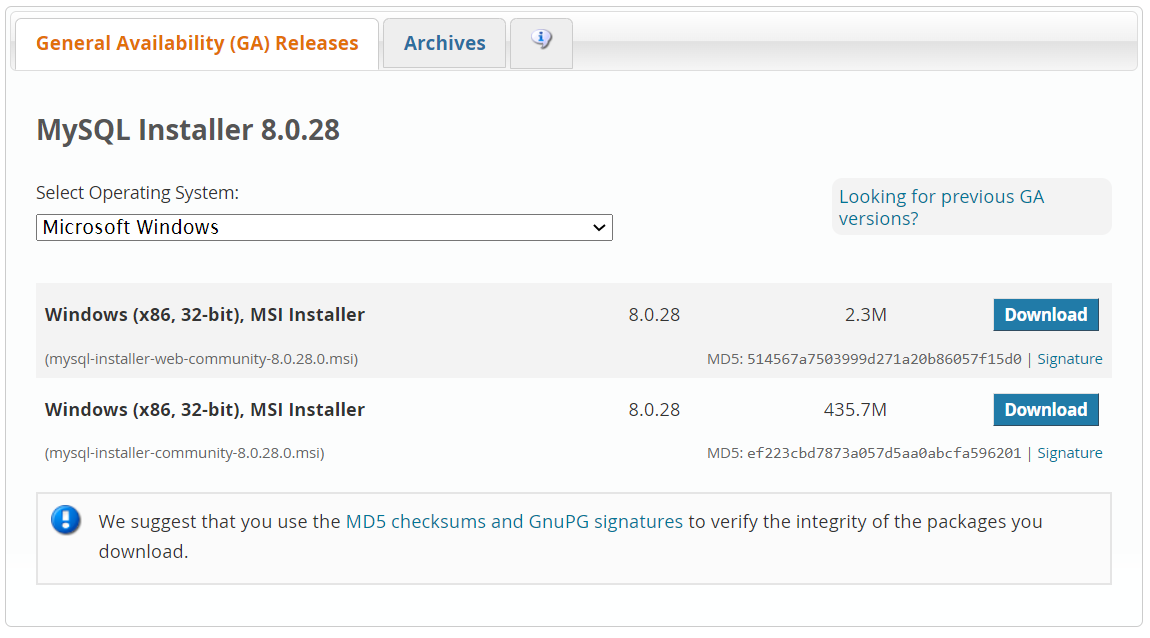
To begin, visit the MySQL Installer download page. As you can see, there are two download options: an online community version and a full version. The key difference between these two is that the online package only includes the MySQL Installer and configuration files, and the installation requires an Internet connection. Apart from MySQL Server, you may choose which programs to download from the online version. The entire package includes all MySQL products for Windows (including MySQL Server) and is appropriate if you wish to install MySQL offline.
-
Now, select the setup type that best fits your use case from the list:
Developer Default includes the installation of MySQL Server and all additional development tools.
This kind is best suited if you intend to create a MySQL database from scratch.
Server only recommends installing a single installation of MySQL Server. This kind is appropriate if you will not be actively managing the database.
The Client only installs all MySQL applications and connections except for the MySQL Server package.
Full installation will include the installation of all MySQL products.
The Custom type gives a wide range of choices for customizing the installation and picking tools from the MySQL catalog.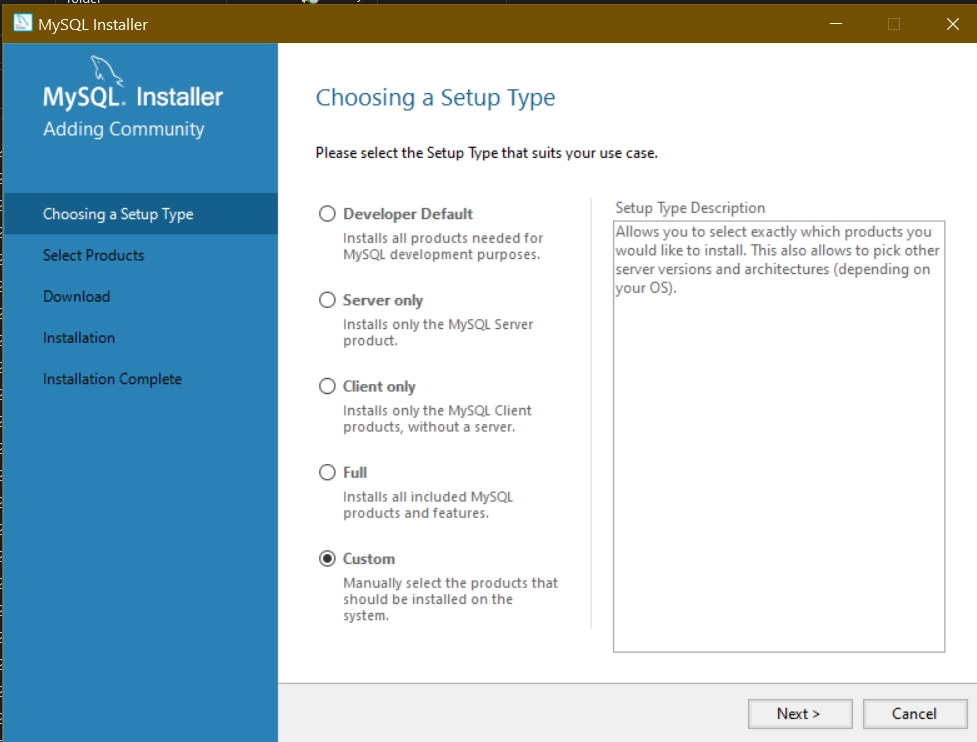
-
Following that, MySQL Installer confirms that you fulfill the installation prerequisites. If any prerequisites fail, the installation will automatically address the discrepancies. If it does not, you will be prompted to resolve the issues manually. You may, for example, need to install some extra apps or packages (for example, Microsoft Visual C++ 2019 Redistributable Package). Furthermore, if you have already installed MySQL on your Windows Server, you may see Path installation discrepancies.
Go to the MySQL servers section, select the required server, and send it to the product/features to be installed box using the green arrow. Similarly, select the MySQL workbench under the applications section. Click next.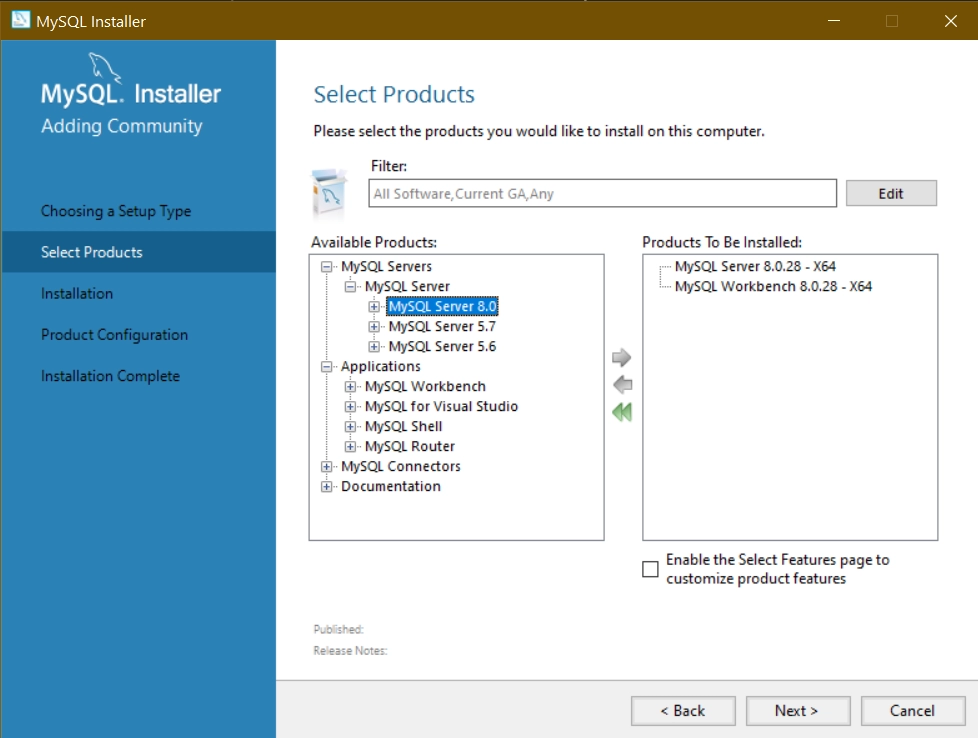
-
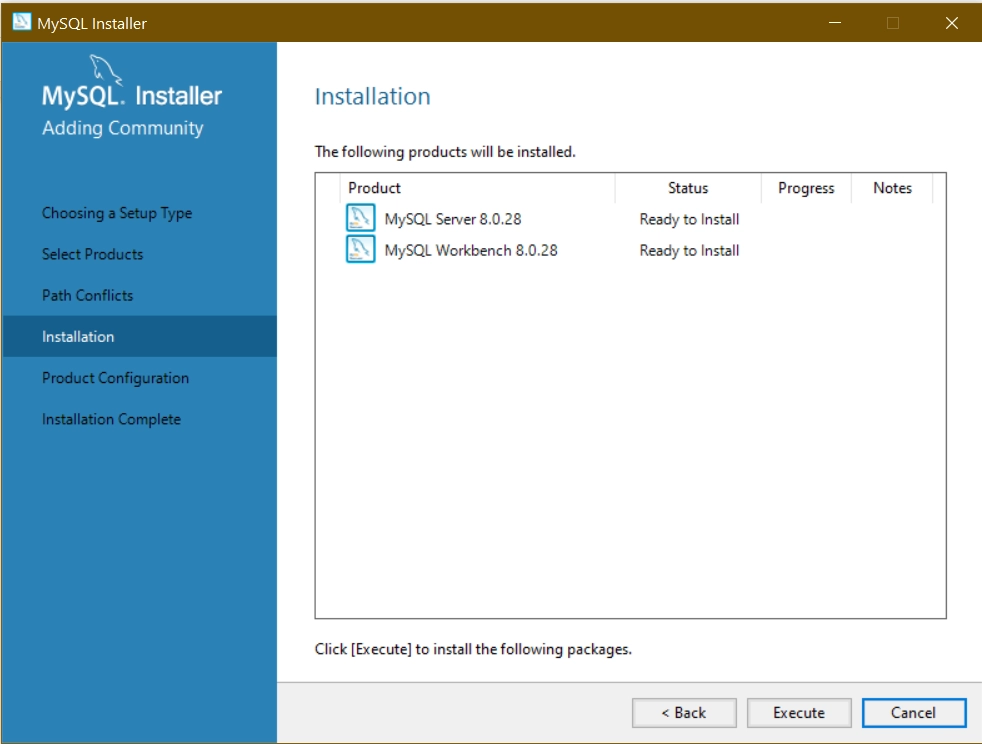
Click on Execute to download the selected products. Go to next.
- We have now arrived at the section where we will configure MySQL Server. Click Next to start the procedure.
-
In the Type and Networking section, you may specify the part of system memory that will be allotted to your MySQL server instance by selecting one of three server configuration types:
Development Computer, Server Computer, or Dedicated Computer.
Select Development Computer if your computer hosts many other programs, and Dedicated if there are no other vital applications.
Choose the Connectivity choices that best suit your requirements, click Next.
-
You will be offered the option of using one of two server-side authentication methods: Strong Password Encryption or Legacy Authentication.
Select the Use Strong Password Authentication option and go to the next step: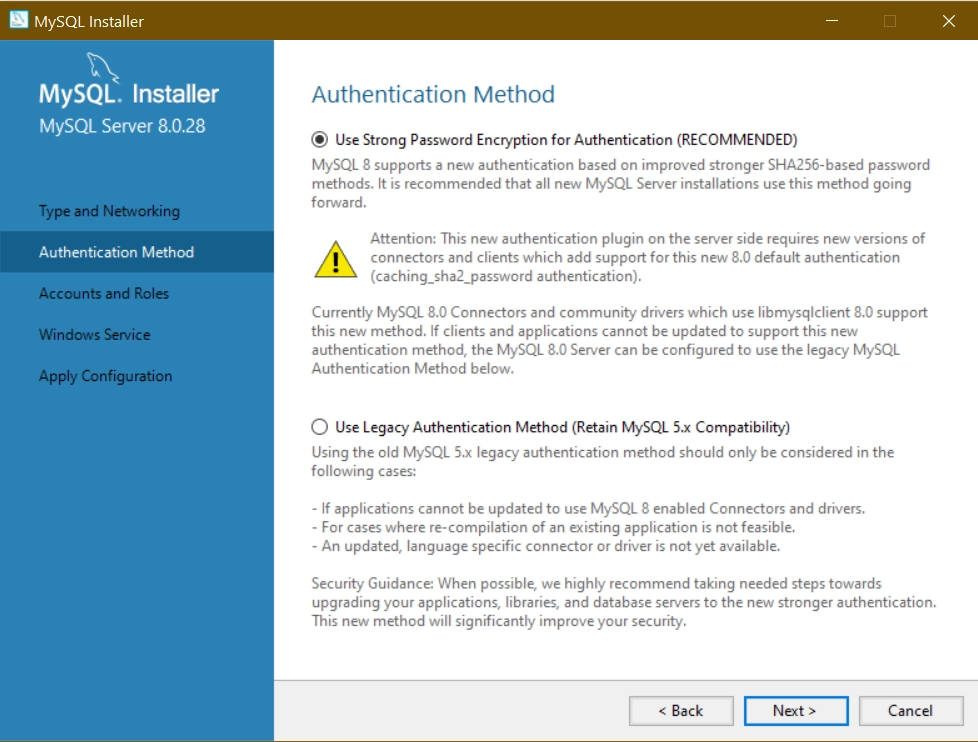
-
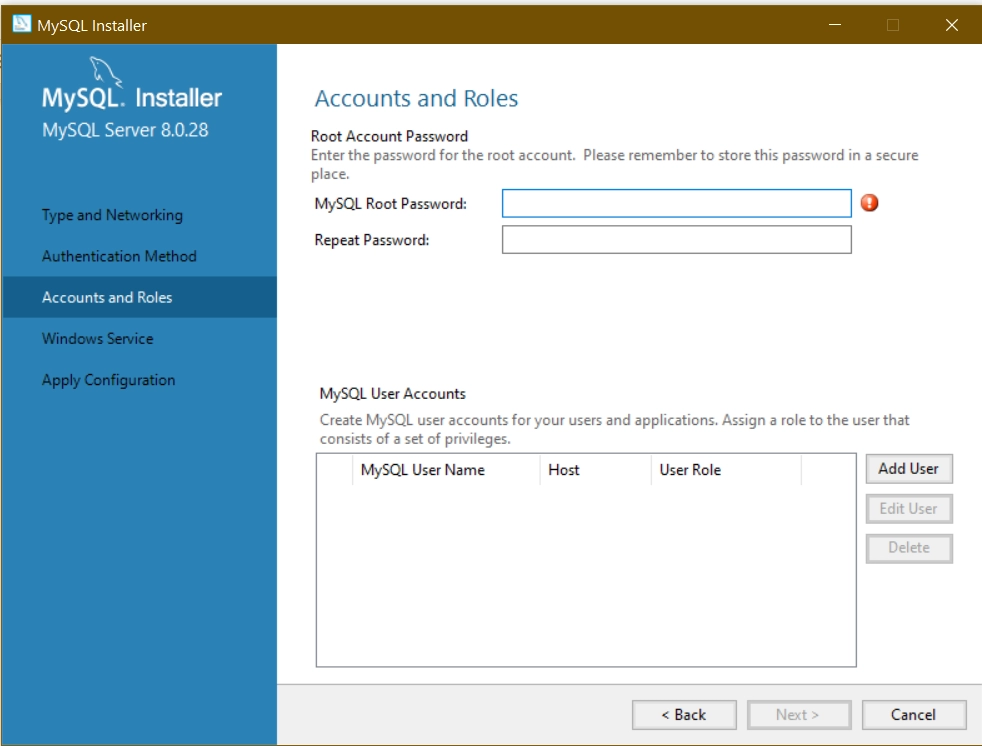
You must provide a strong password for your MySQL root user here. Also, save the password in a safe location for future reference. Click next.
-
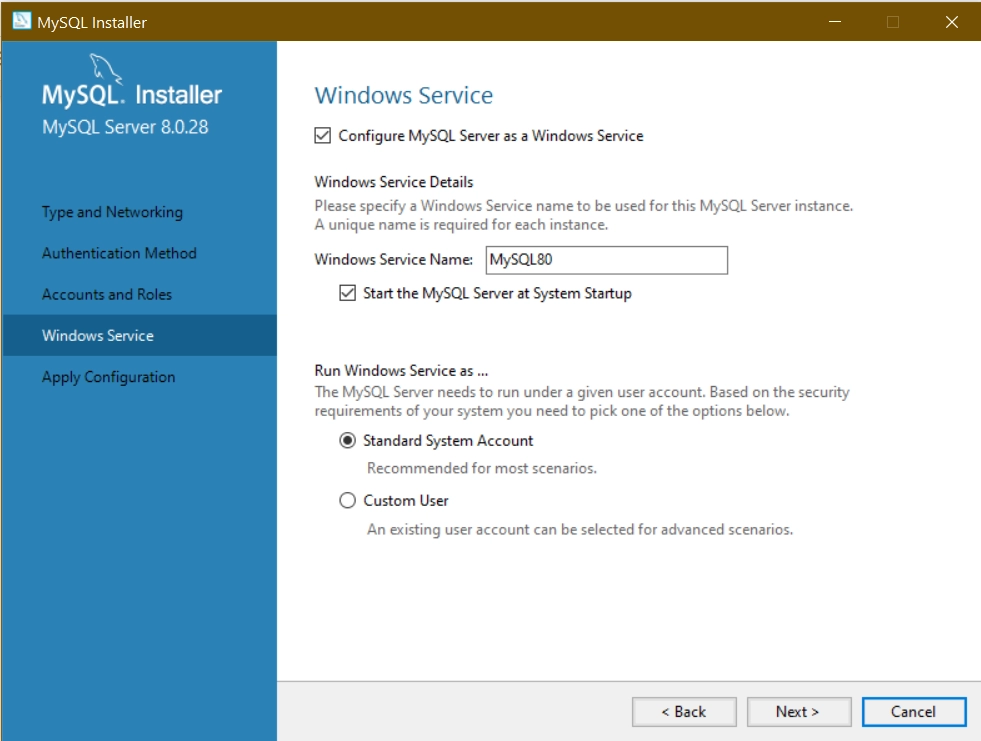
In this step, you may configure MySQL Server to run as a Windows Service and to start automatically when Windows boots. You may also pick the Custom User option and manually adjust the parameters to launch MySQL Server as an executable application.
-
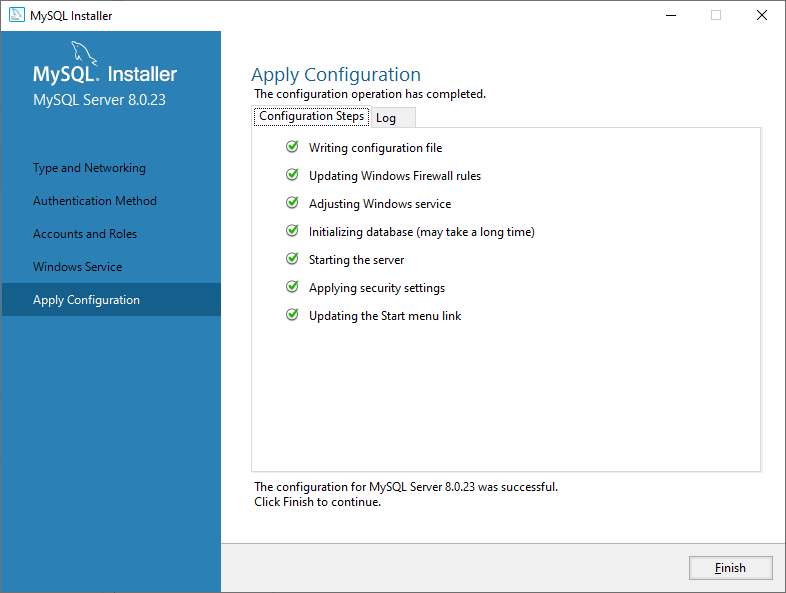
This final step summarises the configuration procedures: When you click Execute, the following configuration options will be implemented one by one: The green checkmarks indicate that the setup procedure has been completed successfully. End by clicking the Finish button.
-
When you have finished configuring your system, click Next.
Congratulations! You have completed the installation of the MySQL Server. Copy the installation process log to the Windows Clipboard and then click Finish.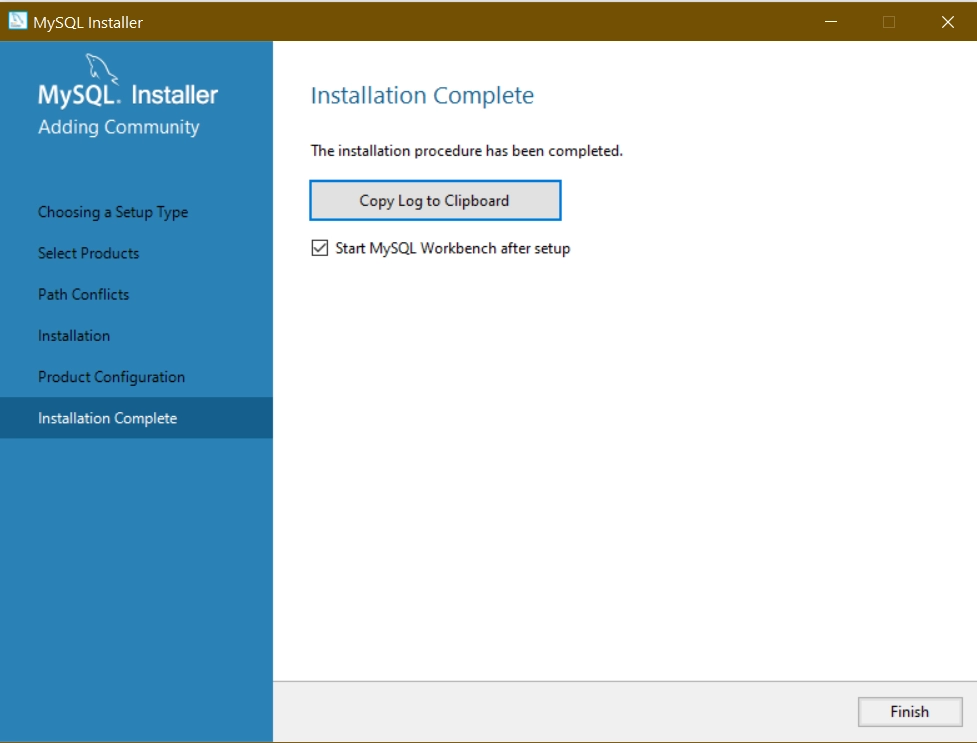


 9+ registered

