Do you think IIT Guwahati certified course can help you in your career?
Introduction
We know that whenever the client requests a resource, the application interacts with the server, fetches the resource, and gives it back to the client as a response. Dio is an HTTP client library that improves the integration process of APIs with servers.
In this article, we will discuss Networking in Flutter using Dio. First, we will discuss it in brief about and Dio, and further, we will implement the functionality.
Dio
Dio (Dart Input-Output) is a lightweight, open-source HTTP (Hypertext Transfer Protocol) client library developed by JianyingLi, a team member of Flutter. Dio is built on top of the Dart HTTP package, allowing programmers to simplify HTTP requests by providing additional features. DIO also helps handle errors and effortlessly make post requests such as GET, PUT, POST, and DELETE effortlessly.
The library is straightforward and easy to use. It provides its users with cancellation support, timeouts, and remote endpoints. Dio also supports interceptors that allow programmers to modify the HTPP request and responses before benign sent or processed. You can easily handle authentication, logging requests, and errors through Dio.
The Dart language provides a package HTTP for performing networking, enables you to make HTTP requests, and serves simple use cases but misses advanced features. This means with an HTTP package; one needs to handle the tasks of manually parsing responses, handling errors, and timeouts.
Traditional methods include using the default HTTP package and manually creating and configuring HttpClient, HttpRequest, and HttpResposne. Therefore, this can prove to be a tedious task.
On the other hand, Dio consists of efficient APIs to handle networking tasks. It provides features like interceptors, timeouts, cancelation, repose data parsing, customization, etc.
DIO APIs
Dio provides us with multiple APIs to make HTTP requests and handle responses. Below are some of the majorly used Dio APIs.
HTTP Methods APIs
Below are the HTTP methods provided by Dio.
dio.get(): GET request
dio.post(): POST request
dio.put(): PUT requests
dio.delete(): DELETE requests
dio.patch():PATCH request
dio.head(): HEAD request
Options Class
This class allows us to customize the request sent by the client by setting multiple parameters like request time-outs, query parameters, etc.
Response Class
This class consists of information about the ‘response’ after the client makes an HTTP request. It consists of information such as status codes, headers, etc.
Interceptors
Interceptors are function that helps in modifying the requests and responses. Therefore, it helps in error handling and authentication, etc.
Cancel Token
The Cancel Token class allows us to cancel the ongoing HTTP request according to the need of an hour. We can cancel a request according to specified conditions. This proves to be useful when a request is not needed anymore.
Moving on, let's explore networking in Flutter using Dio and see what difference does it makes.
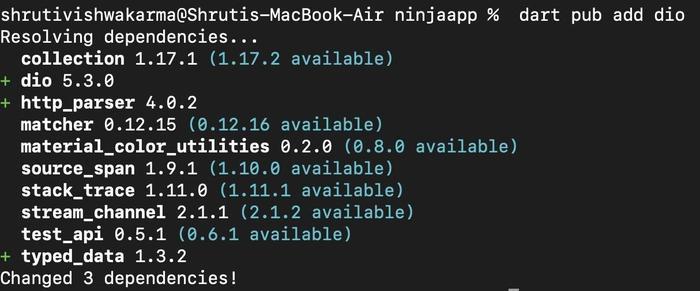
To use the Dio flutter package, you must install it in your required directory by running the following command in your system’s terminal.
dart pub add dio
Or you can also include it in the pubspec.yaml file by mentioning the latest version under the dependencies:
dependencies:
dio: ^(latestVersion)
Above, we have used the caret symbol (^) for specifying the version. We need to mention the latest version inside the brackets.
For example:
After adding the package, the next step is to import it in the dart code.
import 'package:dio/dio.dart';
Code
In ‘main.dart’ file, implement the following code.
// Importing required packages
import 'package:flutter/material.dart';
import 'package:dio/dio.dart';
import 'package:google_fonts/google_fonts.dart';

// The entry point of the flutter application
void main() {
  //calling runApp() , passing NinjaApp() as widget
  runApp(NinjaApp());
}

// Creating stateless widget NinjaApp
// stateless widget-> cannot change its state once built
class NinjaApp extends StatelessWidget {
  @override


  // Build method called to build the UI
  Widget build(BuildContext context) {
    return MaterialApp(


      // Setting NinjNetworking as the home screen
      home: NinjaNetworking(),
      theme: ThemeData(
        textTheme: GoogleFonts.montserratTextTheme(
          Theme.of(context).textTheme,
        ),
      ),
    );
  }
}


// StatefulWidget : that can change its state during lifetime
class NinjaNetworking extends StatefulWidget {
  @override
  _NinjaNetworkingState createState() => _NinjaNetworkingState();
}

class _NinjaNetworkingState extends State<NinjaNetworking> {

  // Creating 'NinjaDio' object from Dio class
  Dio NinjaDio = Dio();

  // For storing the response data from server
  String NinjaResponeInfo = "";

  // Function for fetching data using GET method
  void() async {
    try {

      // Using NinjaDio object for a GET request and storing the fetched data in variable
      Response NinjaResponse = await NinjaDio.get('https://jsonplaceholder.typicode.com/posts/1');
      setState(() {
        NinjaResponeInfo = NinjaResponse.data.toString();
      });
    }

    catch (e) {
      setState(() {

        // Displaying an error if any
        NinjaResponeInfo = "Error occurred: $e";
      });
    }
  }

  void NinjaPostFunction() async {

    try {

      // Using NinjaDio object for sending a POST request to the specified URL
      Response NinjaResponse = await NinjaDio.post('https://jsonplaceholder.typicode.com/posts', data: {

        "title": "NEW POST",
        "body": "Ninja, this is a new post...",
        "userId": 1,

      });

      setState(() {
        NinjaResponeInfo = "Hey Ninja, You have created a Post! \nResponse: ${NinjaResponse.data.toString()}";

      });
    }
    catch (e) {

      setState(() {
        NinjaResponeInfo = "Error !!";

      });
    }
  }


  @override
  Widget build(BuildContext context) {

    return Scaffold(
      appBar: AppBar(
        title: Text('Networking in Flutter using Dio'),
      ),
      body:Container(
        decoration: BoxDecoration(
          image: DecorationImage(
            image: AssetImage("cn3.jpeg"),
            fit: BoxFit.cover,
            colorFilter: ColorFilter.mode(
              Colors.black.withOpacity(0.6),
              BlendMode.srcOver,
            ),
          ),
      ),

        child: Center(
        child: Column(
          mainAxisAlignment: MainAxisAlignment.center,
          children: [
            ElevatedButton(
              onPressed: NinjaFetchFunction,
              child: Text('Ninja, click to fetch data (GET)'),
            ),

            SizedBox(height: 30),
            ElevatedButton(
              onPressed: NinjaPostFunction,
              child: Text('Ninja, click to create a post (POST)'),
            ),
            SizedBox(height: 30),

            Center(
            child:Text(
              NinjaResponeInfo,
              style: GoogleFonts.montserrat(
                  fontSize: 20,
                  fontWeight: FontWeight.bold,
                  color: const Color.fromARGB(255, 200, 154, 154),
                ),
            ),
            ),
          ],
        ),
        ),
      ),
    );
  }
}
Output
Explanation
In the above code, we have created a flutter application. The runApp() accepts NinjaApp(), and a ‘MaterialApp’ is created.
In ‘NinjaApp()’, we have called the build() method and set NinjaNetworking as the home screen.
Next, we have defined the NinjaNetworking class, which is a stateful widget, and included a dio instance named as NinjaDio, which is further used in the program for making HTTP requests. The class also consists of a variable NinjaResponeInfo, which stores the response. Ultimately the user interface is built inside the built method.
The user interface is built inside the ‘built()’ method. We have centered the content using ‘Center’. The ‘Center’ and ‘Column’ are used to arrange two buttons (one for fetching data and the other to create a post), and a ‘Text’ widget displays the response information.
Understanding the functionality:
Whenever we press the ‘Fetch data’ button, the NinjaFetchFunction() is triggered, which sends the ‘GET’ request using the ‘NinjaDio’ object to the specified URL. In case of a successful response, the fetched information is stored in NinjaResponeInfo. And In case of an error, the NinjaResponeInfo displays the error message.
When we press the ‘Create post’ button, the NinjaPostFunction() is triggered, which sends a POST request using the ‘NinjaDio’ object to the specified URL. In the function itself, we have provided the data with the title, body, and userID. So as a response, we get the information of the newly created post, and in case of any error, NinjaResponeInfo gives an error message.
Therefore, we have successfully implemented networking in Flutter using Dio.
Frequently Asked Questions
What is Dio?
Dio is built on top of the Dart HTTP package, allowing programmers to simplify HTTP requests by providing additional features. DIO also helps in handling errors and in making post requests such as GET, PUT, POST, and DELETE effortlessly.
What is Networking in Flutter using Dio?
Dio consists of efficient APIs to handle networking tasks. It provides features like interceptors, timeouts, cancellation, repose data parsing, customization, etc.
What is the response class in Dio?
This class consists of information about the ‘response’ after the client makes an HTTP request. It consists of information such as status codes, headers, etc.
What are Interceptors in Dio?
Interceptors are function that helps in modifying the requests and responses. Therefore, it helps in error handling and authentication, etc.
What is Cancel Token?
The cancel Token class allows us to cancel the ongoing HTTP request according to the need of an hour. We can cancel a request according to specified conditions.
Conclusion
In this article, we have discussed networking in Flutter using Dio. We have also discussed Dio APIs and implemented the functionality. To level up your understanding of flutter, refer to the following articles.
You can read more such descriptive articles on our platform, Coding Ninjas Studio. You will find straightforward explanations of almost every topic on the platform. So take your coding journey to the next level using Coding Ninjas.


 8+ registered

