Do you think IIT Guwahati certified course can help you in your career?
Introduction
Are you looking for a more comfortable way to manage your MongoDB databases without getting lost in complicated command lines?
To solve this issue, you can use NoSQLBooster for MongoDB. It is a powerful tool to simplify your interaction with MongoDB, enhancing productivity. In this article, we will learn about different aspects of NoSQLBooster for MongoDB.
What is NoSQL Booster?
NoSQL Booster is a graphical user interface (GUI) tool designed for NoSQL database development and management. It offers various features tailored to enhance productivity and efficiency when working with NoSQL databases.
Key Features of NoSQL Booster?
Key Features of NoSQL Booster include:
Multi-Platform Support: NoSQL Booster is compatible with multiple operating systems including Windows, macOS, and Linux, ensuring accessibility across different environments.
Multi-Database Support: It supports a variety of NoSQL databases such as MongoDB, Couchbase, Amazon DocumentDB, and more, providing flexibility for developers working with different database systems.
Visual Query Builder: NoSQL Booster offers a visual query builder tool that allows users to construct queries visually, simplifying the process of creating complex database queries.
Code Generation: It provides features for generating code snippets and scripts based on user actions, facilitating faster development and reducing manual coding efforts.
Data Import/Export: NoSQL Booster enables users to import and export data to and from NoSQL databases, supporting various data formats and enhancing data management capabilities.
Schema Management: The tool offers functionality for managing database schemas, including creating and modifying collections, indexes, and other schema elements.
Performance Monitoring: It includes performance monitoring and profiling tools that help developers optimize database queries and identify potential bottlenecks in application performance.
What is MongoDB ?
A modern and well-liked database called Mongodbstores and manages massive amounts of data. It's like a digital filing system for data. MongoDB, however, arranges information into adaptable and simple-to-read documents rather than tables and rows like traditional databases. This flexibility makes it great for handling different data types and adapting to changes in your data needs over time. Applications frequently using MongoDB include websites, mobile apps, big data, and real-time analytics plans.
Key Features of MongoDB
Key features of MongoDB include:
Document-Oriented: MongoDB stores data in flexible, JSON-like documents, enabling schema flexibility and easy data manipulation.
High Scalability: MongoDB scales horizontally, allowing for distributed systems and automatic sharding to handle large volumes of data.
High Availability: MongoDB offers built-in replication with automatic failover, ensuring data availability and reliability.
Flexible Query Language: MongoDB supports powerful query language operations, including ad-hoc queries, indexing, and aggregation pipelines.
Geospatial Indexing: MongoDB provides support for geospatial queries, allowing users to perform location-based searches and calculations.
Aggregation Framework: MongoDB offers a powerful aggregation framework for performing complex data processing tasks, including grouping, filtering, and transforming data.
Rich Ecosystem: MongoDB has a vibrant ecosystem with a wide range of tools, libraries, and integrations, including drivers for various programming languages, making it easy to work with MongoDB in different environments.
How to Install NoSQLBooster for MongoDB
We have followed some steps below to install and set up NoSQLBooster for MongoDB. Let’s assume that you have downloaded MongoDB in your system. If not then click on the link and get a detailed step by step explanation of installing.
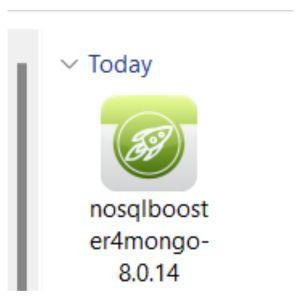
Step 1: Download NoSQLBooster from the official site according to your system. In this case, we have installed the Window version.
Step 2: After downloading, run the installer and select the options according to your requirement. After completing all the steps then, launch the NoSQLBooster.
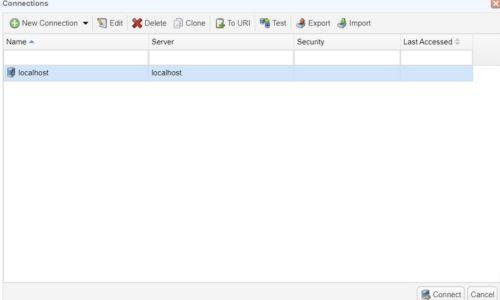
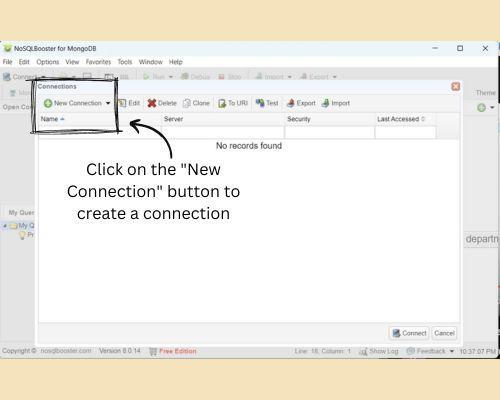
Step 3: Click on the "New Connection" button. It will help you to create a local host.
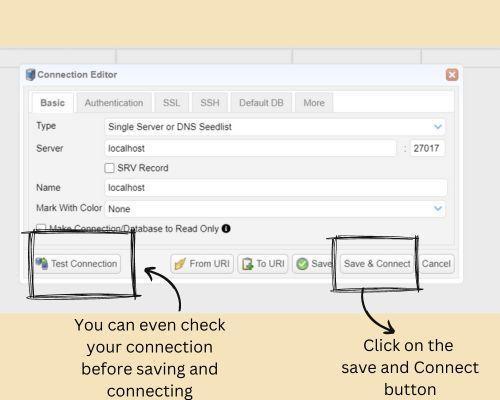
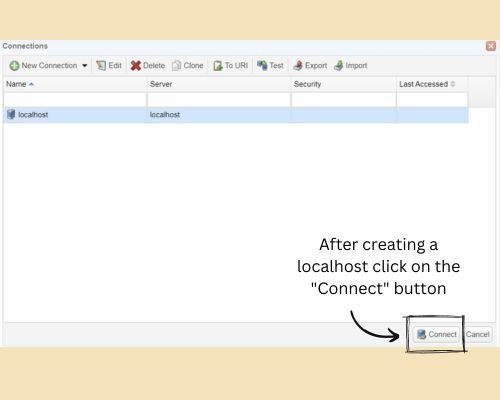
Step 4: Enter all the choices like type, server, name, and more according to your requirement. A successful connection with the name "localhost" has been established. Next, select the "Connect" button in the lower right corner to establish a connection between "localhost" and the MongoDB instance.
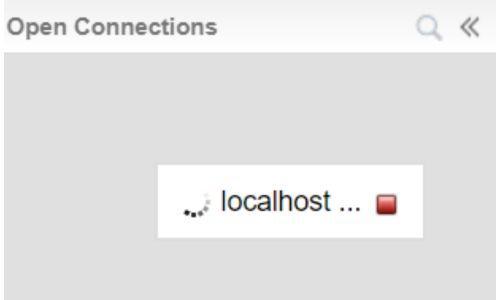
Step 5: Check that NoSQLBooster has been successfully installed on your laptop.
How to use NoSQLBooster for MongoDB?
To use NoSQLBooster for MongoDB, follow these basic steps:
1. Download and Install:
Visit the NoSQLBooster website and download the appropriate version for your operating system.
Install NoSQLBooster by following the installation instructions provided for your platform.
2. Connect to MongoDB:
Launch NoSQLBooster after installation.
Click on the "Connect" button or navigate to the "Connection" menu to establish a connection to your MongoDB server.
Enter the connection details such as host, port, authentication credentials (if any), and database name.
3. Explore Databases and Collections:
Once connected, you can explore the databases and collections in your MongoDB server using the left sidebar navigation panel.
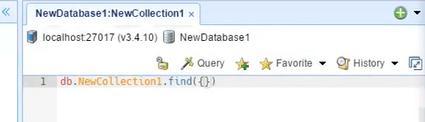
4. Querying Data:
To query data, select a database and collection.
Click on the "Query" tab to open the query editor.
Write your MongoDB query using the MongoDB query language.
Click on the "Run" button to execute the query and view the results.
5. Visual Query Builder:
NoSQLBooster provides a visual query builder that allows you to construct MongoDB queries visually.
Click on the "Visual Query Builder" tab to access the visual query builder tool and create queries using a graphical interface.
6. Data Manipulation:
NoSQLBooster allows you to insert, update, and delete documents directly from the user interface.
Select a collection and use the "Insert Document", "Update Document", and "Delete Document" options to manipulate data.
7. Index Management:
NoSQLBooster provides tools for managing indexes in MongoDB collections.
Navigate to the "Indexes" tab to view existing indexes and create new indexes for improved query performance.
8. Export and Import Data:
You can export data from MongoDB collections to various formats such as JSON, CSV, and SQL.
Use the "Export" option to export data from collections.
Similarly, you can import data into MongoDB collections using the "Import" option.
9. Performance Monitoring:
NoSQLBooster offers performance monitoring tools to analyze query performance and optimize database operations.
Use the built-in profiler and performance analysis features to identify and optimize slow queries.
10. Explore Additional Features:
Explore additional features and functionalities offered by NoSQLBooster, such as schema analysis, code generation, and integration with other MongoDB tools and services.
Example of using NoSQLBooster for MongoDB
Let's understand how to use NoSQLBooster for MongoDB.
In order to setup a local host, first connect by selecting "New Connection" and supplying all necessary information.
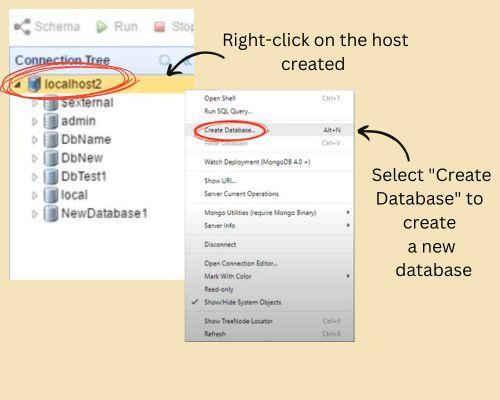
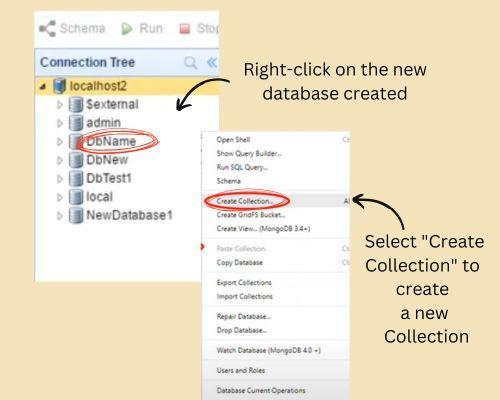
We were able to successfully connect to MongoDB. On the connection tree window, localhost is visible. Now select "Create Database" from the context menu by right-clicking localhost.
You can name the database according to your condition and press the "ok" button. You can see a new database constructed in the connection tree window.
Create a collection by right-clicking on the new database created and select the "Create Collection" option. Now you can perform any operations on this database, like inserting, deleting, searching, and many more.
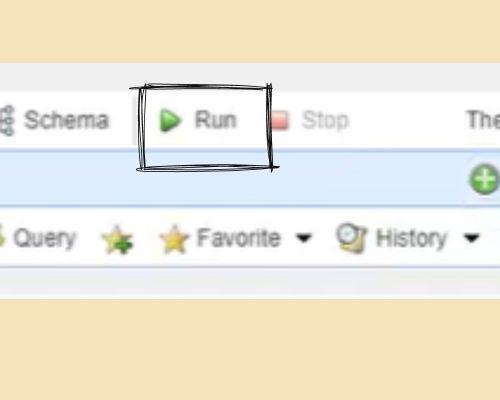
After completing any operation, you can click on the "Run" button, which is present at the top.
Advantages of MongoDB
There are many advantages of using MongoDB, such as:
MongoDB ensures performance and growth as your demands increase by distributing massive volumes of data and traffic across multiple servers.
MongoDB assures data availability and minimal downtime during server failures.
MongoDB's ability to readily store, index, and query JSON documents enables smooth integration with modern online and mobile applications mainly relying on JSON data formats.
Being a NoSQL database, it simplifies development for some typical applications.
MongoDB has a strong community and a vast ecosystem.
It mounts horizontally and holds large amounts of data and high traffic.
MongoDB can handle different data types within the same collection, making it adaptable for multiple use cases.
Disadvantages of MongoDB
There are some disadvantages of using MongoDB:
MongoDB's memory consumption can be higher than standard relational databases, which may pose problems for deployments on memory-constrained platforms.
Running MongoDB on a single node without sufficient replication or clustering can result in data loss if the node fails.
MongoDB does not enable standard SQL-like joins, making complicated queries involving data from several collections challenging to run without denormalizing the data
It has limited analytical capabilities compared to specialized databases.
There is limited support for transactions and data integrity in MongoDB.
MongoDB's performance can be less significant when the working collection surpasses available RAM.
There is limited built-in support for complex data verifications and constraints
Frequently Asked Questions
Which tool is best for MongoDB?
NoSQLBooster is a popular tool for MongoDB with features like query building, data manipulation, and performance monitoring.
Is MongoDB a framework or tool?
MongoDB is a NoSQL database system, not a framework or tool.
Is MongoDB a database or a server?
MongoDB is a database system. It includes a server component (mongod) responsible for data storage and retrieval.
What is the primary purpose of NoSQLBooster?
NoSQLBooster, a well-liked GUI tool for NoSQL databases, typically finds usage with MongoDB. It enables effective user interaction, database querying, and database management.
What are the features that make NoSQLBooster different from other MongoDB clients?
NoSQLBooster differs from other MongoDB clients due to its user-friendly interface, potent query and indexing capabilities, and extensive support for MongoDB commands and features.
How do you connect NoSQLBooster to a MongoDB server?
To connect NoSQLBooster to a MongoDB server, open the software, click "Connect," enter server details (IP, port), optional authentication, and click "Connect."
Conclusion
In this article, we have discussed NoSQLBooster for MongoDB. We have discussed features of NoSQLBooster for MongoDB. We even discussed the different steps involved in installing and setting up the NoSQLBooster for MongoDB. We have explored various aspects of NoSQLBooster for MongoDB through an example in this article. In the end, we have discussed the advantages and disadvantages of MongoDB.
Do check out the link to learn more about such topic
You can find more informative articles or blogs on our platform. You can also practice more coding problems and prepare for interview questions from well-known companies on your platform, Coding Ninjas Studio.


 8+ registered

