Implementation
The first step to get started with ScrollView Widget is that you need to first import it.
from kivy.uix.popup import Popup

You can also try this code with Online Python Compiler
Note that Popup is a unique widget. Try not to make it a child of any other widget. If you do, Popup will be treated like any other widget, rather than being produced in the background, as in:
Basic Method
After importing the module you have to follow the basic algorithm given below:
1. import kivy
2. import kivyApp
3. import Widget
4. import Floatlayout
5. import Label
6. import popup
7. Create widget class
8. Create Layout class :
9. create App class
10.create .kv file (name same as the app class):
10.1 create Widget
10.2 create popup
10.3 Give label to popup
10.4 create button to close popup
11.return Layout/widget/Class(according to requirement)
13.define popup function(Which shows the popup on press the button)
14. Run an instance of the class
Program
# PopUp.py

from kivy.app import App
from kivy.uix.widget import Widget
from kivy.lang import Builder
from kivy.uix.floatlayout import FloatLayout
from kivy.uix.popup import Popup

# Designate our .kv file
Builder.load_file('popup.kv')


# Creating a widget class through this we add button the commands of the
# class is in .kv file
class Widgets(Widget):
   def btn(self):
       # calling of the show popup function
       show_popup()


# Popup class is defined, The command of the class is in .kv file
class Popups(FloatLayout):
   pass


class AwesomePopUpApp(App):
   def build(self):
       return Widgets()


# define popup function in this we create the popup
def show_popup():
   show = Popups()

   popupWindow = Popup(title="Popup Window", content=show,
                       size_hint=(None, None), size=(200, 200))

   # open popup window
   popupWindow.open()


if __name__ == '__main__':
   AwesomePopUpApp().run()
You can also try this code with Online Python Compiler
PopUp.kv
# popup.kv


# Adding Button widget
<Widgets>:
   Button:
       text: "Press me"
       on_release: root.btn()

# Adding Label, Button to popup
<Popups>:

   Label:
       text: "You pressed the button"
       size_hint: 0.6, 0.2
       pos_hint: {"x":0.2, "top":1}

   Button:
       text: "Close the popup"
       # set size of the button
       size_hint: 1, 0.4
       # set position of the button
       pos_hint: {"x":0, "y":0.1}
You can also try this code with Online Python Compiler
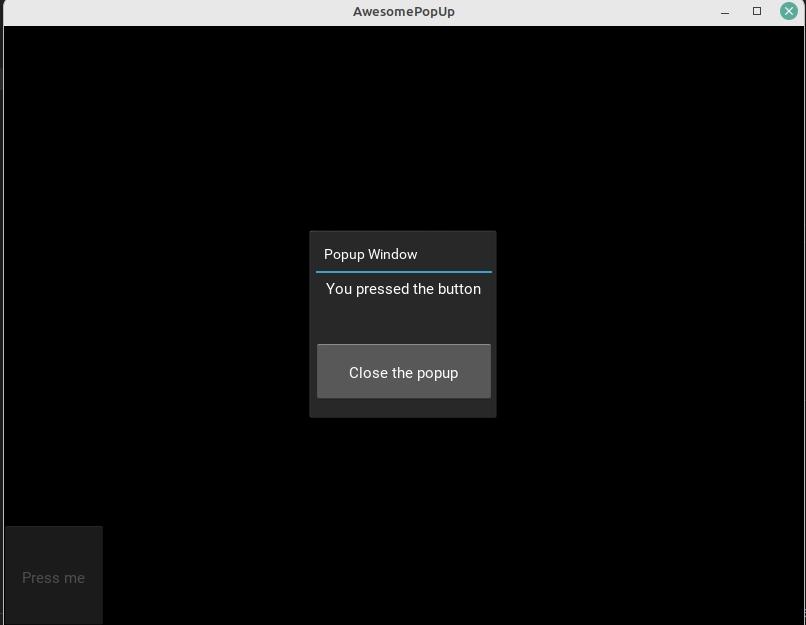
Output
Frequently Asked Questions
What are Kivy widgets?
A Widget is the base building block of GUI interfaces in Kivy. It provides a Canvas that can be used to draw on screen. It receives events and reacts to them.
What is Kivy Uix, exactly?
kivy.uix is a module. Widgets are graphical user interface components that are part of the User Experience. Classes for building and maintaining Widgets may be found in the kivy. uix module.
Is Kivy good for Android?
Kivy is a great tool for developing Android Apps. The best advantage of using kivy is that it is cross platform and the same project can be used to publish apps on iOS , Android , windows , OS x... However , it has some performance related disadvantages(as do most cross-platform tools like unity , cocos etc).
What is Kivy's relative layout?
Relative Layout: This layout allows you to assign children relative coordinates. Use the FloatLayout if you want absolute placement. The RelativeLayout class is similar to the FloatLayout class, with the exception that its child widgets are positioned relative to the layout.
Conclusion
If you have reached till here that means, you really enjoyed this article. This article covers the implementation of popup widget in kivy with code snippets and their use cases. You might be interested in articles such as Floating Layout in Kivy, Carousel Layout in Kivy, Button Action in Kivy, Button Color in Kivy and Slider widget in Kivy.
Do upvote our blog to help other ninjas grow, and head over to our practice platform Coding Ninjas Studio to practise top problems, attempt mock tests, read interview experiences, and much more.
Happy Learning!


 9+ registered

