


Introduction
The fully managed, end-to-end Google Cloud AI Platform allows users to perform data science and machine learning on Google Cloud. A versatile, scalable, and dependable infrastructure for running machine learning workloads is provided by the AI Platform, which leverages Google's AI expertise. AI Platform includes built-in support for PyTorch through Deep Learning Containers that are performance-optimized, compatible with PyTorch, and ready for deployment.
PyTorch
PyTorch is used in an increasing number of use cases, including image recognition, recommender systems, natural language processing, translation, and more, for automating machine learning tasks at scale.
If we want to get our hands on PyTorch without installation or setup, there is no easier way than using something like Colab or Kaggle kernels. We can sign in with our Google account, and then we are ready to use Pytorch.
PyTorch is developed mainly by Facebook, an open-source machine learning and deep learning toolbox. Due to its simplicity of usage and deployment, PyTorch has historically been employed chiefly in research. It has recently experienced remarkable growth in the industry.
Why PyTorch on Google Cloud AI Platform?
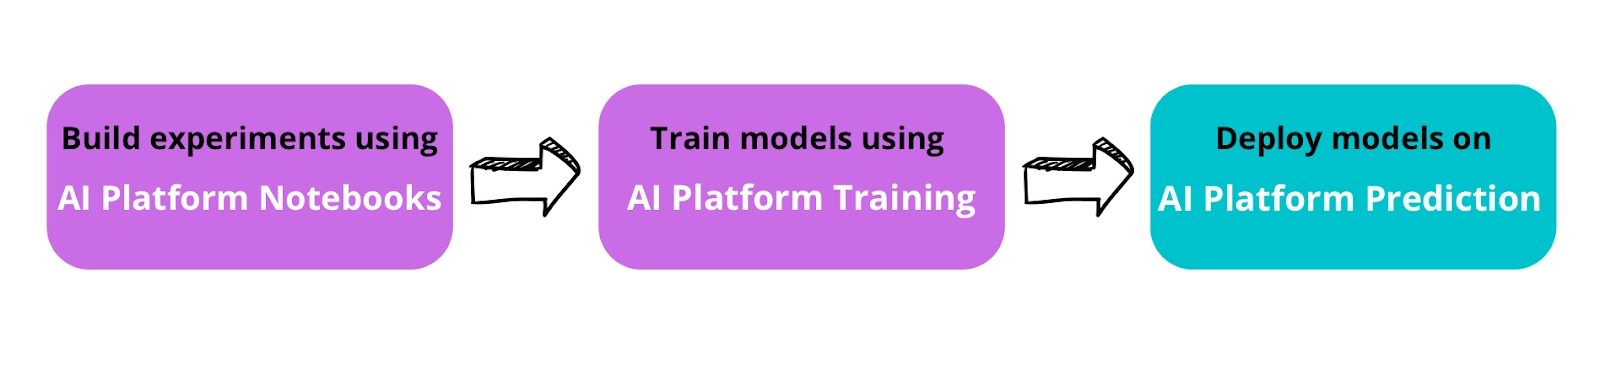
- Flexibility: AI Platform Training and AI Platform Notebooks provide us with the freedom to customise our compute resources to any workload. The platform simultaneously manages a large portion of the dependencies, networking, and monitoring. We do not need to worry about infrastructure; instead, we can spend effort creating models.
- Scalability: Utilize pre-made PyTorch containers or custom containers to run our experiments using AI Platform Notebooks. After that, train models utilising GPUs or TPUs to scale the code with high availability using AI platform training.
- Security: AI Platform uses the same technical infrastructure at a global scale that Google uses to protect data during the whole lifespan of information processing.
- Support: AI Platform works closely with PyTorch and NVIDIA to make sure that it is entirely compatible with NVIDIA GPUs, including PyTorch framework support.
Use Case and Dataset
For a FoodPreferences analysis assignment using PyTorch, we will hone a transformer model (BERT-base) from the Huggingface Transformers Library in this blog. The transformer model pre-trained on a sizable corpus of unlabeled text in a self-supervised manner is called BERT (Bidirectional Encoder Representations from Transformers).
We will test the AI Platform Notebooks with the ZOMATO FoodPreferences classification dataset here. It is advised to use a limited computing AI Platform Notebook instance for testing and development purposes.
We demonstrate how to send the same Jupyter notebook to the AI Platform Training service after being satisfied with the local experiment on the notebook to scale the training with larger GPU forms. The infrastructure is spun up for the training job and spun down once the training is complete by the AI Platform Training service, which optimises the training pipeline without requiring management.
Creating a Development Environment
As a development environment for AI Platform Notebooks, we will use JupyterLab notebooks. We must create a project on the Google Cloud Platform and enable the AI Platform Notebooks API.
Please be aware that we will be charged when we create an instance of the AI Platform Notebook. We only pay while our notebook instance is running. If we stop the instance, the work will be saved, and we will just be charged for boot disk storage until we resume the instance.
Once finished, we should remove the example. We can establish an AI Platform Notebooks instance by utilising the pre-built PyTorch image from the AI Platform Deep Learning VM (DLVM) Image or using a custom container with your packages.
Creating a Notebook Instance
On AI Platform Notebooks instances, which are AI Platform Deep Learning VM Image instances, a JupyterLab notebook environment is enabled and is usable. A PyTorch picture family that supports several PyTorch versions is accessible through AI Platform Notebooks.
We can create a new notebook instance from the Google Cloud Console or the command line interface (CLI). We will use the gcloud CLI to build the Notebook instance on the NVIDIA Tesla T4 GPU.
To create a new notebook instance using Cloud Shell or any other terminal where Cloud SDK is installed, enter the following command:
gcloud notebooks instances create example-instance \
    --vm-image-project=deeplearning-platform-release \
    --vm-image-family=pytorch-1-7-cu110-notebooks \
    --machine-type=n1-standard-4 \
    --location=us-west1-b \
    --boot-disk-size=100 \
    --accelerator-core-count=1 \
    --accelerator-type=NVIDIA_TESLA_T4 \
    --install-gpu-driver \
    --network=default
Go to the Google Cloud Console's AI Platform Notebooks page and click the "OPEN JUPYTERLAB" link next to the newly created instance, which turns active when it is ready for usage.
The newly created instance with the pre-built PyTorch DLVM image already has most of the libraries required for PyTorch experimentation. Use the notebook cells to execute percent pip install <package-name> to install extra dependencies. We will install extra packages like Hugging Face transformers and dataset libraries to support the FoodPreferences classification use case.
%pip -q install transformers
%pip -q install datasets
%pip -q install tqdm
Notebook Instance with Custom Container
Instead of installing dependencies using ‘pip’ in the Notebook instance, it is feasible to package the dependencies inside a Docker container image created from AI Platform Deep Learning Container images. This unique container can be used to create instances of the AI Platform Notebooks or tasks for the AI Platform Training. Here is an illustration of creating a Notebook instance with a unique container.
1. Create a Dockerfile using the PyTorch 1.7 GPU image from the AI Platform Deep Learning Containers as the basis image. Then, run or install any additional packages or frameworks you require. Transformers and datasets are included in the FoodPreferences classification use case.
FROM gcr.io/deeplearning-platform-release/pytorch-gpu.1-7 we need to RUN
pip install transformers
pip install datasets
pip install tqdm
2. Obtain the image location gcr.io/{project_id}/{image_name} by building an image from a Dockerfile using Cloud Build from a terminal or Cloud Shell.
export PROJECT_ID=$(gcloud config get-value core/project)
export IMAGE_NAME='pytorch_1_7_gpu_custom_image'
export IMAGE_TAG='latest'
export IMAGE_URI=gcr.io/${PROJECT_ID}/${IMAGE_NAME}:${IMAGE_TAG}
3. Using the command line, create a notebook instance using the customised image made in step #2.
export INSTANCE_NAME="pytorch-1-7-gpu-custom-notebook"
export CONTAINER_IMAGE="gcr.io/${PROJECT_ID}/${IMAGE_NAME}"
export MACHINE_TYPE="n1-standard-4"
export LOCATION="us-west1-c"
gcloud notebooks instances create $INSTANCE_NAME \
  --container-repository=$CONTAINER_IMAGE \
  --accelerator-core-count=1 \
  --accelerator-type=NVIDIA_TESLA_T4 \
  --machine-type=$MACHINE_TYPE \
  --location=$LOCATION
Training a PyTorch model on AI Platform
We can begin our experiments once the AI Platform Notebooks instance has been created. Let us examine the use case's model details.
The model specifics
To analyse the feelings expressed in the movie reviews in the ZOMATO dataset, we will fine-tune a pre-trained BERT model from Hugging Face. It is possible to fine-tune a model already trained for one task to carry out a similar job. After reproducing all the layers of the pre-trained model, including weights and parameters, but excluding the output layer, a new output classifier layer is created that forecasts labels for the current job. The output layer is learned from scratch in the last stage, while the parameters of all the other layers from the previously trained model are locked. The higher-order feature representations can then be "fine-tuned" to be more pertinent to the specific job at hand, in this case, the analysis of feelings, by learning from the pre-trained representations.
The pre-trained BERT model, which was trained on a sizable corpus of English data in a self-supervised manner, already encodes a lot of language information for analysing feelings. Now that we are using their outputs as features for the FoodPreferences classification task, we only need to fine-tune them slightly. Instead of developing a particular Natural Language Processing (NLP) model with a more comprehensive training dataset, this calls for shorter development iterations on a significantly smaller dataset.

The model trained with a classification layer: The pre-trained BERT Encoder module is indicated by the blue box. The encoder's output is combined into a linear layer with the same number of results as the target labels (classes).
As part of the FoodPreferences classification model training:
- The review data should be preprocessed and transformed (tokenised). Additionally, the sequence classification head for FoodPreferences analysis should be added.
- The pre-trained BERT model should be loaded.
- The BERT model for sentence classification should be improved.
The code snippet to preprocess the data and fine-tune a BERT model is provided below. It is to be noted that the model has already been trained.
To view the complete code and a thorough explanation of these tasks, please visit the Jupyter Notebook.
 # loading the dataset
datasets=load_dataset('zomato')

# instantiate the tokenizer
tokenizer = AutoTokenizer.from_pretrained("bert-base-cased", use_fast=True)

# tokenize the texts
# refer notebook for the preprocess function
datasets = datasets.map(preprocess_function,
                        batched=True, load_from_cache_file=True)

# load pre-trained BERT model
model = AutoModelForSequenceClassification.from_pretrained(
        model_name_or_path,
        num_labels=len(label_list))

args = TrainingArguments(
    evaluation_strategy = "epoch",
    learning_rate=2e-5,
    per_device_train_batch_size=batch_size,
    per_device_eval_batch_size=batch_size,
    num_train_epochs=1,
    weight_decay=0.01,
    output_dir='/tmp/cls'
)

trainer = Trainer(model,
    args,
    train_dataset=datasets["train"],
    eval_dataset=datasets["test"],
    data_collator=default_data_collator,
    tokenizer=tokenizer,
    compute_metrics=compute_metrics
)

# start training
trainer.train()
Be aware that the base model's (also known as the encoder's) weights are not frozen in the previous snippet. To prevent the loss of previously trained representations, a minimal learning rate of 2e-5 is used. The TrainingArguments object records learning rate and other hyperparameters. We are simply collecting accuracy metrics during training. You can alter the compute metrics function to collect and report on different metrics.
Training the Model on Cloud AI Platform
Although you can perform local experimentation on your AI Platform Notebooks instance, a vertically scaled compute resource or horizontally distributed training is frequently needed for larger datasets or models. The service provided by the AI Platform Training is the most efficient way to complete this assignment. The task-specific compute resources are created by AI Platform Training, which guarantees that they are deleted once the training assignment is complete.
The training application code must be packed and put into a Google Cloud Storage bucket that your Google Cloud project can access before the AI Platform Training training application can be launched. The application can be executed on the AI Platform Training in one of two ways:
- Using Python setup tools, manually package Python dependencies and application dependencies.
- Utilise customised Docker containers to package dependencies
The training code can be organised however we like. For our suggested method for organizing training code, please see the GitHub repository or Jupyter Notebook.
Training with Custom Containers
We must define a Dockerfile to install the requirements before we can create a training job with a custom container. Before using our Docker image with AI Platform Training, we first build and test it locally.
 # The base image should be PyTorch DLVM.
FROM gcr.io/cloud-aiplatform/training/pytorch-gpu.1-7

WORKDIR /root

# Installs Google Cloud Storage SDK, datasets, and transformers
RUN pip install google-cloud-storage transformers datasets tqdm

# The trainer code is copied to the docker image.
COPY ./trainer/__init__.py ./trainer/__init__.py
COPY ./trainer/experiment.py ./trainer/experiment.py
COPY ./trainer/utils.py ./trainer/utils.py
COPY ./trainer/metadata.py ./trainer/metadata.py
COPY ./trainer/model.py ./trainer/model.py
COPY ./trainer/task.py ./trainer/task.py

# Create the entry point where the trainer will be called.
ENTRYPOINT ["python", "-m", "trainer.task"]

We must push the image to the Google Cloud Container Registry before submitting the training job and must use the gcloud ai-platform jobs to submit the training command.

 # Install the Docker image on Cloud Container Registry.
docker push ${IMAGE_URI}

# Submit the training job
gcloud ai-platform jobs submit training ${JOB_NAME} \
    --region ${REGION} \
    --master-image-uri ${IMAGE_URI} \
    --scale-tier=CUSTOM \
    --master-machine-type=n1-standard-8 \
    --master-accelerator=type=nvidia-tesla-t4,count=2 \
    --job-dir ${JOB_DIR} \
    -- \
    --model-name="finetuned-bert-classifier"

# Be mindful of the '--' separator.
# Everything that comes after this separation is an objection to the training command.
# (ENTRYPOINT noted in Dockerfile)

Using the Google Cloud Console or the gcloud commands provided below, we may check the status and development of the training task after it has been submitted:

# Track the training position's progress
gcloud ai-platform jobs describe $JOB_NAME

# Console stream logs
gcloud ai-platform jobs stream-logs $JOB_NAME
We can also monitor the job status from the Google AI Platform Jobs console and see the job logs.Let us test a few local predictions using the trained model (refer to the notebook for the complete code). We will be able to use this model on the AI Platform Prediction service after the next post in this series.
label_text = {0 : 'NonVegetarian', 1: 'Vegetarian'}
def predict(input_text, saved_model_path):
# Set up the tokenizer
tokenizer = AutoTokenizer.from_pretrained(model_name_or_path,
use_fast=True)
# Preprocessing and text encoding
predict_input = tokenizer.encode(review_text,
truncation=True,
max_length=128,
return_tensors='pt')
#Loading-trained model
loaded_model = AutoModelForSequenceClassification.from_pretrained(
saved_model_path)
# Get forecasts
output = loaded_model(predict_input)
# returning labels
label_id = torch.argmax(*output.to_tuple(), dim=1)
print(f'FoodPreferences : {label_text[label_id.item()]}\n')Prediction
# Example number 1
review_text = '''Please get me a plate of veg momo.'''
predict_input = predict(review_text, saved_model_path)
> FoodPreferences : Vegetarian
# Example number 2
review_text = '''Please bring me a chicken biriyani.'''
predict_input = predict(review_text, saved_model_path)
> FoodPreferences : NonVegetarianCleaning up the Notebook environment
We can stop or delete the AI Notebook instance whenever we are finished exploring. The AI Notebook instance should be deleted to stop any further charges. We can decide to stop the instance if we wish to save our work.


 6+ registered

