


Introduction
In this blog, you will learn about the Radio Button widget, which is commonly used in Android applications. Understanding the concept of widgets and user interface (UI) is important before proceeding further in the blog. The user interface refers to the frontend or the screen with which the user interacts directly. Widgets are the elements of this user interface that helps provide a smooth interface for the users. Radio buttons allow the users to select an option from a list of available options.
Implementation of Radio Button
In this section, we will create a sample android application that will use the Radio Group and Radio Buttons. Follow the steps given below to make this sample application.
Creating an Android Studio Project
You need to first create an Android Studio project before actually creating your Android apps. To create a new project, open up Android Studio and press the New Project button, select Empty Activity as the activity type and implementation language as Kotlin. Select a minimum SDK version as per your requirements.
Don't have Android Studio and the environment already set up in your machine? No worries, we got you all covered. Refer to the blog Android Studio and Environment Setup on the Coding Ninjas Website to set up things for a smoother development process.
The main activity XML file
The activity_main.xml file is the most important layout of your application which is referenced when we are building the interface of our application. The code for the RadioGroup widget is written in this file. Write the following code into this file.
Code:
<?xml version="1.0" encoding="utf-8"?>
<RelativeLayout
    android:background="@color/yellow"
    xmlns:android="http://schemas.android.com/apk/res/android"
    tools:context=".MainActivity"
    android:layout_height="match_parent"
    xmlns:app="http://schemas.android.com/apk/res-auto"
    xmlns:tools="http://schemas.android.com/tools"
    android:layout_width="match_parent">

    <TextView
        android:layout_width="match_parent"
        android:layout_height="wrap_content"
        android:gravity="center"
        android:text="@string/heading"
        android:textStyle="bold"
        android:layout_marginLeft="0dp"
        android:textColor="@color/dark_orange"
        android:background="@color/dirty_white"
        android:layout_marginTop="20dp"
        android:textSize="25dp"/>

    <TextView
        android:layout_width="wrap_content"
        android:layout_height="wrap_content"
        android:text="@string/question"
        android:textStyle="bold"
        android:textColor="@color/black"
        android:layout_marginLeft="10dp"
        android:layout_marginTop="130dp"
        android:textSize="21dp"/>

    <RadioGroup
        android:layout_marginTop="170dp"
        android:id="@+id/radio_group"
        android:layout_marginLeft="15dp"
        android:layout_width="fill_parent"
        android:layout_height="wrap_content">

        <!-- Button 1 -->
        <RadioButton
            android:layout_width="fill_parent"
            android:layout_height="wrap_content"
            android:id="@+id/radio_button_1"
            android:text="@string/option_1"
            android:textSize="18dp"/>

        <!-- Button 2 -->
        <RadioButton
            android:layout_width="fill_parent"
            android:layout_height="wrap_content"
            android:id="@+id/radio_button_2"
            android:text="@string/option_2"
            android:textSize="18dp"/>

        <!-- Button 3 -->
        <RadioButton
            android:layout_width="fill_parent"
            android:layout_height="wrap_content"
            android:id="@+id/radio_button_3"
            android:text="@string/option_3"
            android:textSize="18dp"/>

        <!-- Button 4 -->
        <RadioButton
            android:layout_width="fill_parent"
            android:layout_height="wrap_content"
            android:id="@+id/radio_button_4"
            android:text="@string/option_4"
            android:textSize="18dp"/>

    </RadioGroup>

    <!-- Clear -->
    <Button
        android:layout_width="wrap_content"
        android:layout_height="wrap_content"
        android:text="Clear"
        android:id="@+id/clear"
        android:textSize="18dp"
        android:layout_marginTop="400dp"
        android:layout_marginLeft="50dp" />

    <!-- Submit -->
    <Button
        android:layout_width="wrap_content"
        android:layout_height="wrap_content"
        android:text="Submit"
        android:id="@+id/submit"
        android:textSize="18dp"
        android:layout_marginTop="400dp"
        android:layout_marginLeft="240dp" />

</RelativeLayout>
The main activity Kotlin file
This is the main file that gets your application running. This file contains the onCreate method, one of the first methods that get called after running our application. The code for MainActivity.kt file is given as below.
Code:
package com.example.radiobuttonjava
import android.os.Bundle
import android.view.View
import android.widget.Button
import android.widget.RadioButton
import android.widget.RadioGroup
import android.widget.Toast
import androidx.appcompat.app.AppCompatActivity
class MainActivity : AppCompatActivity() {
private var radioGroup: RadioGroup? = null
private var submit: Button? = null
private var clear: Button? = null
override fun onCreate(savedInstanceState: Bundle?) {
super.onCreate(savedInstanceState)
setContentView(R.layout.activity_main)
radioGroup = findViewById<View?>(R.id.radio_group) as RadioGroup
clear = findViewById<View?>(R.id.clear) as Button
submit = findViewById<View?>(R.id.submit) as Button
// Reset the buttons
radioGroup!!.clearCheck()
// Adding Event Listener to the Radio Group
radioGroup!!.setOnCheckedChangeListener(RadioGroup.OnCheckedChangeListener { group, checked_id ->
var radioButton = group.findViewById<View?>(checked_id) as RadioButton
})
// Adding Event Listener to the Clear Button
clear!!.setOnClickListener(View.OnClickListener {
try {
radioGroup!!.clearCheck()
}
catch (e:Exception) {
}
})
// Adding Event Listener to the Submit Button
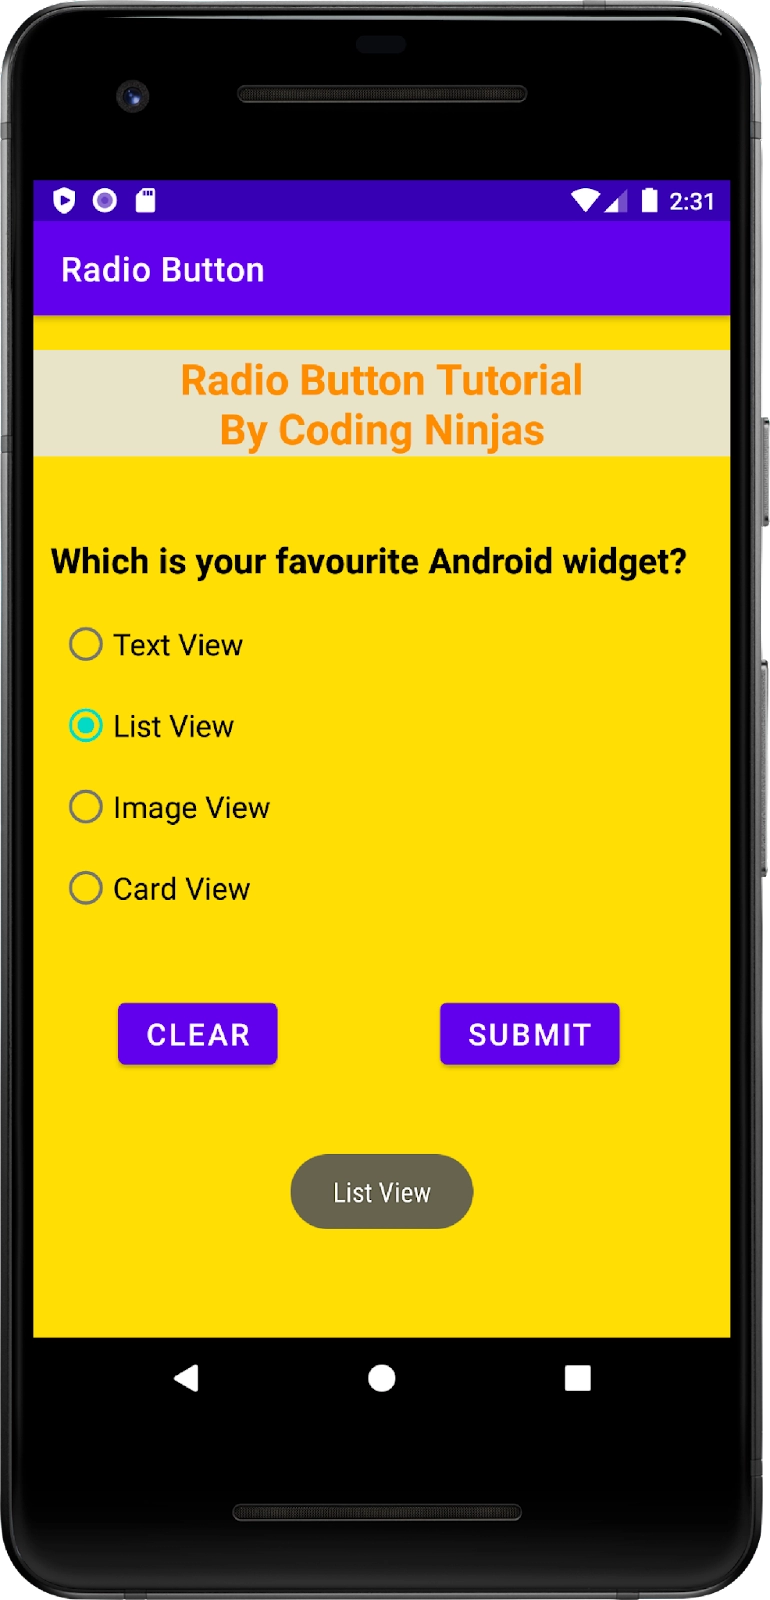
submit!!.setOnClickListener(View.OnClickListener {
var selected_id = radioGroup!!.getCheckedRadioButtonId()
if (selected_id != -1) {
var radioButton = radioGroup!!.findViewById<View?>(selected_id) as RadioButton
var option_text = radioButton.text as String
Toast.makeText(this@MainActivity, option_text, Toast.LENGTH_SHORT).show()
} else {
var display_text = "No answer selected"
Toast.makeText(this@MainActivity, display_text, Toast.LENGTH_SHORT).show()
}
})
}
}The Android Manifest XML file
This file is used for registering our activities. We don’t need to change anything in this file and just use the boilerplate code provided by Android Studio for this. The code for the AndroidManifest.xml file is given below.
Code:
<?xml version="1.0" encoding="utf-8"?>
<manifest xmlns:android="http://schemas.android.com/apk/res/android"
    package="com.example.radiobuttonjava">

    <application
        android:allowBackup="true"
        android:icon="@mipmap/ic_launcher"
        android:label="@string/app_name"
        android:roundIcon="@mipmap/ic_launcher_round"
        android:supportsRtl="true"
        android:theme="@style/Theme.RadioButtonJava">
        <activity
            android:name=".MainActivity"
            android:exported="true">
            <intent-filter>
                <action android:name="android.intent.action.MAIN" />

                <category android:name="android.intent.category.LAUNCHER" />
            </intent-filter>
        </activity>
    </application>

</manifest>
The Resources directory
The resources folder named res in our Android Studio project is an important folder that contains all the resources for our application. It contains all non-coding assets of our application. For example, consider the strings.xml file present under the directory res/values. This file contains the name of the application, which is rendered when we run the application. The code of this file is written below. In this blog, we have named the application as Radio Button.
Code:
<resources>
    <string name="app_name">Radio Button</string>
    <string name="heading">Radio Button Tutorial\nBy Coding Ninjas</string>
    <string name="question">Which is your favourite Android widget?</string>
    <string name="option_1">Text View</string>
    <string name="option_2">List View</string>
    <string name="option_3">Image View</string>
    <string name="option_4">Card View</string>
</resources>
The code for the colors.xml file is given as follows.
Code:
<?xml version="1.0" encoding="utf-8"?>
<resources>
    <color name="purple_200">#FFBB86FC</color>
    <color name="purple_500">#FF6200EE</color>
    <color name="purple_700">#FF3700B3</color>
    <color name="teal_200">#FF03DAC5</color>
    <color name="teal_700">#FF018786</color>
    <color name="black">#FF000000</color>
    <color name="white">#FFFFFFFF</color>
    <color name="dark_orange">#FF8C00</color>
    <color name="dirty_white">#E8E4C9</color>
    <color name="yellow">#FFDE03</color>
</resources>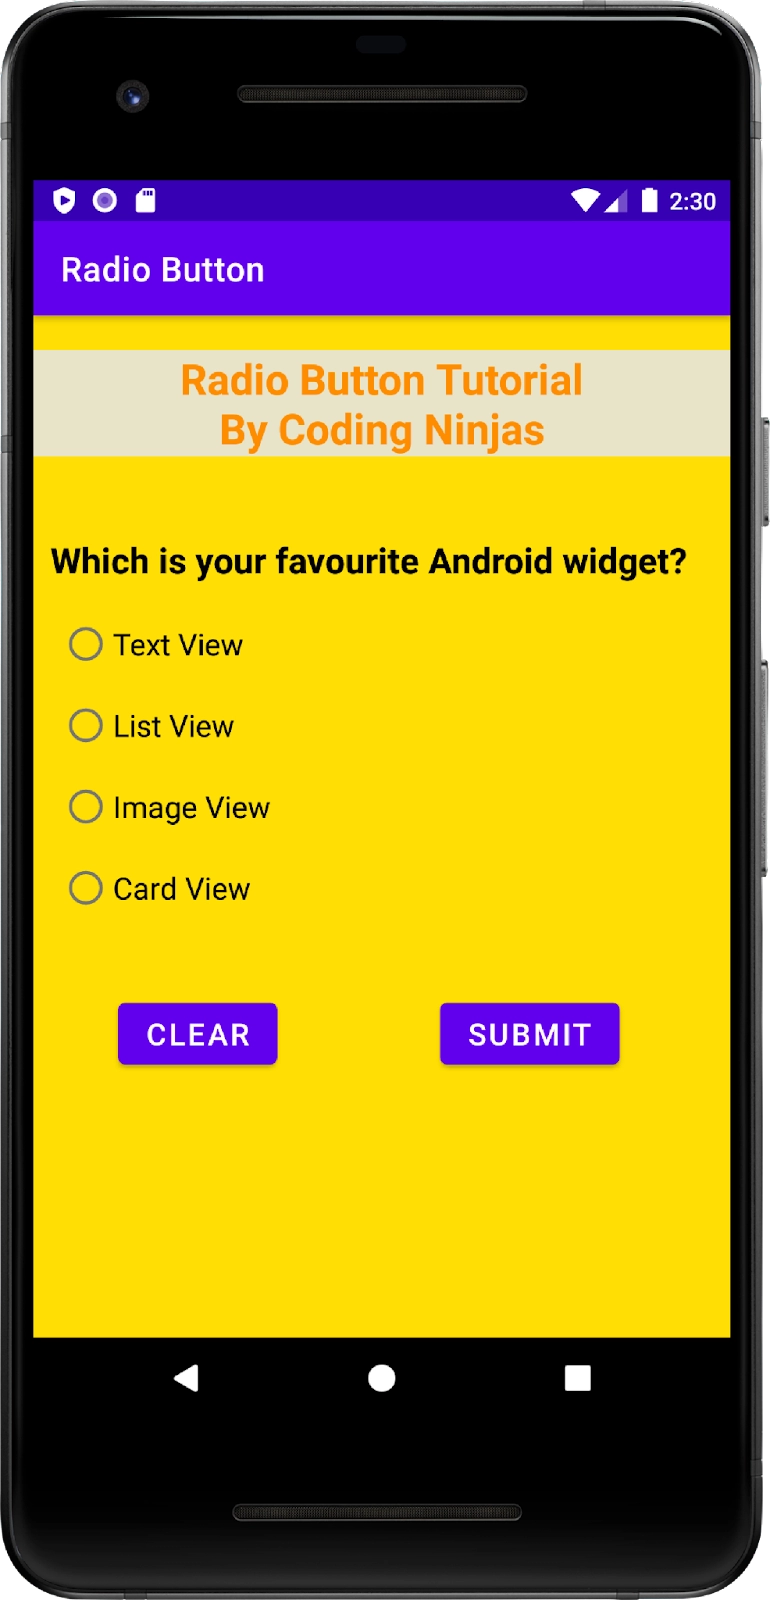


 8+ registered

