Table of contents
1.
Introduction
2.
What is ListView?
2.1.
Syntax
3.
Features of ListView
4.
ListView Methods
5.
React Native ListView Examples
5.1.
Example1
5.2.
Example2
6.
Frequently asked questions
6.1.
What is ListView in React Native?
6.2.
What is the difference between ListView and FlatList in React Native?
6.3.
What is renderRow in ListView?
7.
Conclusion
Last Updated: Jul 16, 2024
Easy

React Native ListView

Author Rajat Agrawal
0 upvote
Career growth poll
Do you think IIT Guwahati certified course can help you in your career?

Introduction

Several times, we have seen scrollable items in a Mobile application. Sometimes the list items are very large and dynamic. With the help of React Native, we can easily implement those scrollable lists.

React Native ListView

In React Native, there are several ways to build a scrolling list, the most notable of which are the ScrollView and the ListView. Each has advantages and disadvantages.

In this blog, we will briefly discuss about ListView component of React Native.

What is ListView?

ListView in React Native is a view component that displays a list of items in a vertical scrollable list. ListView.DataSource is the very minimal API for creating a list view. 

You will need two things to use the ListView component effectively:-

1.) ListView.DataSource: It does a lot of work behind the scenes to turn a basic array into an efficient data blob that the ListView component can understand.

2.) renderRow: It is a function that just returns a component that renders the row. As a prop to the function, the data for that row is passed.

Syntax

A ListView in Android is defined in an XML layout using:

<ListView
    android:id="@+id/listView"
    android:layout_width="match_parent"
    android:layout_height="wrap_content" />


In Java, use ArrayAdapter to bind data:

ListView listView = findViewById(R.id.listView);
listView.setAdapter(new ArrayAdapter<>(this, android.R.layout.simple_list_item_1, data));
You can also try this code with Online Java Compiler
Run Code

Features of ListView

Some of the handiest features of ListView are given below:-

1.) It is entirely Cross-Platform.

2.) Header support.

3.) Footer support.

4.) Separator support.

5.) Sticky Section Headers support.

ListView Methods

  • getMetrics(): This method retrieves the metrics of the ListView, such as height, width, and other display properties, which are useful for layout calculations and adjustments.
  • scrollTo(int x, int y): This method scrolls the ListView to the specified x and y coordinates, enabling precise control over the scroll position programmatically.
  • scrollToEnd(): This method scrolls the ListView to the last item, ensuring that the end of the list is visible, which is particularly useful for displaying new data at the bottom.
  • flashScrollIndicators(): This method temporarily displays the scroll indicators, providing a visual cue to the user that the ListView is scrollable, enhancing user experience

React Native ListView Examples

Example1

In this example, we establish a data source and populate it with an array of data blobs. Create a ListView component using that array as the data source and feed it to the renderRow callback. The renderRow function returns a component for rendering the row.

import React, { Component } from 'react'  
import { Text, ListView, StyleSheet } from 'react-native'  
  
export default class MyListComponent extends Component {  
    constructor() {  
        super();  
        const ds = new ListView.DataSource({rowHasChanged: (r1, r2) => r1 !== r2});  
        this.state = {  
            dataSource: ds.cloneWithRows(['Delhi','Kolkata','Berlin','Moscow','Tokyo',
            'Mumbai','London','Paris','Singapore','Los Angeles',
            'New York','San Francisco','Amsterdam','Manchester',
            'Copenhagen','Montreal','Pune'
            ])
    };  
    render() {  
        return (  
            <ListView  
                dataSource={this.state.dataSource}  
                renderRow={  
                    (rowData) =>  
                        <Text style={{fontSize: 20}}>{rowData}</Text>}  
            />  
        );  
    }  
}  
You can also try this code with Online Javascript Compiler
Run Code

Output:

In the above code, we create an instance of ListViewDataSource in the constructor. The ListViewDataSource is a parameter that accepts any of the following four arguments:-

1.) getRowData(dataBlob, sectionID, rowID)

2.) getSectionHeaderData(dataBlob, sectionID)

3.) rowHasChanged(previousRowData, nextRowData)

4.) sectionHeaderHasChanged(previousSectionData, nextSectionData)

Example2

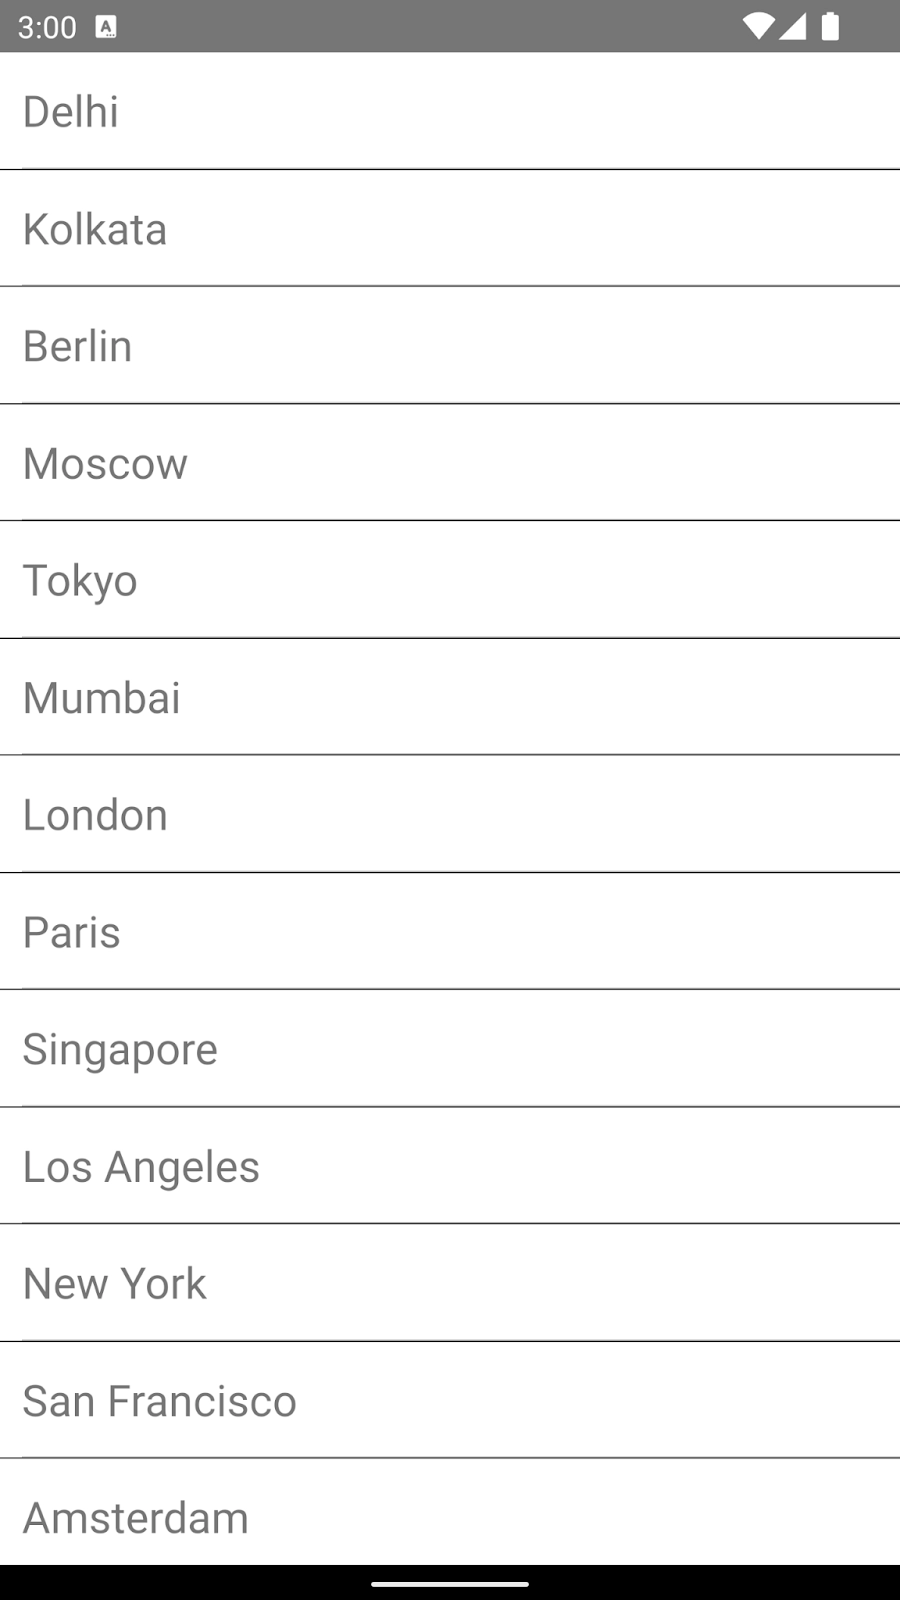
We will add separation and perform action on listview items in this example.

Separation is added to create a separate block and improve list item appearance. The renderSeparator prop is used to add a separator between ListView elements (data).

Use the onPress props over Text to perform an action when a list item is clicked. We create an alert message and display the list items that a user selects.

import React from 'react';  
import { View, ListView, StyleSheet, Text,Alert} from 'react-native';  
  
class ListViewDemo extends React.Component {  
    constructor(props) {  
        super(props);  
  
        const ds = new ListView.DataSource({rowHasChanged: (r1, r2) => r1 !== r2});  
        this.state = {  
            dataSource: ds.cloneWithRows(['Delhi','Kolkata','Berlin','Moscow','Tokyo',
            'Mumbai','London','Paris','Singapore','Los Angeles',
            'New York','San Francisco','Amsterdam','Manchester',
            'Copenhagen','Montreal','Pune'
            ])    
        };  
    }  
    //handling onPress action  
    getListViewItem = (rowData) => {  
        Alert.alert(rowData);  
    }  
    render() {  
        return (  
                <ListView  
                    style={styles.container}  
                    dataSource={this.state.dataSource}  
                    renderRow={(rowData) =>  
                      <Text style={styles.rowViewContainer}  
                            onPress={this.getListViewItem.bind(this, rowData)}>{rowData}  
                      </Text>  
                    }  
                    renderSeparator={(sectionId, rowId) =>  
                        <View key={rowId} style={styles.separator} />}//adding separation  
                />  
        );  
    }  
}  
  
const styles = StyleSheet.create({  
    container: {  
        flex: 1,  
        backgroundColor: "#e5e5e5"  
    },  
    separator: {  
        height: 0.5, width: "100%", backgroundColor: "#000"  
    },  
    rowViewContainer: {  
        flex: 1,  
        paddingRight: 15,  
        paddingTop: 13,  
        paddingBottom: 13,  
        borderBottomWidth: 0.5,  
        borderColor: '#c9c9c9',  
        flexDirection: 'row',  
        alignItems: 'center',  
        fontSize: 20,  
        marginLeft: 10,  
    },  
});  
  
export default ListViewDemo; 
You can also try this code with Online Javascript Compiler
Run Code

Output:

We can see the list of cities having a separation between them and popping out when clicked.

Read More, React Native Paper, Hooks in React JS

Frequently asked questions

What is ListView in React Native?

ListView in React Native is a view component that displays a list of items in a vertical scrollable list. ListView.DataSource is the very minimal API for creating a list view.

What is the difference between ListView and FlatList in React Native?

ListView is an older, deprecated component for displaying lists in React Native, requiring more manual setup for performance optimizations. FlatList is the modern alternative, offering better performance out-of-the-box with features like lazy loading, recycling, and support for header/footer components.

What is renderRow in ListView?

renderRow is a function that just returns a component that renders the row. As a prop to the function, the data for that row is passed.

Conclusion

In this article, we have extensively discussed React Native ListView, its key features, uses, and code implementationIf you want to learn more, check out our articles on Method ChainingFunction CompositionObject PrototypeCRUD API FlaskJSON Response Flask API, and App Routing in Flask.

Do upvote our blog to help other ninjas grow.

Happy Coding!

Live masterclass