Do you think IIT Guwahati certified course can help you in your career?
Introduction
The Google Maps service offers a variety of configuration options for its map service. You can provide users with more contextual information by including Google Maps in your application than a street address or set of coordinates.
Nowadays, Google Maps is available in almost all apps. Some mobile apps display the location of their outlets, track users (such as Uber), and display nearby places. Thus, maps play an important role in mobile apps. Let's go step-by-step through integrating Google Maps into a React Native app using the popular React Native Maps package.
The management of an app's codebase is very important for a developer or company. Nowadays, you can develop mobile apps for both iOS and Android using platforms like React Native. In this blog, I will not talk in detail about React and React Native. As a result, we are focusing on more Google Maps integration on iOS and Android.
React Native apps can integrate Google Maps in two ways:
create-react-native-app cli
React-native-cli
React-native-cli is developer-friendly and offers the ability to build native components. However, this means every little part of your application must be configured. In addition, you must use a real device or a simulator for both iOS and Android in order to test your application. During the installation and configuration of various npm packages, you might generate a lot of bugs.
With create-react-native-app, you can use the SDK's built-in modules. This simplifies the process of creating apps. It is not necessary to have a device (not even a simulator) to run and test the apps. Using the expo apps built for Android and iOS, you only need to develop and test the code. When you run npm start, you only need the QR Code generated by your application.
You should also have a basic or intermediate understanding of JavaScript, React, and React Native.
What are the necessary components for integrating React Native Maps?
Text Editor or IDE (We are using Visual Studio Code).
Node JS (As always, needed to install packages & other stuff).
react-native (A CLI command-line tool to install React Native onto your system.)
Step 1: Set up React Native application
Install the React Native command line interface on visual studio by running: npm install -g react-native-cli. Create your project by simply using the following command: react-native init ReactNativeMaps.
Try react-native run-ios or react-native run-android now. You should not have any problems doing so.
Step 2: Add and Link react-native-maps package
Here is how to install react-native-map: npm install --save react-native-maps. Then, link it with your native applications: react-native link react-native-maps.
Step 3: Set up Apple Maps (iOS)
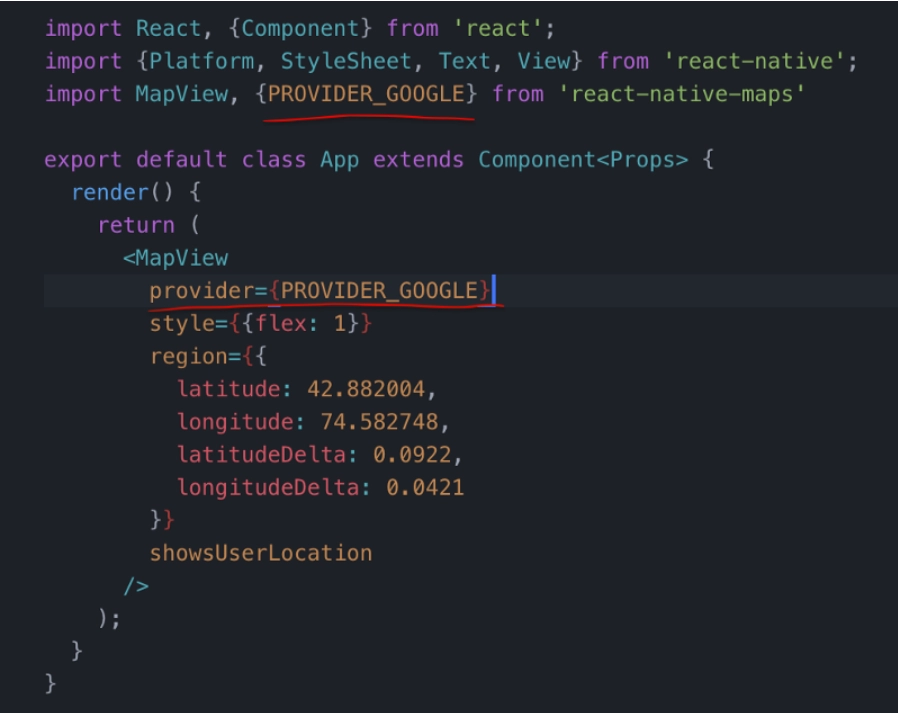
Setting them up separately by the platform will make things easier, so let's start with iOS first. To integrate Google Maps, we will first verify that Apple Maps is working properly. Your current rendering component should have the following code where you want your MapView to be rendered.
import MapView from 'react-native-maps'
You can also try this code with Online Javascript Compiler
Specify the appropriate longitude and latitude for any location you wish to test. Adding the showUserLocation property to the MapView component enabled the user location, as you can see. Your location is shown on the device if you are running the application.
Step 4: Install 'GoogleMaps' package and Cocoapods (iOS)
In order to use Google Maps on iOS, we have to install the SDK. A CocoaPods package should be installed. Install it with sudo gem install cocoapods if you have never used it before.
In order to specify the dependencies of your iOS application, you need to create a Podfile. In your React Native app, navigate to the iOS/ folder, and then run pod init or touch Podfile. The result should look like this:
# platform :ios, '9.0'
target 'ReactNativeMaps' do
# Pods for ReactNativeMaps
pod 'GoogleMaps'
end
You can also try this code with Online Javascript Compiler
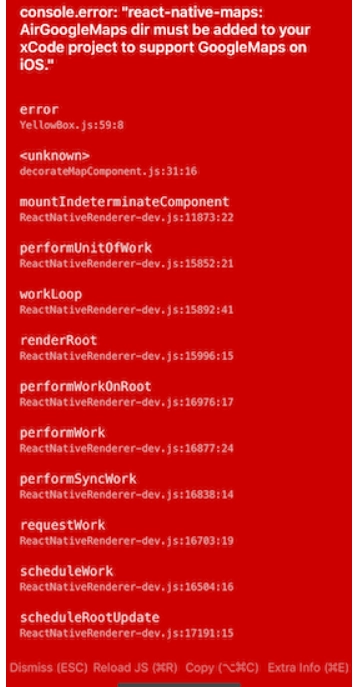
Pod GoogleMaps has been added and now needs to be installed, as you can see. To install it, run pod install from the iOS folder. You will probably receive an error when trying to run it right now:
It's all right, we'll do what it wants. Open the Xcode workspace now. From node_modules/, navigate to the AirGoogleMaps folder and make sure it is at the top of your XCode project. You can try building your Xcode project again if you are having problems. You should add HAVE_GOOGLE_MAPS=1 Preprocessor Macro to Build Settings.
Step 5: Get the Google Maps API key and Run iOS app.
We now need to generate an API key for Google Maps.
The API key should be copied and added to the AppDelegate.m file like below.
What Is the Name of API for Google Maps in React Native?
It is google-maps-react.
Is Google Maps supported for both iOS and Android?
Yes, it is supported for both iOS and Android.
What are the Prerequisites?
Node.js installed locally.
Familiarity with the React JavaScript framework.
A Google Maps JavasScript API Key.
Conclusion
In this tutorial, we will show you how to integrate Google Map with your React Native application. With this knowledge, you will be able to build custom features on top of the react-native-maps library. These lessons can be used to create a variety of applications, including taxi services, restaurant finders, delivery apps, and many others. In the React Native ecosystem, react-native-maps make integrating maps easy and is an essential library.
Check out this link if you want to explore more about React.
If you are preparing for the upcoming Campus Placements, don't worry. Coding Ninjas has your back. Visit this data structure link for cracking the best product companies.


 8+ registered

