Do you think IIT Guwahati certified course can help you in your career?
Introduction🤔
Sometimes, while using postman, which is an API platform for building and using APIs, one might wonder how to share the postman collection with the users. The answer to this question is using and creating the run in postman buttons.😊
So, let us learn about using and creating run in postman buttons and coding with the run in postman.
Are you ready❓
Using Run in Postman Buttons🎯
The 'run in postman' button is a way to share a postman collection (and optional environment) with your users.
Live run in postman buttons automatically stays updated with changes to your collection, providing consumers with its most recent version. You can also attach an environment to your live button to help onboard new users to your API quickly and efficiently.
User interaction with your button🏌🏻
When a user comes across the run in postman button, they can choose to fork the collection to their workspace, view the collection in the public workspace, or import the collection into Postman. Then, they can begin interacting with your API. The run in postman button allows the consumers to fork your collection, which creates a copy of the collection while keeping a link to the parent.
Note - run in postman buttons are only available for documentation and embed flows.
Creating Run in Postman Buttons🦾
One way of sharing your postman collections is to build a stand-alone run in postman button. The run in postman button allows users to fork the collections. You can embed the button in the website or a README to let developers interact with your API more quickly.
Being a user, you can still make the run in the postman button from API specification formats like OpenAPI and RAML. To make a button for the standard you use, first, convert the file to a collection by importing it into Postman or authoring your specification in Postman to generate a collection.
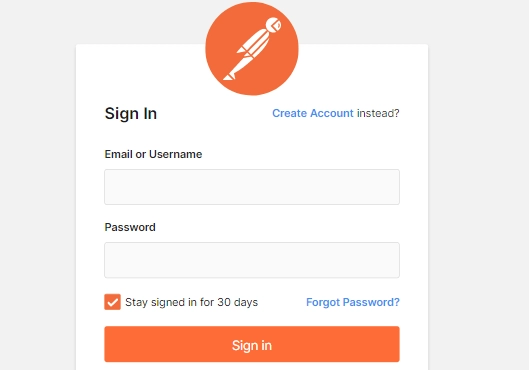
Before diving into creating a run in postman button. First, ensure if you are signed in to your postman account or not and have a collection in a public workspace to share.
Note - If the collection is present in a public workspace, you can directly embed the copied code where you would like your button to be displayed. If the collection is present in a personal workspace or a team, share the collection to a public workspace to build the run in postman button.
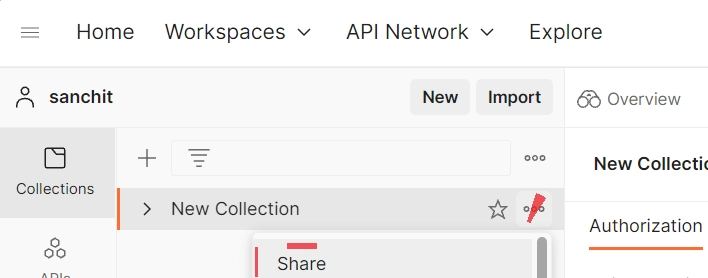
Open the collection you want to share in postman.
Next to the collection name, to expand the collection details select the more actions icon and to open a modal, select Share collection.
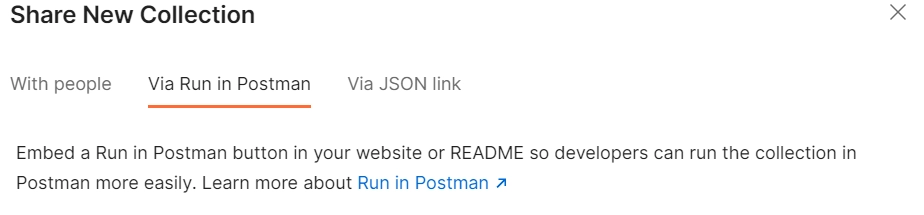
Tab over to via run in postman.
Choose a static or live button:
Live button🔘 - This button uses HTML, CSS, and javascript, which let you customise the button for websites. The run in postman API can also be accessed to create and update environments dynamically.
Static button🔘 - Static button uses markdown so that you can display it in a README, blog, or other markdown documents.
Note - To create a live button, you must share the collection to a public workspace, or if you do not have a public workspace to share, you can create a new one using the modal. For the users on enterprise plans, you need to have a community manager role in creating a new public workspace.
You have an option to include an environment to embed with the collection. Now select the add an environment dropdown list and choose the environment.
Select the Copy Code📋.
Your embed code will include your ID of collection.
In the examples below -
:collection_id is a placeholder for that ID.
:collection_url is a placeholder for the URL.
The code will have the environment parameter if you include an environment in your button.
Markdown snippet sample📄
[](https://god.gw.postman.com/run-collection/:collection_id)
Embed the code wherever you want the button to be displayed.
You can include an environment and a collection in your run in postman button. The live button grants you access to the run in postman API to create and make changes to environments.
Selecting the run in postman button will open the page where you can fork the collection to your workspace. Forking the collection into your workspace will enable you to contribute to the source collection using the pull requests.
Using the links present on the screen, you can also view the collection in a public workspace and even import a copy of the collection. All the collections shared with the new Run in postman buttons come along with Fork counts that help you and your consumers get to know how the API is used.
Coding with Run in Postman👨💻
Some API publishers use the run in postman buttons alongside their API documentation. If users input data in a developer portal, for example, the run in postman API can dynamically inject this provided information as environment variable values into the embedded run in postman button.
The run in postman API uses the _pm() method to create or update environments in your website's client-side code through the existing dynamic run in postman buttons.
As another example, you can use the API to pass login credentials to Postman:
The env.create action will return the total number of environments associated with the run in postman buttons on the page on success and false on failure.
Editing an Existing Environment🧑🔧
Use the env.assign method to update an environment:
The env.assign method works for environments you included in the run in postman button when you created it or environments you added using the env.create method. You can't use env.assign to create new environments. Calls made using env.assign will fail if an environment doesn't already exist.
// Existing environment named 'user_data'
{
 auth_token: 'authtokenstringdef3897ryq3891s',
 user_id: '786',
 session_data: {}
}
// Remove the 'user_data' environment
_pm('env.remove', 'user_data');
The env.remove method will return true on success or false on failure. The specified environment must exist, or env.remove will fail.
Using Multiple Buttons with Separate Environments🧳
You can embed multiple buttons on a single page. If you want to include a different environment in each button, enable the segregateEnvironments property.
If you enable segregateEnvironments, you will have to use runButtonIndex in all pm() methods to reference each button according to its position in your page DOM. Because segregateEnvironments is deactivated by default, runButtonIndex is optional by default.
Including The Index🪡
If you enable segregateEnvironments, you'll have to use runButtonIndex in all pm() methods to reference each button according to its position in your page DOM. The runButtonIndex is an integer.
var runButtons = Array.prototype.slice.call(document.getElementsByClassName('postman-run-button')),
 runButtonIndex = runButtons.indexOf(elem);
Using The Index for jQuery🪢
var runButtonIndex = $('postman-run-button').index(elem);
Getting All Environments🌐
To retrieve an array of all the environments, you can use the get() method.
Postman is an API platform for building and using APIs.
What does API stand for?
API stands for Application Programming Interface.
What is API used for?
API is a software intermediary that allows two different applications to communicate with each other.
What workspace is used for in postman?
Postman workspaces are used to organise API work and collaboration across organisations and the world.
What collection is used for in postman?
A collection in postman helps us to group similar requests. It helps in systematically arranging the requests into folders.
Conclusion
In this article, we discussed using and creating run in postman buttons to share the postman collection with the users and coding with the run in postman.
See the official website for documentation and other information about Postman or you may refer to our blogs on API, API testing and web testing.


 9+ registered

