Table of contents
1.
Introduction
2.
@import
2.1.
Nested@import
2.2.
Partial@import
2.3.
Plain CSS@import
3.
@extend 
3.1.
Extend in@media
4.
@warn 
5.
@error
6.
Frequently Asked Questions
6.1.
What are directives in SASS?
6.2.
What do Leaner Style Sheets elements contain?
6.3.
Which directive is used to detect the errors in Sass?
6.4.
Do SASS supports inline comments?
7.
Conclusion
Last Updated: Mar 27, 2024

Sass @At rules and directives - Part 1

Author Aryan Raj
0 upvote
Career growth poll
Do you think IIT Guwahati certified course can help you in your career?

Introduction

The Sass @At Rules and directives in syntactically awesome style sheets are backbone features that you should at least know about, particularly when it concerns the @import rule. Some of these @-rules are extensions of Cascading Style Sheets(CSS) @-rules, while others are Sass-specific directives. Either way, you should know what these rules are for and how they work if you will be working with Sass.


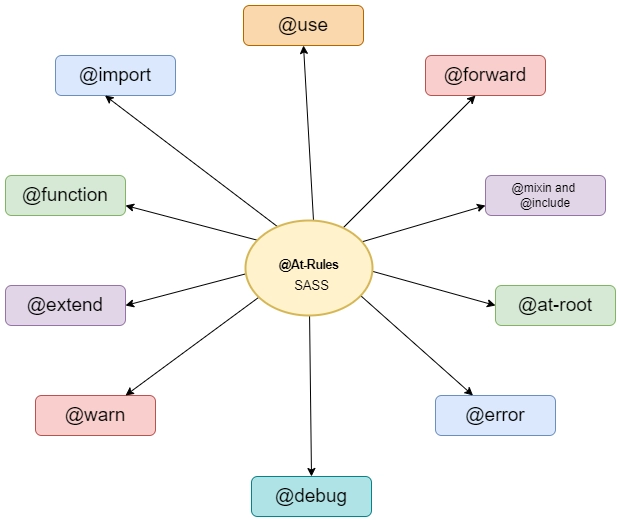
This blog is Part-I of Sass @At rules and directives. In this blog, we will discuss @imports, @extend, @warn, @error in detail with their syntax.

The remaining topics are covered in Sass @At rules and directives Part-II.
 

@import

Syntactically awesome style sheet extends the CSS's @import rule with the ability to import CSS and SASS stylesheets, providing access to functions, mixins, and variables and combining multiple stylesheets' CSS together. Unlike plain Cascading Style Sheet(CSS) @imports, which requires the browser to make multiple HTTP requests as it renders your page, Sass imports are handled entirely during compilation.


SCSS Syntax:

// foundation/_text.scss
code {
  padding: .30em;
  line-height: 0;
}


// foundation/_code.scss
ul, ol {
  text-align: left;


  & & {
    padding: {
      bottom: 0;
      left: 0;
    }
  }
}


// style.scss
@import 'foundation/code', 'foundation/lists';


SASS Syntax:

// foundation/_text.sass
code
  padding: .30em
  line-height: 0


// foundation/_code.sass
ul, ol
  text-align: left


  & &
    padding:
      bottom: 0
      left: 0


// style.sass
@import foundation/code, foundation/lists


CSS Syntax:

code {
  padding: .30em;
  line-height: 0;
}


ul, ol {
  text-align: left;
}
ul ul, ol ol {
  padding-bottom: 0;
  padding-left: 0;
}

Syntactically awesome style sheet imports have the same syntax as the CSS imports, except they allow multiple imports to be separated from each other by commas rather than requiring each one to have its @import. Also, in the indented syntax, imported URLs are not required to have quotes.


Nested@import

@imports are generally written at the top level of a stylesheet document, but they can also be nested within the style rules or plain CSS at-rules. The imported Cascading Style Sheets are nested in that context, making nested imports useful for scoping a chunk of CSS to a particular element or media query. Note that top-level functions, mixins, and variables defined in the nested import are still defined globally.


SCSS Syntax:

// _theme.scss
pre, code {
  font-family: 'Source Code Pro', Helvetica, Arial;
  border-radius: 4px;
}


// style.scss
.theme-sample {
  @import "theme";
}


SASS Syntax:

// _theme.sass
pre, code
  font-family: 'Source Code Pro', Helvetica, Arial
  border-radius: 4px


// style.sass
.theme-sample
  @import theme


CSS Syntax:

.theme-sample pre, .theme-sample code {
  font-family: 'Source Code Pro', Helvetica, Arial;
  border-radius: 4px;
}


Partial@import

When you import an SCSS/Sass file, it will be compiled to a CSS file of the same name. We usually want to import separate SASS/SCSS files into one master CSS file instead of multiple CSS files. To fulfill this, we need to import the files as partials. 

We make a SASS/SCSS file into a partial by adding an underscore(_) in front of the name. The underscore tells sass not to compile the file as an individual CSS file but to concatenate it with the current file that contains the @import statement.

Let's see an example:

We changed myNinja into _myNinja.

@import "myNija";

While importing these partials, we do not have to include the underscore. 

The difference is that no myninja.css file will be created, the file will be merged with the main CSS file.


Plain CSS@import

Since @import is defined in CSS, sass needs a way of compiling plain CSS @imports without trying to import the files at compile time. 

To fulfill this, and to ensure SCSS is as much of a superset of CSS as possible, Sass will compile any @imports with the following characteristics to plain CSS imports:

  • Imports where the Uniform Resource Locator ends with .css.
  • Imports where the Uniform Resource Locator begins https:// or http://.
  • Imports where the Uniform Resource Locator is written as a URL().


SCSS Syntax:

@import "theme.css";
@import "http://fonts.googleapis.com/css?family=Droid+Sans";
@import url(theme);
@import "landscape" screen and (orientation: landscape);


SASS Syntax:

@import "theme.css"
@import "http://fonts.googleapis.com/css?family=Droid+Sans"
@import url(theme)
@import "landscape" screen and (orientation: landscape)


CSS Syntax:

@import url(theme.css);
@import "http://fonts.googleapis.com/css?family=Droid+Sans";
@import url(theme);
@import "landscape" screen and (orientation: landscape);


@extend 

While designing a page, there are often cases when one class should have all the styles of another class and its own specific styles. 

Let's say we had two classes for text, one regular and one for emphasized text.

.main {
  color:  black;
  font-size: 12px;
}
.emphasis {
  font-weight: bold;
}


This works well enough, but to use the emphasized text, we have to do this:

<div class="main emphasis">


Remember, we can use sass to decrease the amount of typing. The @extend directive allows us to have one element inherit the styles of another.

.master {
  color:  black;
  font-size: 12px;
}
.emphasis {
  @extend .master;
  font-weight: bold;
}


As you can see, (.emphasis) is included with (.master) and has styles that only applies to emphasized text. To use this class, we have to include the .emphasis class.

.master, .emphasis {
  color: black;
  font-size: 12px;
}

.emphasis {
  font-weight: bold;
}


With the help of the @extend directive, we can extend complex selectors, have multiple @extends, chain @extends, and much more.


Extend in@media

Since @extend is allowed within @media and other CSS at-rules, it cannot extend selectors that appear outside its at-rule. This is because the extending selector only applies within the given media context. There’s no way to ensure that restriction is preserved in the generated selector without duplicating the entire style rule.


SCSS Syntax:

@media screen and (max-width: 600px) {
  .error--serious {
    @extend .error;
    //      ^^^^^^
    // Error: ".error" was extended in @media but used outside it.
  }
}


.error {
  border: 1px #f00;
  background-color: #fdd;
}


SASS Syntax:

@media screen and (max-width: 600px)
  .error--serious
    @extend .error
    //      ^^^^^^
    // Error: ".error" was extended in @media, but used outside it.


.error
  border: 1px #f00
  background-color: #fdd


@warn 

When writing functions and mixins, you may want to discourage users from passing specific arguments or particular values. Users may be passing legacy arguments that are now deprecated, or they may be calling your API(Application programming interface) in a way that's not quite optimal.

The @warn directive prints the value of a Sass expression(usually a string) to the standard error output stream. It will print the value of the expression as well as the line number of the warning.

Once the error is displayed, syntactically awesome style sheets stop compiling the stylesheet and tell whatever system is running it that an error occurred.


SCSS Syntax:

$known-prefixes: webkit, moz, ms, o;


@mixin prefix($property, $value, $prefixes) {
  @each $prefix in $prefixes {
    @if not index($known-prefixes, $prefix) {
      @warn "Unknown prefix #{$prefix}.";
    }


    -#{$prefix}-#{$property}: $value;
  }
  #{$property}: $value;
}


.tilt {
  // Oops, we typo'd "webkit" as "wekbit"!
  @include prefix(transform, rotate(15deg), wekbit ms);
}


SASS Syntax:

$known-prefixes: webkit, moz, ms, o


@mixin prefix($property, $value, $prefixes)
  @each $prefix in $prefixes
    @if not index($known-prefixes, $prefix)
      @warn "Unknown prefix #{$prefix}."


    -#{$prefix}-#{$property}: $value


  #{$property}: $value


.tilt
  // Oops, we typo'd "webkit" as "wekbit"!
  @include prefix(transform, rotate(15deg), wekbit ms)


CSS Syntax:

.tilt {
  -wekbit-transform: rotate(15deg);
  -ms-transform: rotate(15deg);
  transform: rotate(15deg);
}


@error

When writing functions and mixins that take arguments, you usually want to ensure that those arguments have the types and formats your API(Application programming interface)expects. If they aren't, the user needs to be notified, and your function/mixin needs to stop running.

Sass makes this easy with the @error rule written @error <expression>. It prints the value of the expression (usually a string) along with a stack trace indicating how the current mixin or function was called. Once the error is printed, Syntactically awesome style sheets stop compiling the stylesheet and tell whatever system is running it that an error occurred.


SCSS Syntax:

@mixin reflexive-position($property, $value) {
  @if $property != left and $property != right {
    @error "Property #{$property} must be either left or right.";
  }


  $left-value: if($property == right, initial, $value);
  $right-value: if($property == right, $value, initial);


  left: $left-value;
  right: $right-value;
  [dir=rtl] & {
    left: $right-value;
    right: $left-value;
  }
}


.sidebar {
  @include reflexive-position(top, 12px);
  //       ^^^^^^^^^^^^^^^^^^^^^^^^^^^^^
  // Error: Property top must be either left or right.
}


SASS Syntax:

@mixin reflexive-position($property, $value)
  @if $property != left and $property != right
    @error "Property #{$property} must be either left or right."


  $left-value: if($property == right, initial, $value)
  $right-value: if($property == right, $value, initial)


  left: $left-value
  right: $right-value
  [dir=rtl] &
    left: $right-value
    right: $left-value


.sidebar
  @include reflexive-position(top, 12px)
  //       ^^^^^^^^^^^^^^^^^^^^^^^^^^^^^
  // Error: Property top must be either left or right.


The error and stack trace format varies from implementation to implementation and depends on your build system. While running from the command line, this is what it looks like in Dart Sass : 

Error: "Property top must be either left or right."
  ╷
3 │     @error "Property #{$property} must be either left or right.";
  │     ^^^^^^^^^^^^^^^^^^^^^^^^^^^^^^^^^^^^^^^^^^^^^^^^^^^^^^^^^^^^
  ╵
  example.scss 3:5   reflexive-position()
  example.scss 19:3  root stylesheet

Frequently Asked Questions

What are directives in SASS?

Control directives and expressions are used in syntactically awesome style sheets to include styles only under some conditions or to involve the same style several times with variations. Directives are an advanced feature that exists mainly for use in mixins. You might not need to use directives unless you work on a big project.

What do Leaner Style Sheets elements contain?

Leaner Style Sheets elements contain commonly used mixins like:
.rounded
.gradient
.box-shadow
.opacity
.inner-shadow

Which directive is used to detect the errors in Sass?

The @debug directive is used to detect the errors in Sass. It also displays the Sass script expression values to the standard error output stream.  

Do SASS supports inline comments?

In Syntactically Awesome Style Sheets, 
Single line comments // will be taken out by the .scss pre-processor and won't appear in your .css file.
Multiline comments */ are valid CSS, and will be preserved* between the translation from .scss to your .css file.

Conclusion

In this blog, we discussed Sass @at rules and directives in complete detail. We have discussed @imports, @extend, @warn, @error in detail with their syntax.

This blog is Part-I of Sass @At rules and directives.

The remaining topics are covered in the Sass @At rules and directives Part-II.

If you are pursuing a new career in Web Development, we suggest you get your fundamentals crystal clear with our Full Stack Development course

Happy Learning, Ninja!

Live masterclass