


Introduction
Selenium is one of the most famous open-source tools used for Functional Automation Testing. Selenium can be used to write test cases in several popular programming languages like C#, JavaScript, Python, Perl, Java, etc. Selenium was rolled out in 2004 and is widely used for web testing Automation. Selenium can be very efficiently deployed on all the major operating systems such as Windows, Linux, and Macintosh OS.
Selenium has the following features,
- It supports programming languages like Java, Ruby, C#, Python, PHP, etc.
- It supports parallel browser execution to increase the test coverage and reduce the execution time.
- Selenium is supported by all widely used Browsers such as Firefox, Chrome, Safari, etc.
- We can also integrate Selenium with other testing frameworks.
In this blog, we will be looking at the working of Selenium using C#.
Setup Selenium in VSCode
To set up Selenium in VSCode or Virtual Studio Code, we need to follow the following steps,
Step-1
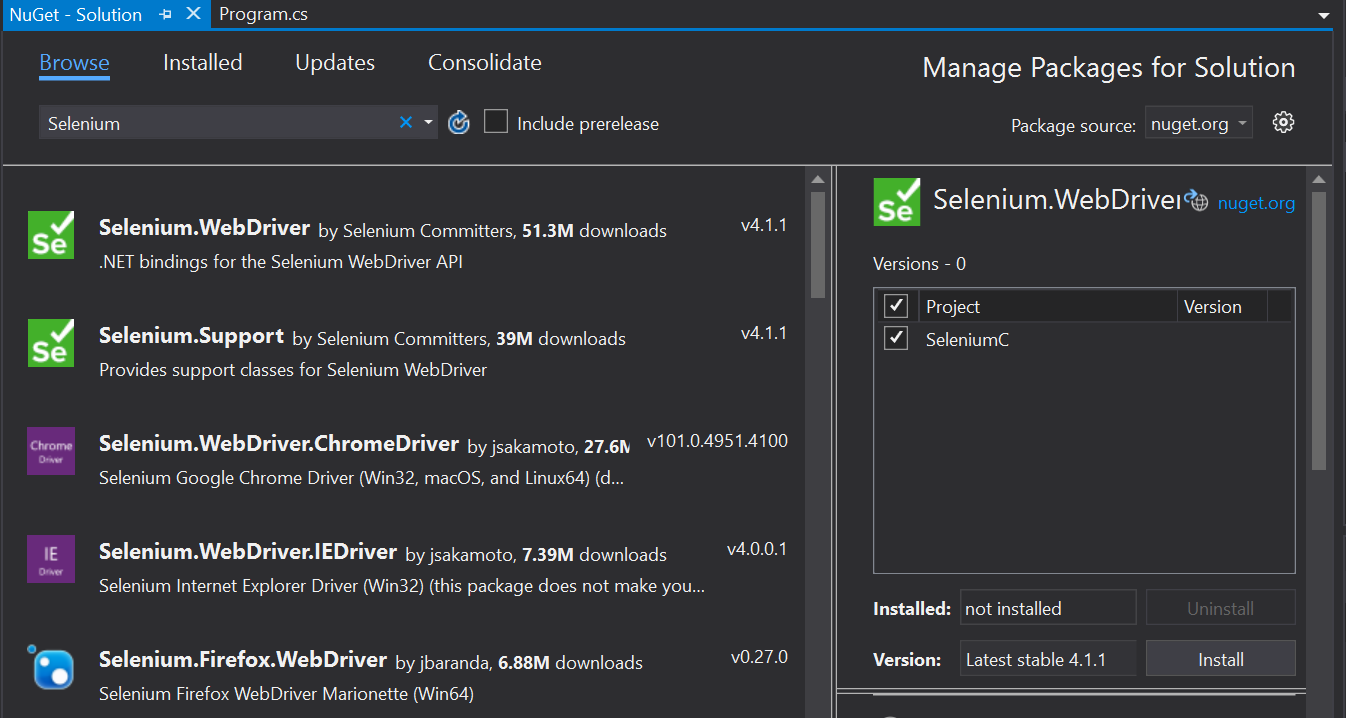
First, we will need to download the Selenium Web Driver in VSCode. We can easily download the Selenium Web Driver by navigating to the NuGet Packet Manager in the Tools menu. We can then select the Manage Nuget Packages for Solution from there.

Step-2
In the second step, we have to search for Selenium in the Search bar. From the results obtained, we have to select Selenium.WebDriver and check all the checkboxes. After all the boxes are checked, we click on the install button.
Step-3
After clicking install, the user will receive the following text box.

After the web driver is installed, Selenium can be used on the VSCode using C#.


 8+ registered

