Spring Boot AOP After Returning Advice
After Returning Advice in Spring AOP invokes after the execution of join point successfully. It will not invoke if an exception is thrown. We can implement after returning advice in an application by using @AfterReturning annotation.
After returning advice invokes when a matched method execution returns a value normally. The name that we define in the return attribute must be similar to the parameter's name in the advice method. When a method returns a value, the value will be passed to the advice method as the corresponding argument value.
Let's implement the after returning advice in a Spring Boot application.
Step1: Create a basic Spring Boot application using Spring Tool Suite (STS) or Spring Intializr.
Step2: Before implementing the AOP Returning Advice in a Spring Boot application, we need to add Spring AOP dependency into the pom.xml file.
<dependency>
<groupId>org.springframework.boot</groupId>
<artifactId>spring-boot-starter-aop</artifactId>
</dependency>

You can also try this code with Online Java Compiler
We have added the above dependency in the following picture:

Step3: Create a package with the name com.<name>.model. (For example: com.codingninjas.model) in src/main/java folder. This package will contain the different database models we design.
We have created a package with the name com.codingninjas.model in the following picture:
src/main/java->com.codingninjas.model

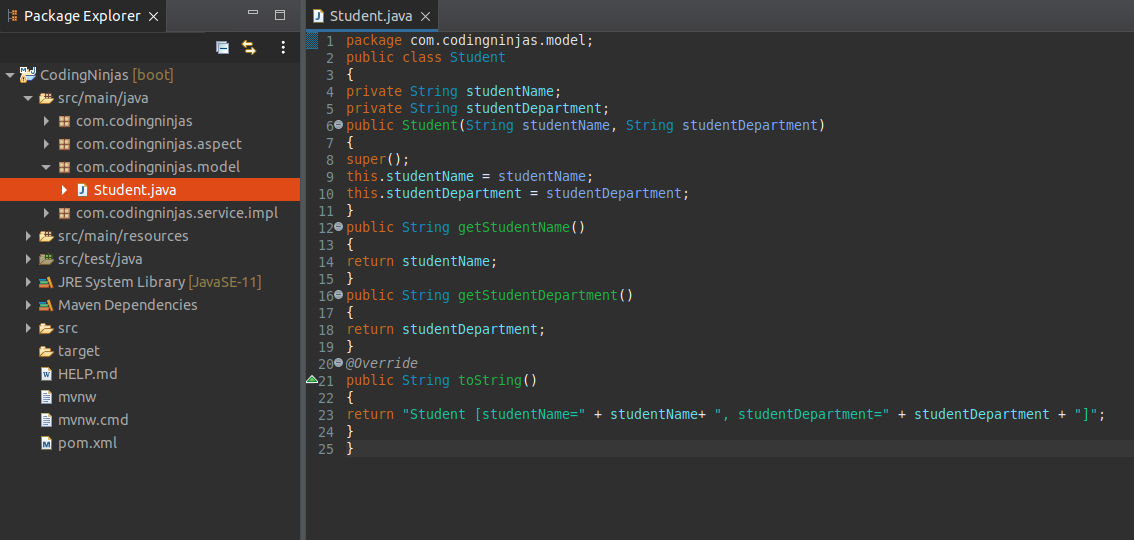
Step4: Create a class in the above package with the name Student.
In the above class, we have defined two variables, studentName, and studentDepartment of type String.
Student.java
package com.codingninjas.model;
public class Student
{
private String studentName;
private String studentDepartment;
public Student(String studentName, String studentDepartment)
{
super();
this.studentName = studentName;
this.studentDepartment = studentDepartment;
}
public String getStudentName()
{
return studentName;
}
public String getStudentDepartment()
{
return studentDepartment;
}
@Override
public String toString()
{
return "Student [studentName=" + studentName+ ", studentDepartment=" + studentDepartment + "]";
}
}
You can also try this code with Online Java Compiler
We have created the above class and method in the following picture:
Step5: Create another package with the name com.<name>.service.impl. (For example: com.codingninjas.service.impl). This package will contain the service component where business logic is written.
We have created a package with the name com.codingninjas.service.impl in the following picture:
src/main/java->com.codingninjas.service.impl

Step6: Create a class in the above package with the name StudentServiceImpl.
In this class, we have defined student service.
StudentServiceImpl.java
package com.codingninjas.service.impl;
import java.util.HashMap;
import java.util.Map;
import java.util.Map.Entry;
import java.util.Set;
import org.springframework.stereotype.Service;
import com.codingninjas.model.Student;
@Service
public class StudentServiceImpl implements StudentService
{
//storing student detail in the HashMap
private static Map<String,Student> map = null;
static
{
map = new HashMap<>();
//adding student detail in the map
map.put("STD01", new Student("Rajat", "Information Technology"));
map.put("STD02", new Student("Rishab", "Electrical Engineering"));
}
@Override
public Student getStudentByStudentId(String studentId) throws Exception
{
if(studentId ==null)
{
throw new Exception("Invalid! Student Id");
}
Student student= null;
Set<Entry<String, Student>> entrySet = map.entrySet();
for (Entry<String, Student> entry : entrySet)
{
if(entry.getKey().equals(studentId))
{
student= entry.getValue();
}
}
return student;
}
}
You can also try this code with Online Java Compiler
We have created the above class and method in the following picture:

Step7: Create an interface with the name StudentService in the package com.codingninjas.service.impl.
StudentService.java
package com.codingninjas.service.impl;
import com.codingninjas.model.Student;
//creating interface that throws exception if the student id is not found
public interface StudentService
{
public abstract Student getStudentByStudentId(String studentId)
throws Exception;
}
You can also try this code with Online Java Compiler
We have created the above class in the following picture:

Step8: Create a package with the name com.<name>.aspect. (For example: com.codingninjas.aspect) in the src/main/java folder. This package will contain the AOP component, where we write our secondary logic.
We have created a package with the name com.codingninjas.aspect in the following picture:
src/main/java->com.codingninjas.aspect

Step 9: Create a class StudentAspect.java in the above package. In this class, we implemented the after returning advice using the @AfterReturning annotation. We have also defined a method named afterReturningAdvice().
Note: The name (student here) that we define in the returning attribute must be similar to the name of a parameter in the advice method.
StudentAspect.java
package com.codingninjas.aspect;
import org.aspectj.lang.JoinPoint;
import org.aspectj.lang.annotation.AfterReturning;
import org.aspectj.lang.annotation.Aspect;
import org.springframework.stereotype.Component;
import com.codingninjas.model.Student;
@Aspect
@Component
public class StudentAspect {
//implementing after returning advice
@AfterReturning(value="execution(* com.codingninjas.service.impl.StudentServiceImpl.*(..))",returning="student")
public void afterReturningAdvice(JoinPoint joinPoint, Student student)
{
System.out.println("After Returning method:"+joinPoint.getSignature());
System.out.println(student);
}
}
You can also try this code with Online Java Compiler
We have created the above class and method in the following picture:

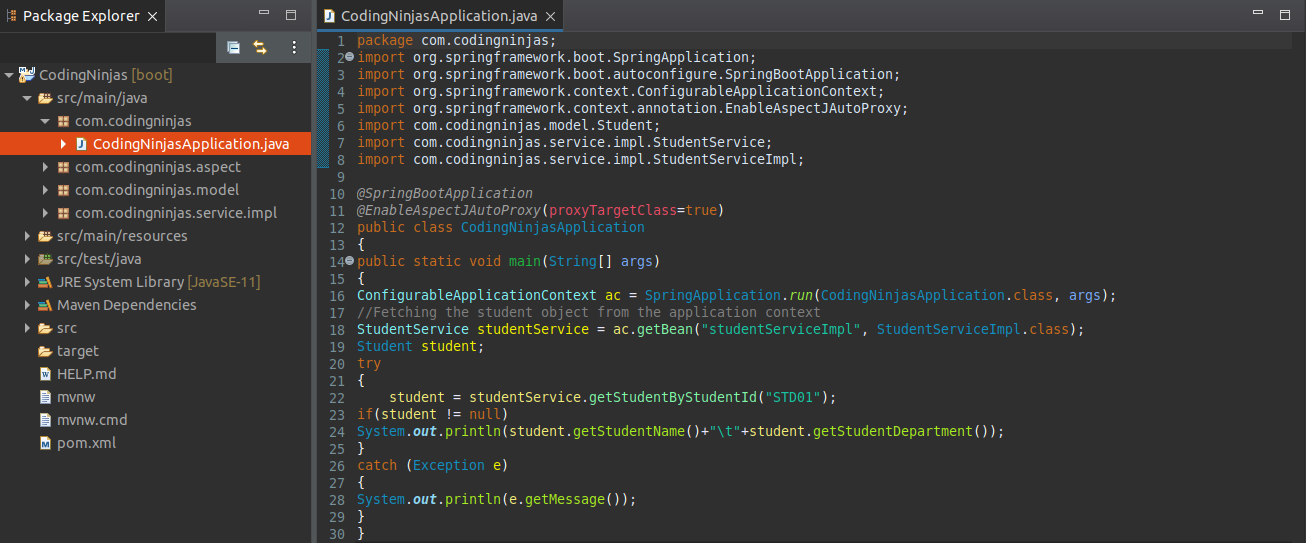
Step10: Open <Application>.java (CodingNinjasApplication.java here) file and add an annotation @EnableAspectJAutoProxy.
The @EnableAspectJAutoProxy annotation enables support for handling components marked with @Aspect annotation. It is used along with the @Configuration annotation.
We have used the proxyTargetClass attribute of the annotation @EnableAspectJAutoProxy. The attribute proxyTargetClass=true allows us to use CGLIB (Code Generation Library) proxies instead of the default interface-based JDK proxy approach.
ConfigurableApplicationContext is an interface that provides convenience to configure an application context and the application context client methods in the ApplicationContext.
CodingNinjasApplication.java
package com.codingninjas;
import org.springframework.boot.SpringApplication;
import org.springframework.boot.autoconfigure.SpringBootApplication;
import org.springframework.context.ConfigurableApplicationContext;
import org.springframework.context.annotation.EnableAspectJAutoProxy;
import com.codingninjas.model.Student;
import com.codingninjas.service.impl.StudentService;
import com.codingninjas.service.impl.StudentServiceImpl;

@SpringBootApplication
@EnableAspectJAutoProxy(proxyTargetClass=true)
public class CodingNinjasApplication
{
public static void main(String[] args)
{
ConfigurableApplicationContext ac = SpringApplication.run(CodingNinjasApplication.class, args);
//Fetching the student object from the application context
StudentService studentService = ac.getBean("studentServiceImpl", StudentServiceImpl.class);
Student student;
try
{
student = studentService.getStudentByStudentId("STD01");
if(student != null)
System.out.println(student.getStudentName()+"\t"+student.getStudentDepartment());
}
catch (Exception e)
{
System.out.println(e.getMessage());
}
}
}
You can also try this code with Online Java Compiler
We have implemented the above code in the following picture:
Step11: Run the CodingNinjasApplication.java file as a java application.
Output:

In the above output, we can see that the method afterReturningAdvice() invokes after the successful execution of getStudentByStudentId() method.
FAQs
-
Why is AOP used in Spring Boot?
AOP stands for Aspect-Oriented Programming. It is used to increase modularity by separating cross-cutting concerns or secondary logic.
-
Types of Advice in Spring AOP framework?
There are five types of advice in the Spring AOP framework: before, after, after-returning, after-throwing, and around advice.
-
What is the use of @EnableAspectJAutoProxy annotation?
The @EnableAspectJAutoProxy annotation enables support for handling components marked with @Aspect annotation. It is used along with the @Configuration annotation.
Key Takeaways
In this blog, we learned about Spring Boot AOP Advice, different types of AOP advice, and implementation of AOP After Returning Advice.
You can also check how to carry out the STS Download. You can also consider our Spring Boot Course to give your career an edge over others.
Happy Learning!!


 8+ registered

