Do you think IIT Guwahati certified course can help you in your career?
Introduction
Spring Boot is a Java-based open-source framework for developing microservices.
How cool would it be to get templates that didn't require an application server? Thymeleaf in Spring Boot fulfills this requirement.
In this article, we will learn about Spring Boot Thymeleaf. So, without any further ado, let's get started!
What is Spring Boot Thymeleaf?
Thymeleaf is a Java library that is open-source and licensed under the Apache License 2.0. It's a template engine that supports HTML5, XHTML, and XML. It's a Java template engine that works in web and non-web environments. It's ideal for HTML5 JVM web development today.
Thymeleaf's architecture allows for fast template processing due to the caching of parsed files. During execution, it performs as few I/O operations as possible. To display data generated by the application, it applies a set of transformations to template files. It can be used in web applications to serve XHTML/HTML5.
Thymeleaf's goal is to make templates more elegant and well-formed. It is built on the foundation of XML tags and attributes. Instead of explicitly writing that logic as code inside the template, these XML tags define predefined logic on the DOM (Document Object Model).
Templates in Thymeleaf
Our files are converted into well-formed XML files by Thymeleaf. It includes six different types of templates, as shown below:
HTML5
XHTML
Valid XHTML
Legacy HTML5
XML
Valid XML
All templates refer to well-formed valid XML files, with the exception of Legacy HTML5. We can use legacy HTML5 to render HTML5 tags on web pages, even if they aren't closed.
Why do we use Thymeleaf?
JSP is similar to HTML in many ways. However, unlike Thymeleaf, it is not completely HTML compatible. A Thymeleaf template file can be opened and displayed normally in the browser, but a JSP file cannot.
Variable expressions, similar to Spring EL and run on model attributes, asterisk expressions run on the form backing bean, hash expressions are used for internationalization, and link expressions rewrite URLs are all supported by Thymeleaf.
Thymeleaf Features
The features of Thymeleaf are as follows:
It can be used in web and non-web settings.
Its high-performance parsed template cache cuts down on I/O.
HTML5/ XML/ XHTML template engine written in Java.
It enables programmers to extend and create their dialects.
It is based on dialects, which are modular feature sets.
If necessary, it can be used as a template engine framework.
It supports a variety of template formats, including XML, XHTML, and HTML5.
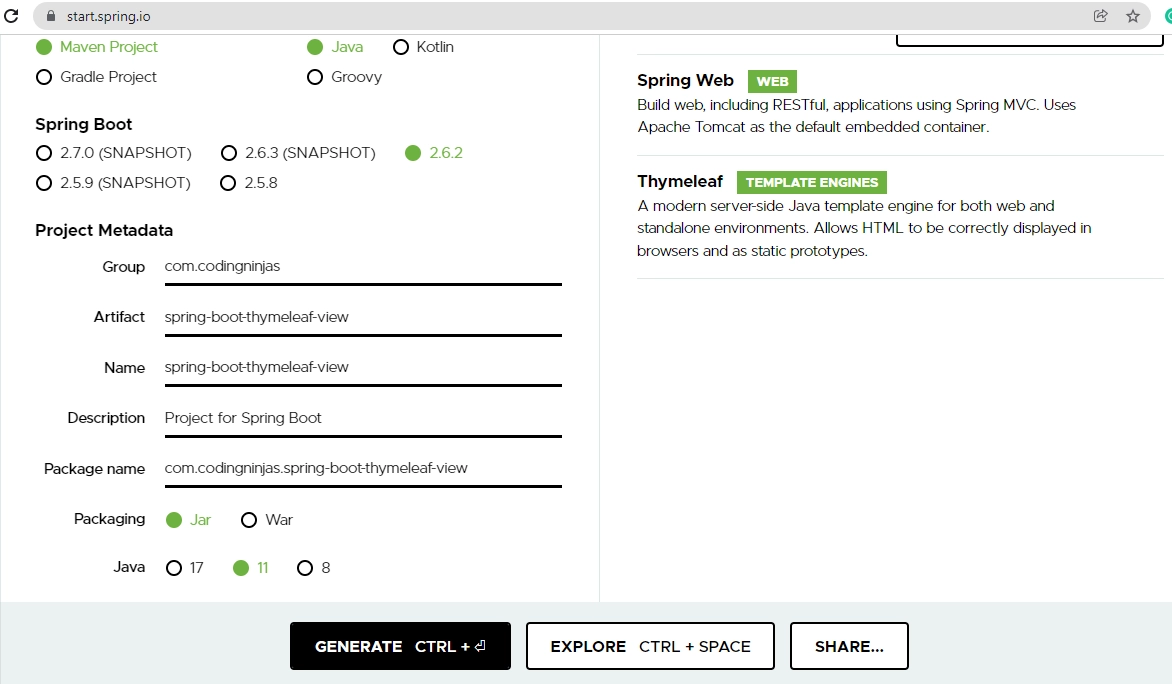
Implementation of Thymeleaf
By adding a spring-boot-starter-thymeleaf dependency to our application's pom.xml file, we can use the Thymeleaf template engine. Spring Boot sets up the template engine to read the template from /resource/templates:
What is Spring Boot? Spring Boot is a Java-based open-source framework for developing microservices. Pivotal Team created it, and it is used to create stand-alone and production-ready spring applications.
What is Thymeleaf? Thymeleaf is a Java library that is open-source and licensed under the Apache License 2.0. It's a template engine that supports HTML5, XHTML, and XML. It's a Java template engine that works in web and non-web environments.
What are the features of Spring Boot Thymeleaf? The features of Thymeleaf are as follows:
It can be used in web and non-web settings.
Its high-performance parsed template cache cuts down on I/O.
HTML5/ XML/ XHTML template engine written in Java.
It enables programmers to extend and create their dialects.
It is based on dialects, which are modular feature sets.
If necessary, it can be used as a template engine framework.
It supports a variety of template formats, including XML, XHTML, and HTML5.
Key Takeaways
This article has learned about Spring Boot Thymeleaf features, use, and example application.


 9+ registered

