Spring Initializr Modules:
Spring Initializr provides a range of modules that you can include in your generated project. These modules cover different aspects of Spring development and help you quickly set up the necessary dependencies and configurations. Let's see some of the key modules available in Spring Initializr:
- Web: It includes the necessary dependencies for building web applications using Spring MVC or Spring WebFlux. It provides support for creating RESTful APIs, handling HTTP requests, and generating responses.
- Data JPA: It adds support for using Spring Data JPA, which simplifies database access and object-relational mapping (ORM) using Java Persistence API (JPA). It includes dependencies for JPA and a database connection pool.
- Security: It provides the essential dependencies for implementing authentication and authorization in your Spring application using Spring Security. It includes support for various authentication mechanisms, such as form-based login, OAuth, and JWT.
- Actuator: It includes the Spring Boot Actuator module, which provides production-ready features for monitoring and managing your application. It exposes endpoints for checking health, metrics, logging, and other operational aspects of your application.
- DevTools: It adds development-time tools and features to enhance the development experience. It includes automatic application restart, live reload, and other developer-friendly features.
- Testing: It includes dependencies for writing unit tests and integration tests for your Spring application. It provides support for popular testing frameworks like JUnit, Mockito, and Spring Test.
- Validation: It adds support for bean validation using the Java Bean Validation API (JSR-380). It allows you to define validation constraints on your domain objects and handle validation errors.
- Lombok: Includes the Lombok library, which provides annotations for reducing boilerplate code in your Java classes. It simplifies the creation of getters, setters, constructors, and other common code patterns.
- Thymeleaf: It adds support for using Thymeleaf as the template engine for rendering views in your web application. Thymeleaf is a modern server-side Java template engine that integrates well with Spring.
- Kafka: It provides dependencies for using Apache Kafka, a distributed streaming platform. It allows you to build event-driven applications and handle real-time data streams.
- OpenFeign: It includes support for using OpenFeign, a declarative REST client for making HTTP requests to external services. It simplifies the creation of client-side APIs and handles request/response mappings.
These are just a few examples of the modules available in Spring Initializr. The exact set of modules and their names may vary depending on the version of Spring Initializr and the Spring Boot version you are using.
Note: When generating a project using Spring Initializr, you can select the desired modules based on your project requirements. Spring Initializr will automatically include the necessary dependencies and configurations for the selected modules in the generated project, saving you time and effort in setting up the project manually.
How To Create A Spring Boot Project?
There are four basic ways to create a Spring Boot project:
1.) Create a Maven project and add starter dependencies.
2.) Using Spring Initializr.
3.) Using Spring Tool Suite(STS) IDE.
4.) Using Spring Boot command-line interface.
One of the suitable ways to start a spring boot project is using Spring Initializr with any of the recommended IDE.
You can advance your career by taking our comprehensive Spring Boot Course today.
Let’s now understand how to create a spring boot project using Spring Initializr and Eclipse IDE.
Creating A Spring Boot Project Using Spring Initializr
Let’s understand step by step how to create a spring boot project using Spring Initializr and Eclipse IDE.
We have divided the whole project creation process into two Parts. The first part will cover the Spring Boot project structure creation using Spring Initializr, and the second part will cover the testing and running of the Spring Boot project in Eclipse IDE.
Part 1: Creating The Project Structure
Step 1: We can use the Spring Initializr either from the website, Command-Line, or IDE.
One of the easiest ways to use Spring Initializr is through the Web.
You can go through the link given below to create the project structure.
Visit: https://start.spring.io/
Step2: After visiting the above link, an interface will open, like below.
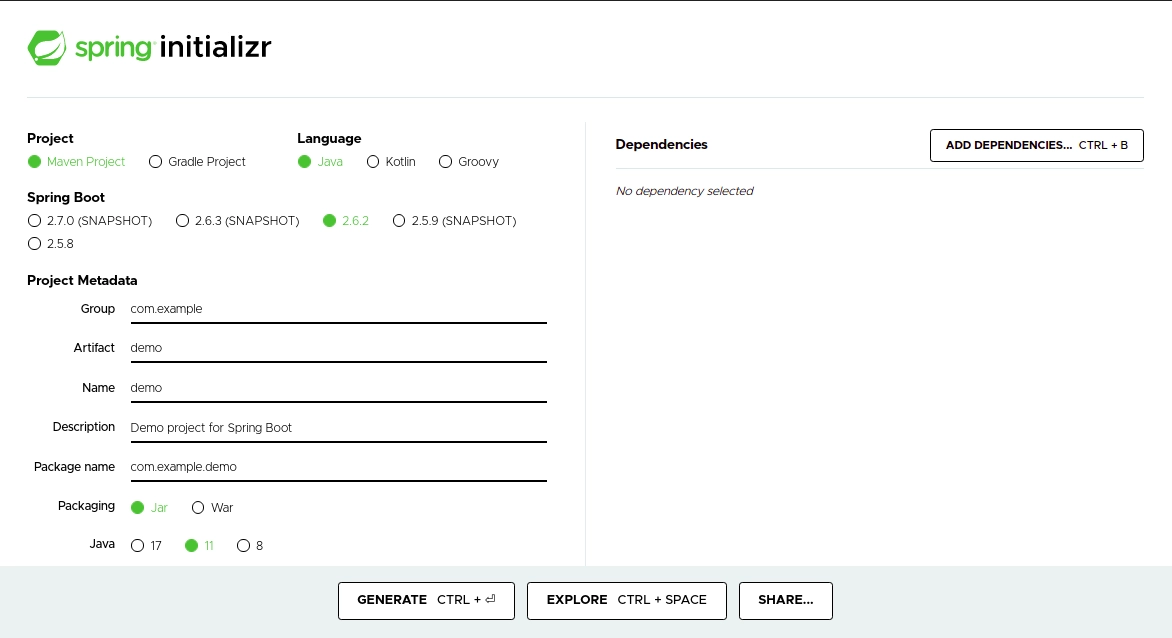
There is some information that you need to fill in to create the project structure:
1.) Project: It defines the kind of project. You have given two choices to choose the type of project management tool you want to use. We can create either Maven Project or Gradle.
2.) Language: It provides the choice among three languages Java, Kotlin, and Groovy. Java is by default selected.
3.) Spring Boot: Version of Spring Boot you want to work with. The most stable version is selected by default.
4.) Project Metadata: Here, we need to fill in the basic information about the project like project name, artifact, etc.
1.) Group: Group denotes the package name. By default is com.example. We can change the group id to something else.
2.) Artifact: Artifact denotes the Application name.
3.) Name: In this field, you have to specify the name of your project. It is filled by default while filling the Artifact field.
4.) Description: Put the description of the project here.
5.) Package Name: It is the same as the Group name.
6.) Packaging: We can select Jar or War as our package. The Jar is by default selected.
7.) Java: Here, we can select the Java version. Select the version which is supported in your system.
5.) Dependencies: You can choose the different dependencies you want to inject into your project. For example, if you build a web application, you can select the Spring Web dependency.
We have added the Spring Web dependency into our project.
We have filled all the required fields, like below.
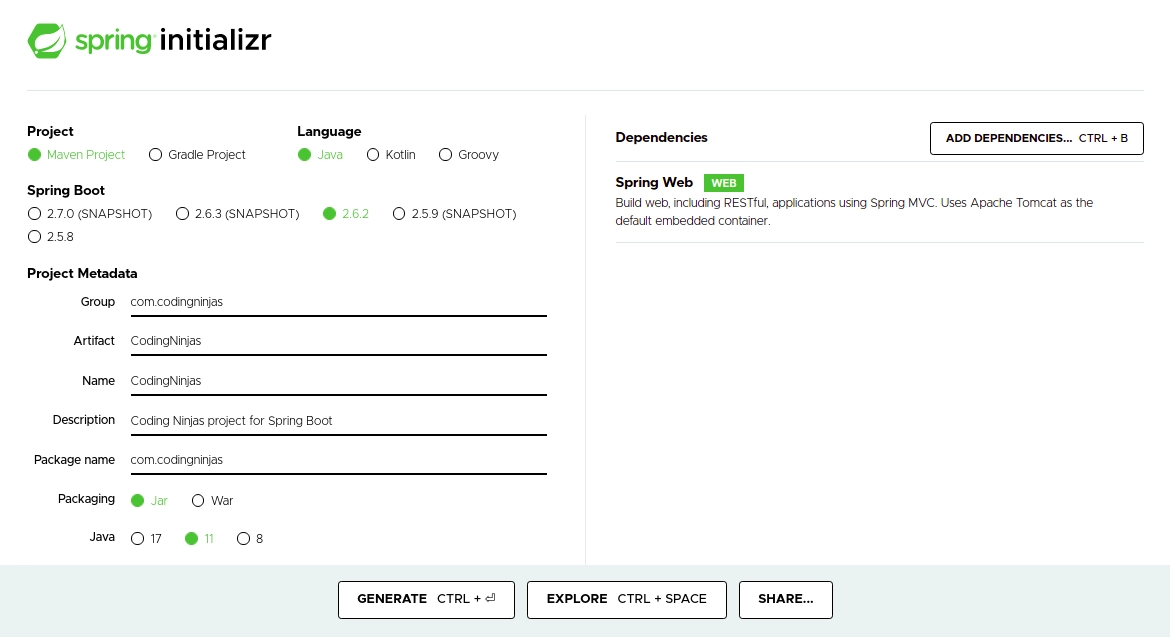
Step 3: After filling all the fields, click on the Generate button to create the project.
The project structure is given to you in the form of a zip file.
You need to extract that zip file to see the whole project structure.
Now we have completed Part 1 of our project creation process. In the next part, i.e., Part 2, we will see how to integrate these folders and files with our Eclipse IDE to run the Spring Boot project finally.
Part 2: Testing and Running the Spring Boot project in Eclipse IDE.
Step1: Open the Eclipse IDE go to the File menu->Import->Maven select the Existing Maven Projects an interface will open, like below.
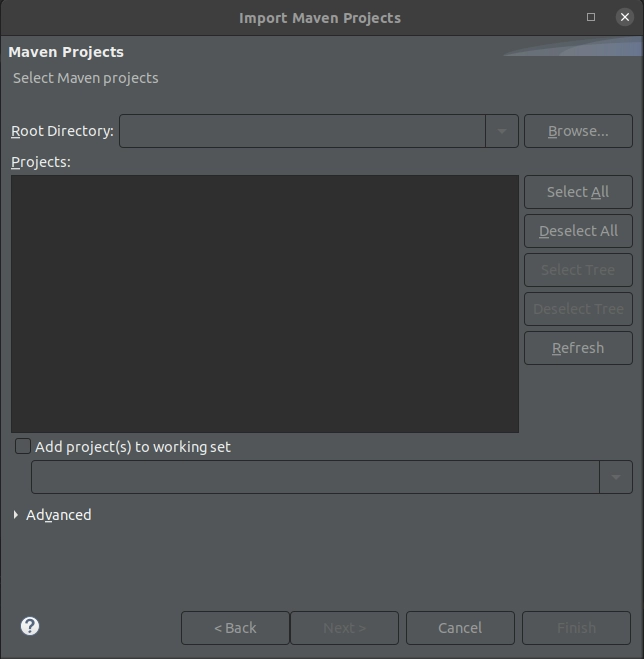
In the Root Directory, we need to mention the project path we created with the spring initializr. The path should be the root directory of the src folder.
Step 2: After choosing the correct path, click on the Finish button, and the whole project structure will open on the left side of the workspace, like below.
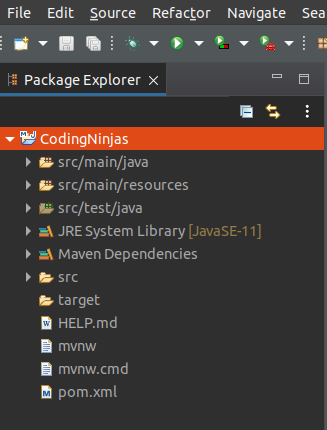
The main project folder (CodingNinjas here) contains many folders and files.
Some Important Files and Folders are:
1.) pom.xml: This file contains the information about our project & all the dependencies which we have currently injected.
2.) applications.properties: This file resides inside the src/main/resources folder and is used to specify various properties of the project. For example, We can specify the port number on which our application runs.
Step 3: Now, to run your application, you can go into the src/main/java->com.packagename->App.java
In our case it is: src/main/java->com.codingninjas->CodingNinjasApplication.java
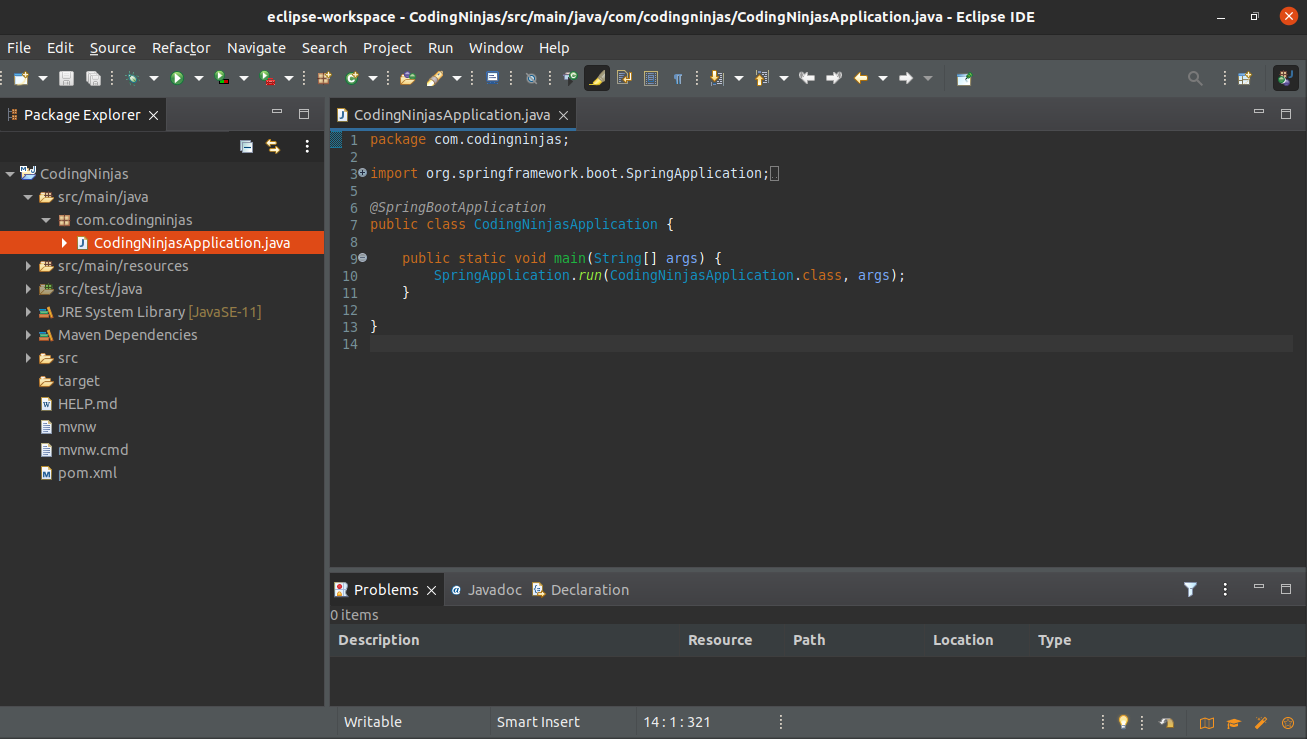
Step 4: Right-click on App.java (CodingNinjasApplication.java here) and Run as Java Application.
You can see your application is running on default port 8080, like below.
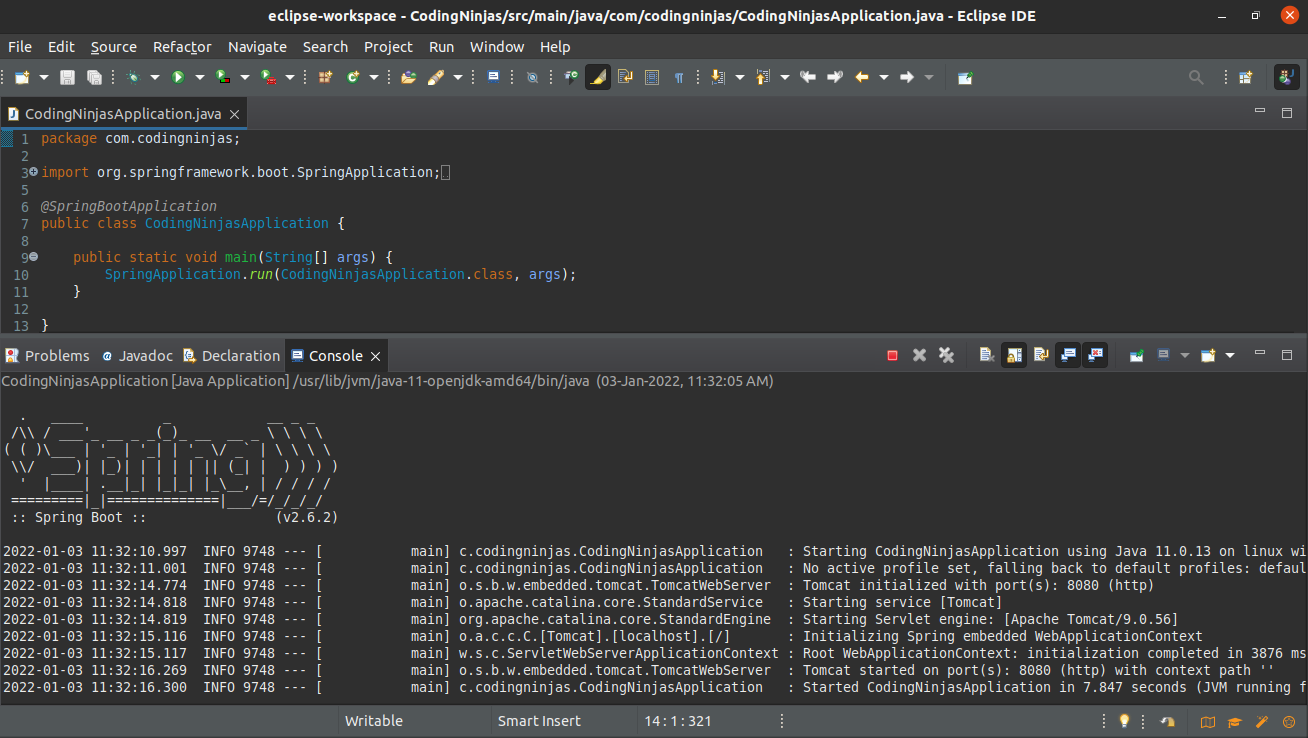
We have successfully created our Spring Boot project using Spring Initializr and Eclipse IDE.
Recommended Topic, spring mvc vs spring boot
Frequently Asked Questions
What are the different ways to use Spring Initializr?
We can use the Spring Initializr either from the Website(https://start.spring.io/) or Command-Line or IDE.
What is the use of a pom.xml file?
This file contains the information about our project & all the dependencies which we have currently injected into the project.
What is the use of the applications.properties file?
This file is used to specify various properties of the project. For example, We can specify the port number on which our application runs.
Conclusion
In this article, we have talked about Spring Initializr, a web-based tool that simplifies the creation and setup of Spring-based projects. It provides a user-friendly interface for generating preconfigured projects with necessary dependencies and configurations, which saves developers time and effort in setting up projects manually.


