Code360 powered by Coding Ninjas X Naukri.com. Code360 powered by Coding Ninjas X Naukri.com
Table of contents
1.
Introduction
2.
Creating a Server
2.1.
Renaming the Server
2.2.
Adding More Monitors
2.3.
Checking If The Server Or Monitor Is Connected
3.
Monitoring Server Performance During Runtime
4.
Cloning Servers and Monitors
5.
Frequently Asked Questions
5.1.
Describe API.
5.2.
Is it possible to plan a run in ReadyAPI?
5.3.
Can a headless machine utilize the -R and -o TestRunner arguments?
6.
Conclusion
Last Updated: Mar 27, 2024

Steps to do server monitoring in ready API

Author Shivani Singh
0 upvote

Introduction

When conducting load tests, you generate a load that the server must manage in a particular way. Using ReadyAPI, you may monitor a number of web server metrics to see if they are operating as you had anticipated. You utilize the Monitoring page to accomplish this.

During a test run, ReadyAPI collects all available metrics from tested web servers. During the test run, ReadyAPI shows the most crucial information as graphs at the bottom of the page in real-time. You can see all of the gathered information on the Statistics page. Typically, it includes all of the test's statistics and server metrics, including the number of simulated users and server response time.

Server monitoring

Creating a Server

To add the server, do the following:

Step 1: Go to the Monitoring page first.

adding the server

Step 2: On the toolbar, select Add New Image.

Step 3: The following Add server dialogue box:

  • In the Name area, type the server name. This name won't have an impact on your server and will only be used in ReadyAPI.
  • In the Host Name area, type the server's address. Either the IP address or the hostname can be entered.
  • Choose your web server's default monitor and enter connection details.

Step 4: Click OK when you've finished setting up the connection properties.

Renaming the Server

To rename the server, do the following:

Step 1: Launch the Monitoring page first.

Step 2: Click the Rename Server option from the context menu of the server you wish to rename.

Step 3: Type a new server name in the Rename Server dialogue box that appears.

Step 4: Press OK.

Adding More Monitors

To add a monitor do the following:

Step 1: Go to the Monitoring page first.

Adding a monitor

Step 2: Select the toolbar's third image.

Step 3: The Add monitor window is shown:

  • Set the monitor's connection properties in accordance with the subjects covered in the Monitor Reference section.
  • Select OK.

The monitor name should always be distinct.

Checking If The Server Or Monitor Is Connected

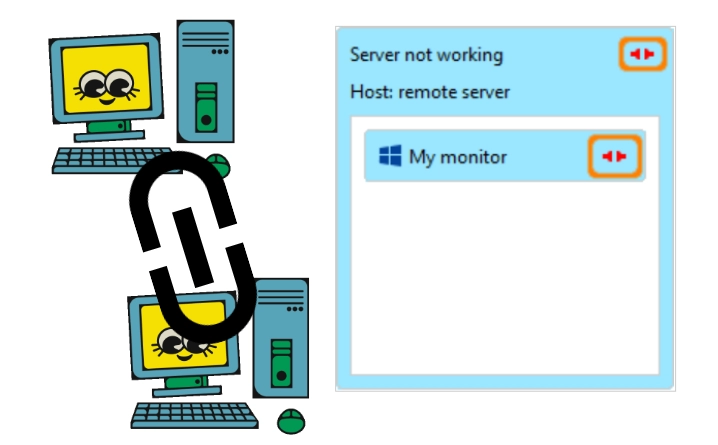
The Monitoring page's connected sign appears when you are connected to the server or monitor. The disconnected icon will appear on the server or monitor if the connection is lost. 
Checking If The Server Or Monitor Is Connected

Both the server and the monitors will display the disconnected symbols if ReadyAPI is unable to connect to the server.

The monitor connection can be verified by:

Step 1: Pick a monitor.

Step 2: Click Test connection in the inspector on the right side of the page.

Step 3: When ReadyAPI tries to connect to the monitor, it displays both the connected and disconnected symbols, depending on whether the connection was successful.

You must modify your server's address in ReadyAPI if it has changed:

Step 1: Visit the Monitoring page now.

Step 2: To show the Editor panel, click the server.

Step 3: In the Host field, enter the updated value.

Monitoring Server Performance During Runtime

During the test run, ReadyAPI gathers and stores all available metrics to assist you in determining whether the tested server can manage the load.

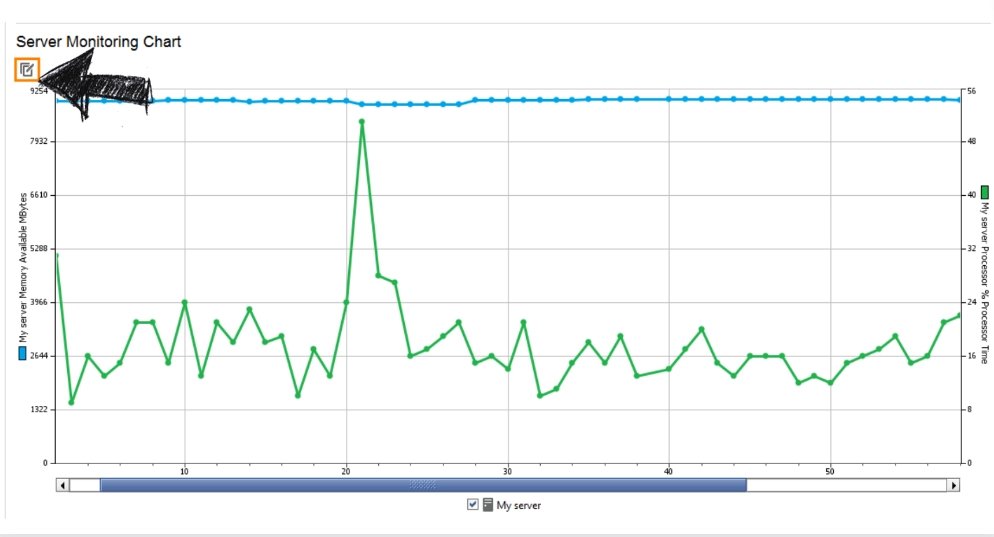
To keep the Server Monitoring Chart organized and simple to read, the majority of metrics are not displayed by default. The metrics you track in this chart are editable, or you can access them on the Statistics page after the test run.

To add more metrics to the chart, do the following:

Step 1: Go to the Monitoring page first.

adding more metrics to the chart

Step 2: Select the button in the image.

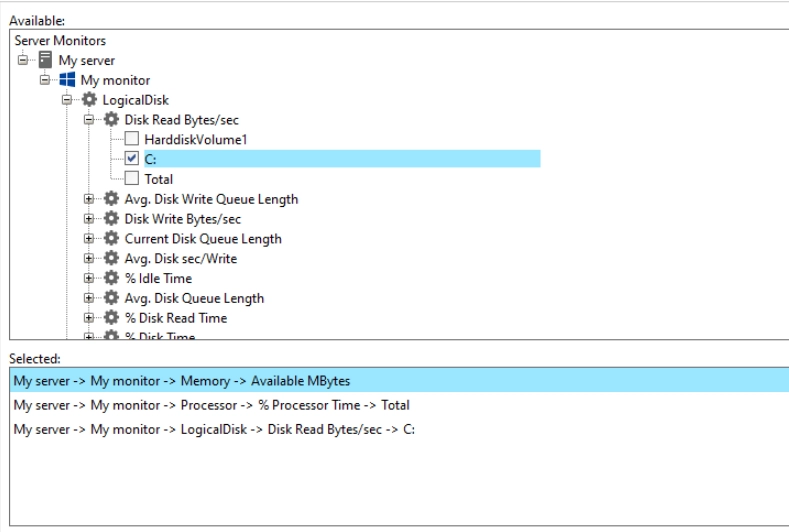
Step 3: In this dialogue, tick the box next to the server monitor you require.

adding more metrics to the chart

To remove statistics from the chart, highlight them on the Selected list and click the Remove button. Click the Remove All button to make the chart blank.

Cloning Servers and Monitors

You can clone the complete server to any project you want if you already have a configured monitor and want to utilize it in another one of your projects:

Step 1: Navigate to the project's Monitoring page where the specified monitor is located.

Step 2: Either choose the server and click the third button on the toolbar or right-click the server holding the required monitors and choose Clone Server.

Step 3: Select load tests or projects in the Clone Server dialogue that the server should be copied to, then click OK.

Frequently Asked Questions

Describe API.

Application Programming Interfaces (APIs) provide data interchange and communication between two software systems. APIs serve as an interface between two applications, enabling communication between the two computer programs.

Is it possible to plan a run in ReadyAPI?

You can use task scheduling tools or continuous integration (CI) tools to arrange the execution of ReadyAPI functional tests.

Can a headless machine utilize the -R and -o TestRunner arguments?

Both options require an active X11 session because the -R option uses Jasper Reports, which interacts with the GUI, and the -o option opens the created report in a browser. Therefore, you cannot use the -R and -o parameters on a headless machine unless you are logging into an X11 session in order to launch a GUI.

Conclusion

In this blog, we discussed how to create a server, and rename it. We also saw how to add more monitors and check if the server or the monitor is connected or not. Then we discussed Monitoring Server Performance During Runtime and Cloning Servers and Monitors. 

Check out this problem - Smallest Distinct Window.

For more content, Refer to our guided paths on Coding Ninjas Studio to upskill yourself.

Do upvote our blogs if you find them helpful and engaging!

Happy Learning!

Thankyou
Live masterclass