Implementation Approach
The basic approach one should follow while implementing the TabbedPanel widget using Kivy is as follows:
Step 1: import libraries, classes, widgets and layouts required (in this case, kivy, kivyApp, FloatLayout, TabbedPanel)
Step 2: create the required classes (in this case, tabbed panel class and App class)
Step 3: create the .kv file consisting of the multiples tabs and their functionality
Step 4: return the layout/widget/class (in this case, Tab)
Step 5: run the instance of the class (in this case, TabbedPanelApp())
Implementation Code
Given below is the code showing the implementation of the TabbedPanel widget.
.py file
# Tabbed Panel Widget Implementation

import kivy
from kivy.app import App

# restrict the kivy version(optional)
kivy.require('1.9.0')

from kivy.uix.tabbedpanel import TabbedPanel
from kivy.uix.floatlayout import FloatLayout

# creation of Tabbed class
class Tab(TabbedPanel):
	pass

# creation of App class
class TabbedPanelApp(App):
	def build(self):
		return Tab()

# run the App
if __name__ == '__main__':
	TabbedPanelApp().run()
.kv file
# .kv file of tabbed panel widget
<Tab>:
# creating the size and the alignment of the tab
size_hint: .5, .5
pos_hint: {'center_x': .5, 'center_y': .5}
do_default_tab: False
# Creation of 1st tab
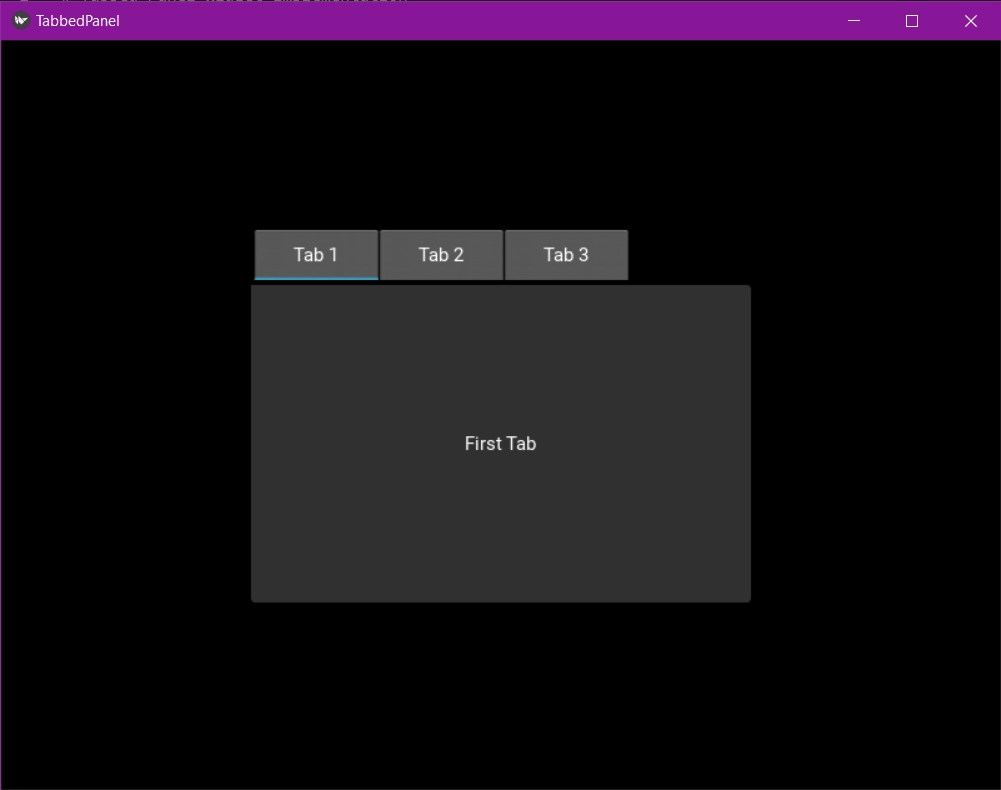
TabbedPanelItem:
text: 'Tab 1'
Label:
text: "First Tab"
# Creation of 2nd tab
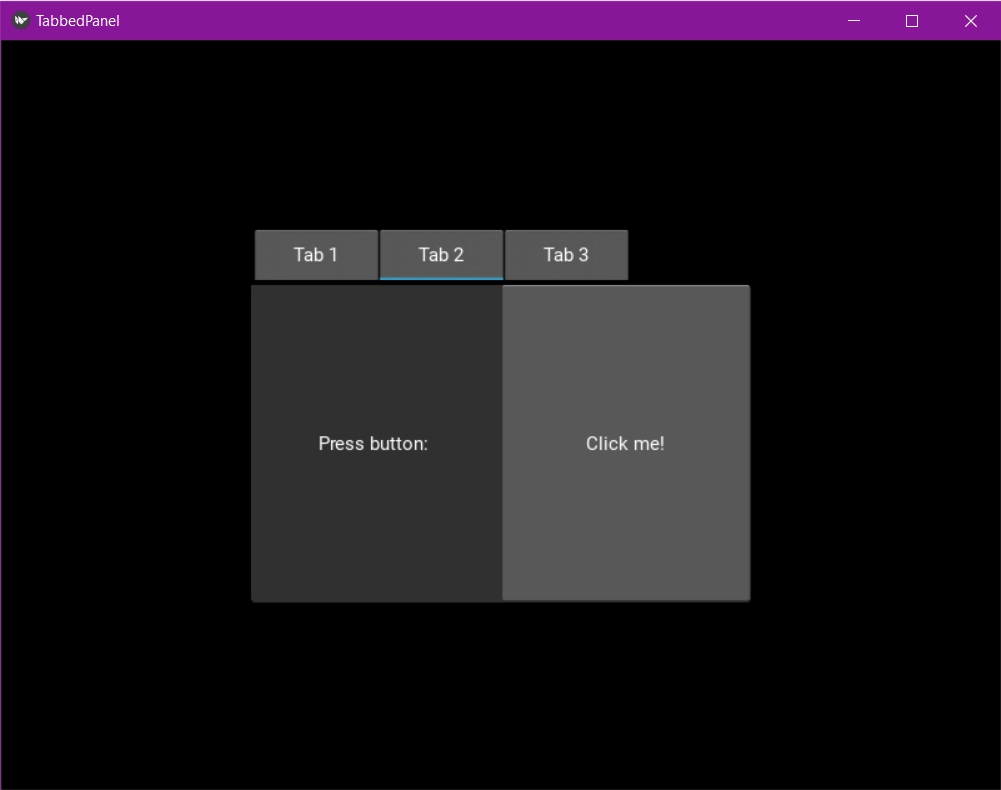
TabbedPanelItem:
text: 'Tab 2'
BoxLayout:
Label:
text: 'Press button: '
Button:
text: 'Click me!'
# Creation of 3rd tab
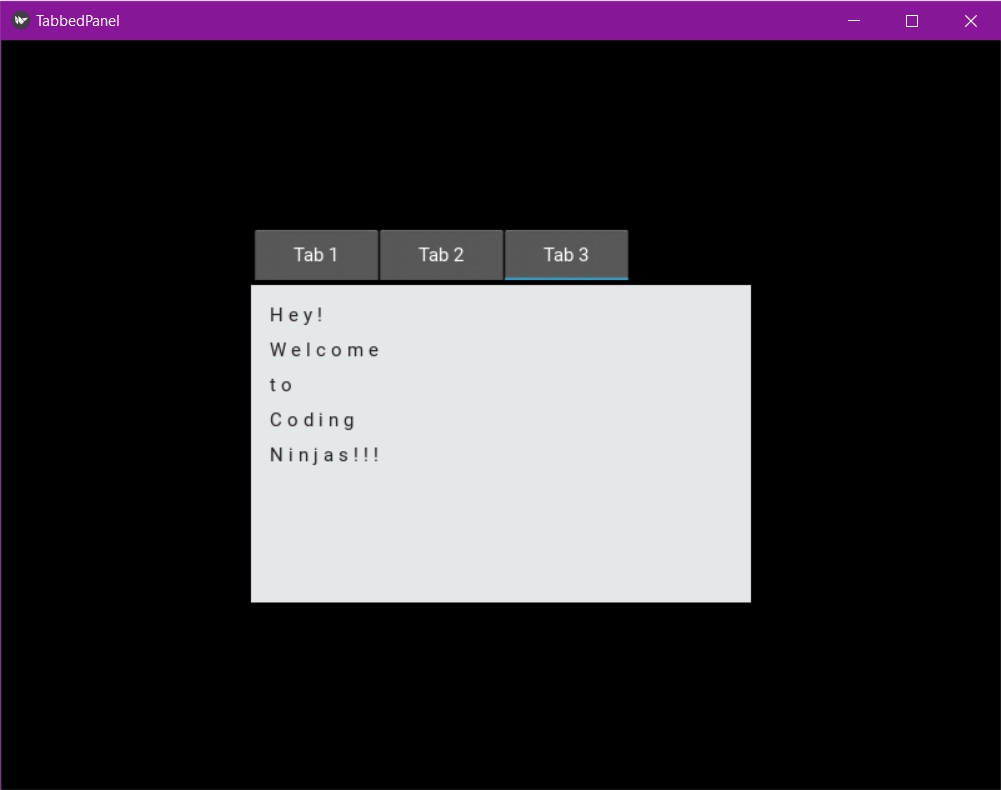
TabbedPanelItem:
text: 'Tab 3'
RstDocument:
text: '\n'.join(("Hey! Welcome to Coding Ninjas!!!"))
Code Explanation
In the .py file, we first import the required libraries, classes, widgets and layouts; then, we create the required classes. We also check if the version of kivy is below the one we need or not, though this is entirely optional. In the end, we run our instance of the class.
The .kv file describes the various tabs we create using the Tab class. We first align the tab itself and describe its position. In the first tab, we firstly give its name and then insert a label in it. In the second tab, we give it a name and then apply box layout to divide it into two parts. One part contains a label, and the other includes a button.
Output Image 1
Output Image 2
Output Image 3
Frequently Asked Questions
Which versions of Python support Kivy?
Kivy 2.1.0 is supported by Python versions from 3.7 to 3.10. As for Kivy 2.0.0, it is supported by Python2.
What is a layout?
One of the most crucial terms in graphic design is layout. It's utilised to organise elements for a more pleasing appearance. A layout widget does not render anything; instead, it functions as a trigger for its children to be arranged in a specified fashion.
Define button widget.
A Button is a Label that has actions connected with it that are activated when the button is pressed (or released after a click/touch). The same settings are used to configure a button as they are for a label. When the button is clicked, it changes state, and we can also add properties or bind actions to it.
What is a box layout?
BoxLayout organises widgets vertically, one on top of the other or horizontally, one after the other.
Conclusion
In this article, we learned about the TabbedPanel widget in Kivy. We saw the various steps required to implement it. We followed the steps and used them to create a TabbedPanel widget in Python.
We hope this blog has helped you enhance your knowledge. If you want to learn more, check out our articles on Introduction to Kivy - Coding Ninjas Coding Ninjas Studio, Kivy Float Layout in Python - Coding Ninjas Coding Ninjas Studio, The drop-down List In Kivy - Coding Ninjas Coding Ninjas Studio and Using Python through Shell & Terminal - Coding Ninjas Coding Ninjas Studio. Do upvote our blog to help other ninjas grow.
Head over to our practice platform Coding Ninjas Studio to practice top problems, follow guided paths, attempt mock tests, read interview experiences, interview bundle, solve problems, participate in contests and much more!
Happy Reading!


 8+ registered

