Automate Selenium Login With Java
We will look into the steps that will help us perform automation testing using Selenium for login with Java in detail:
Creating A Selenium WebDriver Instance
Webdriver driver=new ChromeDriver();
You must set the system properties to the required browser's driver's path to launch the website in that browser. This Selenium article will demonstrate a Selenium login example with Java using chromedriver. The following is the syntax for the same:
System.setProperty(“webdriver.chrome.driver”, “File path for the Exe”);
Configuring Browser
We can customize the browser to meet our needs. For example, in this Selenium Java tutorial on Selenium login with Java, the browser will be minimized by default; however, we can set it to maximize mode. The syntax for this can be found below.
driver.manage().window().maximize();
Other options for configuring your browser include disabling information bars, enabling browser notifications, adding extensions, and so on. You can also use the capabilities class to run the script across multiple browsers, useful for cross-browser testing.
Navigating to the Required URL
Navigating the required URL is pretty straightforward: open the browser and type in the desired URL. You have to type the following syntax, and your URL will appear in the desired browser.
driver.get(“https://www.linkedin.com/login”);
Locate The HTML Element
For example, let's look for LinkedIn's login form's email and password fields. The DOM for the email input box is as follows:
 Source
In Selenium WebDriver, you can find it using the ID locator as shown below:
driver.findElement(By.id(“username”));
Because this returns a web element, you can save it in the web element variable as shown below.
WebElement username=driver.findElement(By.id(“username”));
The same can be said for the password and login button fields, which are both required.
driver.findElement(By.id(“password”));
WebElement password=driver.findElement(By.id(“password”));
driver.findElement(By.xpath(“//button[text()=’Sign in’]”));
WebElement login= driver.findElement(By.xpath(“//button[text()=’Sign in’]”));
Performing Action On The Located HTML Element
Once you've found it, you'll need to take the desired action, which in our case is sending text to email and entering a password in the password field, then clicking the login button. To carry out this action in the Selenium login example with Java, we use Selenium's sendKeys and click methods, as shown below:
username.sendKeys(“xyz@gmail.com”);
password.sendKeys(“exampleAboutSelenium123”);
login.click();
Verify & Validate The Action
All you have to do to validate the results is use assertion. When comparing expected and actual results, assertions are essential. Almost like your test cases, where each test case has an expected and actual behavior. If they match, the test case succeeds; if they don't, it fails. Assertions work in the same way. Both JUnit and TestNG frameworks provide an assertion class; you can use either. By using the Selenium login with Java syntax, you can assert (validate) the results of your actions.
Assert.assertEquals(String actual, String expected);
So, in this case, we'll save the following string value as our actual url post login:
String actualUrl=” https://www.linkedin.com/feed/”;
The following method can be used to find the expected URL:
String expectedUrl= driver.getCurrentUrl();
As a result, your final assertion would be:
Assert.assertEquals(actualUrl, expectedUrl);
Collective code
The collective code for all of the assertions-based statements is shown below.
import java.util.concurrent.TimeUnit;

import org.openqa.selenium.By;
import org.openqa.selenium.WebDriver;
import org.openqa.selenium.WebElement;
import org.openqa.selenium.chrome.ChromeDriver;
import org.testng.Assert;
import org.testng.annotations.Test;

public class LoginUsingSelenium {

    @Test
    public void login() {

        System.setProperty("webdriver.chrome.driver", "path of driver");
        WebDriver driver=new ChromeDriver();
        driver.manage().window().maximize();
        driver.get("https://www.linkedin.com/login");

        WebElement username=driver.findElement(By.id("username"));
        WebElement password=driver.findElement(By.id("password"));
        WebElement login=driver.findElement(By.xpath("//button[text()='Sign in']"));

        username.sendKeys("example@gmail.com");
        password.sendKeys("password");
        login.click();

        String actualUrl="https://www.linkedin.com/feed/";
        String expectedUrl= driver.getCurrentUrl();

        Assert.assertEquals(expectedUrl,actualUrl);


    }

}
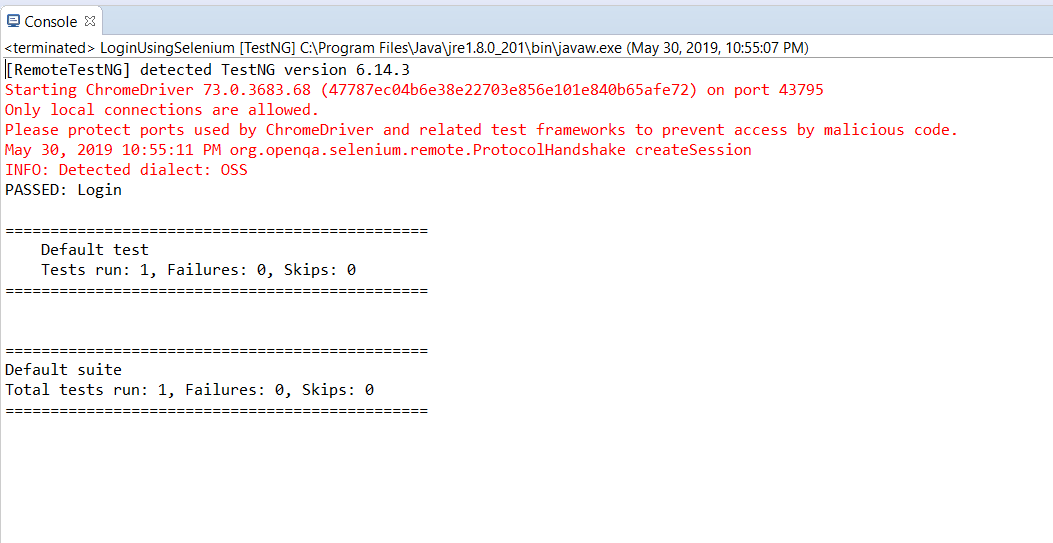
Output in the console:

Source
Frequently Asked Questions
-
Which command can be used to add the Selenium library to Python?
The following command helps add Selenium in Python:
pip install selenium
-
In Python, which command will you use to import the Selenium WebDriver?
The following command helps add the WebDriver in Python:
from selenium import webdriver
-
Which command helps to start the Webdriver in Python?
The following command helps start the WebDriver in Python:
driver = webdriver.Chrome()
-
What method can be used to enter text in the web element using Selenium?
The sendKeys() method is used to enter text in the web element.
-
How to maximize browser window using Selenium WebDriver?
The following line of code can be used to maximize the browser window:
driver.manage().window().maximize();
Conclusion
There you have it; this article has provided an essential foundation for automating a simple login process with Selenium.
We hope that this blog has helped you enhance your knowledge regarding Testing Login Flow using Selenium and if you would like to learn more, check out our articles on Coding Ninjas Studio. Do upvote our blog to help other ninjas grow. Happy Coding!


