Do you think IIT Guwahati certified course can help you in your career?
Introduction
Welcome, Ninjas! Have you ever used Eclipse IDE for writing and compiling programs? Do you know about the other features of this software? Are you curious to learn more about it? Well, here we go.
Let us get started!
About Eclipse
Before moving on to further topics of the blog, let’s establish basic concepts of the Eclipse software.
Eclipse, an integrated IDE for Java Development, is an extensible plug-in system. The development environment of Eclipse consists of the Java development tools (JDT) for Java and Scala, Eclipse CDT for C/C++, and Eclipse PDT for PHP, among others. Eclipse provides a well-efficient workspace, editors, and views.
What is TestNG in eclipse?
In this section of the blog, we will be learning about TestNG unit followed by it's installation and properties.
TestNG is a JUnit- and NUnit-inspired unit testing framework for Java that allows you to run tests using TestNG annotations. It is popular because it supports an annotation pane compared to JUnit.
The features that make the TestNG framework so popular are
Broad annotation support.
Supports data-driven testing
Flexible execution model with Testng.xml configuration
Simultaneous testing
TestNG can run tests on an arbitrarily large thread pool using various available policies (all methods in their thread, one thread per test class, etc.) to ensure that your code is multithread safe. It provides parallel execution support & Parallel testing that allows you to run multiple tests simultaneously, supporting large-scale testing in a short amount of time.
How to install it?
Let us see how to install the Eclipse Software.
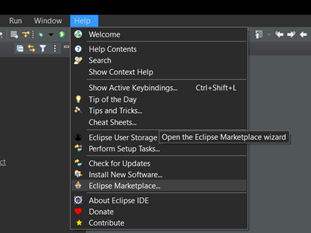
Step 1 - First, open the Eclipse workspace and go to the top left menu. Under the ‘Help’ drop-down, find the ‘Eclipse Marketplace’ option and click on it.
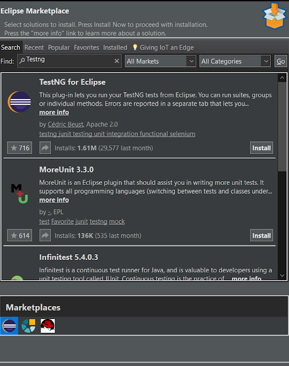
Step 2 - In the search bar, type ‘TestNg’. Now click on the first option below, as shown.
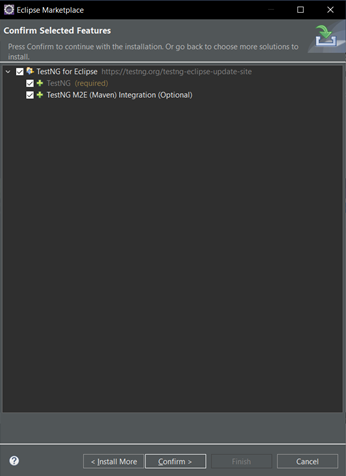
Step 3 - The following window pops up. Here, confirm the selected options.
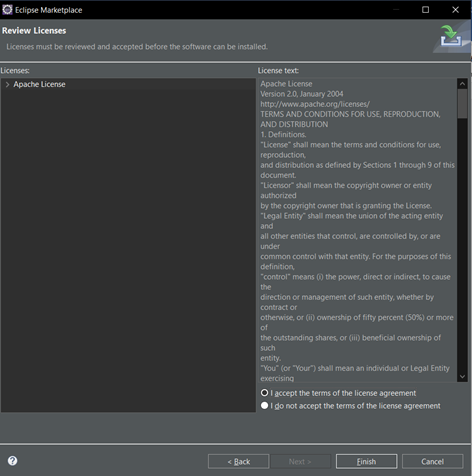
Step 4 - A license agreement box pops up as we confirm the selected options. Select ‘I accept the terms and conditions of license agreement’ and click on finish.
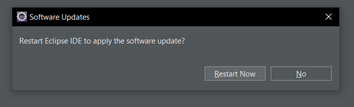
Step 5 - Click on ‘Restart now’ to apply the software update.
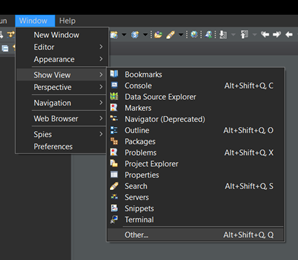
Step 6 - After this, we can check if the software has been installed successfully. Go to the ‘Window’ option in the top bar and the ‘Show view’-> ‘Other’.
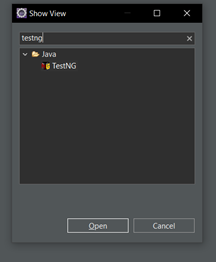
Step 7 - The following window shows that TestNG was installed successfully.
Performing testing using TestNG
Adding the TestNG library to the project
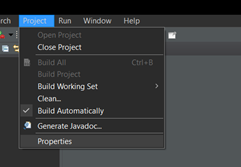
Step 1 –To add the TestNG library to the project, first, open a Java Project or import one. After opening the project in Eclipse, go to the windows bar in the top bar menu. From there, select the ‘Properties’ option.
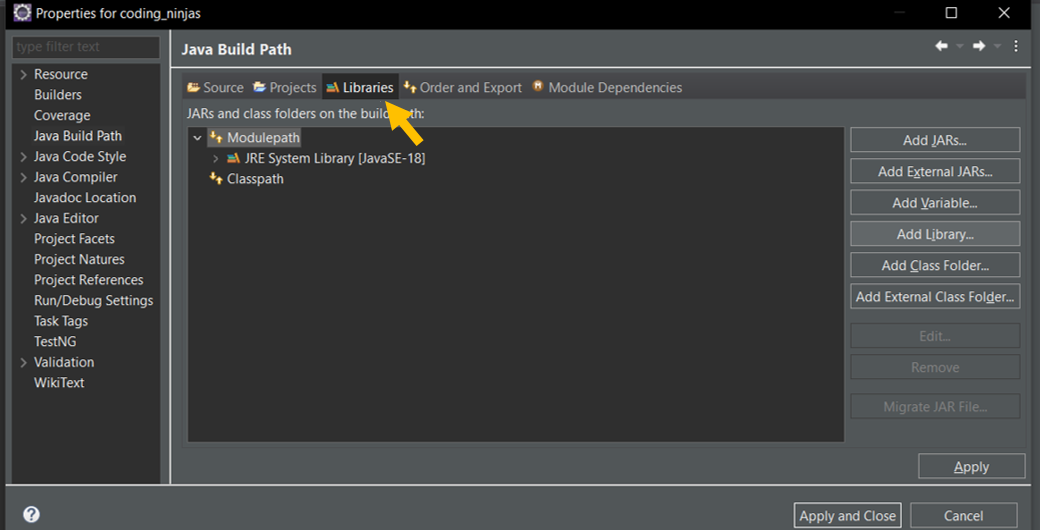
Step 2 - When the following window opens, Go to the ‘libraries’ section.
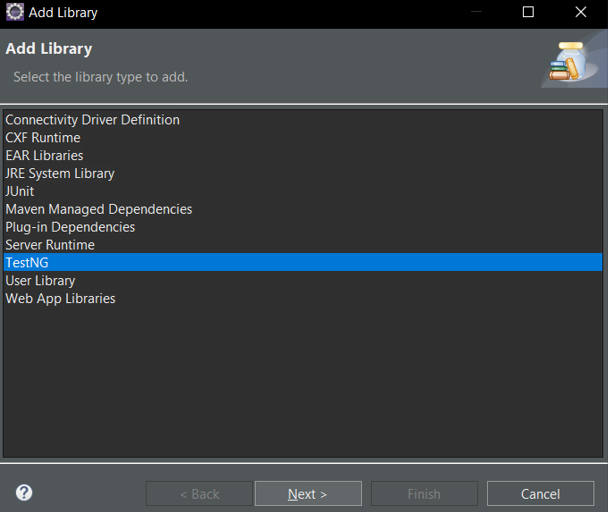
Step 3 - Click on ‘Add Library’ in the right corner. Then, successfully add the ‘TestNG’ library to the project by clicking on ‘next’.
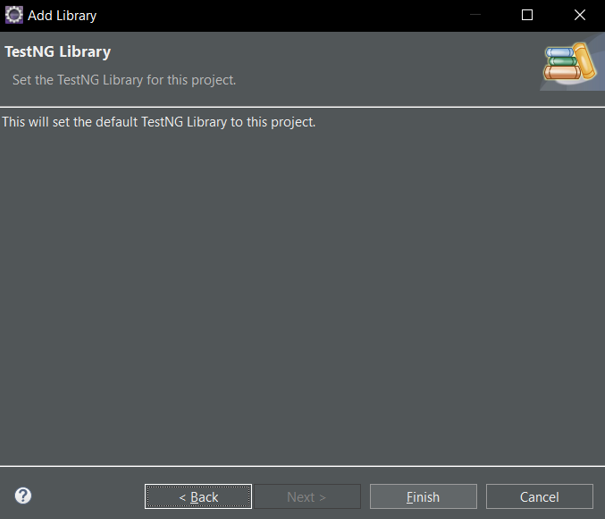
Step 4 - Finally, click on ‘finish’, and you can see the library has been added to the project ( in the left corner).
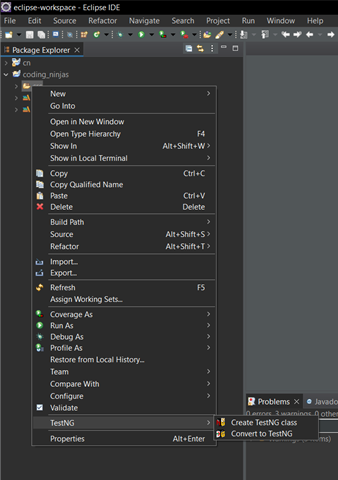
Creating a TestNG Class
Step 1 - To create a TestNG class, right-click on the src folder and select ‘Create TestNG class’ under the TestNG option.
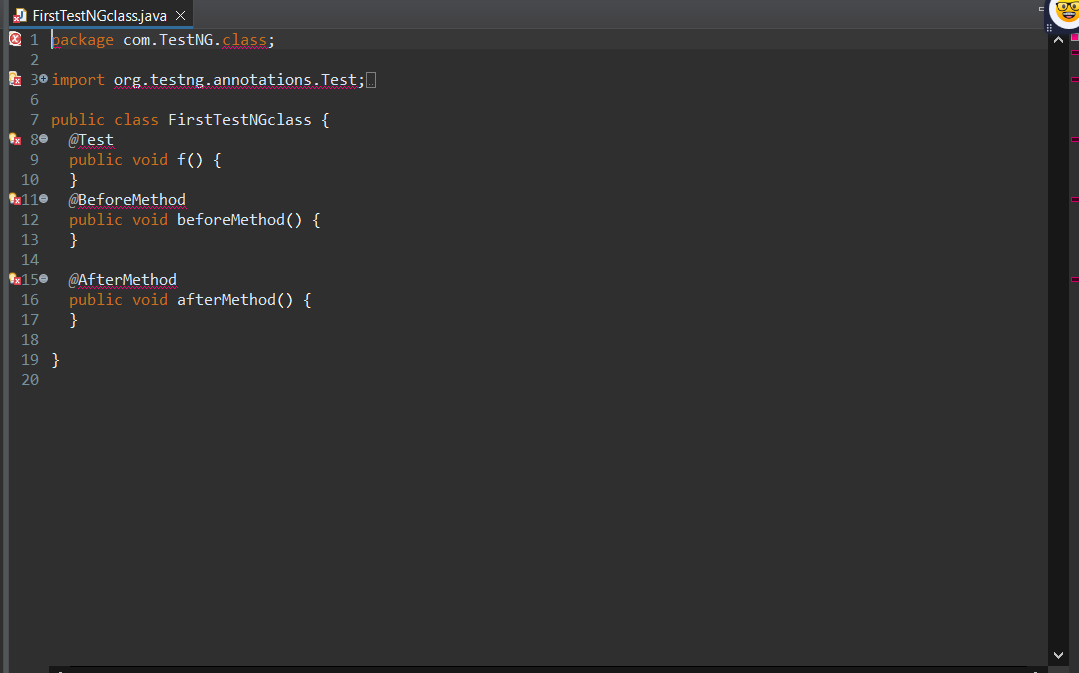
Step 2 - Provide the location where you want your test class to be and the package name. Also, select two basic annotations - ‘@BeforeMethod’ and ‘@AfterMethod’.
Step 3 - Finally, the TestNG class is created and looks as follows.
Frequently Asked Questions
What do you mean by JUnit Tool?
It is one of the unit testing frameworks for Java programming language. It is used in test-driven development and belongs to the family of xUnit.
What are testing annotations?
Testing annotations are blocks of code containing logic to control the flow of execution of the test methods.
What does ‘@test’ annotation mean?
‘@test’ annotation plays an important role in testing. It consists of the logic that can be used to automate something.
Conclusion
We hope this blog was easy to understand. Firstly, We discussed the basic concepts of the Eclipse software and its features, followed by the TestNG library, its installation, addition to the project and making of test class.


 8+ registered

