Emailable report
Default reports are generated by TestNG in most cases. When you run the testng.xml file and refresh the project, you'll get the test-output folder. Select the option to open with the web browser by right-clicking on emailable-report.html in the test-output folder.
Consider the following scenario, which includes three methods with the @Test annotation: passTest, failTest, and skipTest.
Step 1: Open the Eclipse IDE.
Step 2: Make a Brand-New Package.
Step 3: Make an "EmailReport" Java Class.
package testngpackage;

import org.testng.Assert;
import org.testng.SkipException;
import org.testng.annotations.Test;

public class EmailReport {
//To make it pass
@Test
public void passTest(){
Assert.assertTrue(true);
}
//To make it fail
@Test
public void failTest(){
Assert.assertTrue(false);
}
//To make it skip
@Test
public void skipTest(){
throw new SkipException("Skipping - This method is skipped testing ");
}
}
Step 4: Create a TestNG.xml file
<?xml version="1.0" encoding="UTF-8"?>
<!DOCTYPE suite SYSTEM "http://testng.org/testng-1.0.dtd">
<suite name="testngpackage" parallel="methods">
<test name="testngTest">
<classes>
<class name="testngpackage.EmailReport" />
</classes>
</test>
</suite>
Step 5: Refresh the project by running the testng.xml file. You can see your project in the image below.

Source
Expand the 'test-output' folder and you should see a report called "emailable-report.html," which is TestNG's default report.

Source
Step 6: Select emailable -report.html from the context menu, then open with and select web browser.

Source
The following is an example of a report:

Source

Source
Index HTML
Expand the 'test-output' folder to find the option "index.html," which is TestNG's default report.

Source
Select open with from the context menu when you right-click on index.html, and then choose web browser.

Source
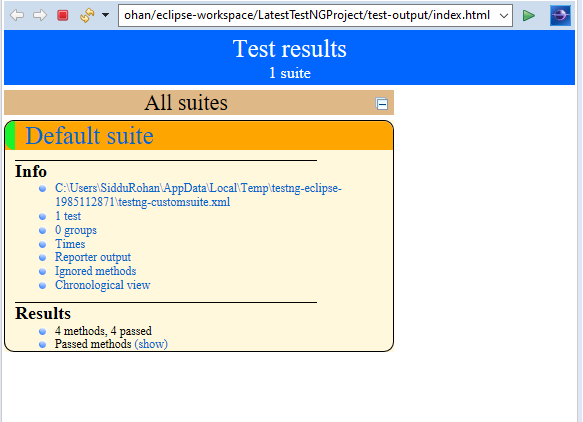
The following is an example of a report:

Source
Reporter Class
In addition to the above two methods for generating reports, the object.properties file can be used to store both system-generated and user-generated logs. One of the simplest ways to store log information in testing is to use the Reporter Class. In TestNG, there is an inbuilt class called Reporter. It aids in the storage of logs within user-generated or system-generated reports so that we can view the logs directly from the report rather than having to rerun the test cases in the future.
In TestNG, there is a class called Reporter. It has four different ways of storing log data:
- Reporter.log(String s);
- Reporter.log(String s, Boolean logToStandardOut);
- Reporter.log(String s, int level);
- Reporter.log(String s, int level, Boolean logToStandardOut);
The reporter class is used with the following syntax.
Reporter.log(string);
We simply need to use the "log" function of TestNG's Reporter class.
Example
Create a class called GoogleTest and add the following code to it.
package com.sampletestpackage;

import org.openqa.selenium.WebDriver;
import org.openqa.selenium.chrome.ChromeDriver;
import org.testng.Reporter;
//import org.openqa.selenium.firefox.FirefoxDriver;
//import org.openqa.selenium.ie.InternetExplorerDriver;
import org.testng.annotations.Test;

public class GoogleTest {

WebDriver driver;
@Test(priority = 1)
public void driverSetup()
{
// System.setProperty("webdriver.gecko.driver", "src\\main\\java\\com\\browserdrivers\\geckodriver.exe");
System.setProperty("webdriver.chrome.driver", "src\\main\\java\\com\\browserdrivers\\chromedriver.exe");
//System.setProperty("webdriver.ie.driver", "src\\main\\java\\com\\browserdrivers\\IEDriverServer.exe");

driver=new ChromeDriver();
Reporter.log("The browser is opened");

}
@Test(priority = 2)
public void getURL()
{
  driver.get("https://www.google.com");
     // System.out.println("Launching Google site");
      Reporter.log("The Google Site is Launched");

}
@Test(priority = 3)
public void getTitle()
{
  String title = driver.getTitle();
  System.out.println(title);
      Reporter.log("Prints the web page title");

  }
@Test(priority = 4)
public void closeBrowser()
{
  driver.close();
  //System.out.println("Test successfully passed");
      Reporter.log("Close the driver");

  }

}
- Create a testng.xml file by selecting the class, choosing run as, and then selecting convert to Testng.
- Then select run as and select Testng suite to run this testng.xml file.
- Then open the test-output folder and refresh the project.
1. Right-click on the emailable-report.html file in the test-output folder and select Open. It will appear as follows:

Source

Source
2. Right-click on index.html in the test-output folder and select open with, then select web browser.
Source
Select Reporter output from the drop-down menu. It will access the logging information stored in the test methods.

Source
Select "Times" from the drop-down menu. It will display how long it took to run the test method in the class.

Source
Allure Reports
The steps for creating Allure Reports with TestNG are as follows.
Step 1: Create a new Maven project and update the pom.xml file with the required dependencies from https://mvnrepository.com/.
- TestNG
- Selenium Java
- Webdrivermanager
- Allure-TestNG
TestNG Dependencies
<!-- https://mvnrepository.com/artifact/org.testng/testng -->
<dependency>
    <groupId>org.testng</groupId>
    <artifactId>testng</artifactId>
    <version>7.1.0</version>
    <scope>test</scope>
</dependency>
Selenium Java
<!-- https://mvnrepository.com/artifact/org.seleniumhq.selenium/selenium-java -->
<dependency>
    <groupId>org.seleniumhq.selenium</groupId>
    <artifactId>selenium-java</artifactId>
    <version>4.0.0-alpha-6</version>
</dependency>
Webdrivermanager
<!-- https://mvnrepository.com/artifact/io.github.bonigarcia/webdrivermanager -->
<dependency>
    <groupId>io.github.bonigarcia</groupId>
    <artifactId>webdrivermanager</artifactId>
    <version>4.0.0</version>
</dependency>
Allure-TestNG
<!-- https://mvnrepository.com/artifact/io.qameta.allure/allure-testng -->
<dependency>
    <groupId>io.qameta.allure</groupId>
    <artifactId>allure-testng</artifactId>
    <version>2.13.3</version>
</dependency>
Step 2: Install Maven and Allure Binaries and configure the path.
- Download and extract the zip folder from https://maven.apache.org/download.cgi (apache-maven-3.6.3-bin.zip)
- Go to the bin folder and copy the path, then set the maven path in environment variables by clicking on Extracted folder.
- Right-click My PC->Properties -> Advanced System Settings -> Environment Variables – > Click Path under System Variables and click Edit -> New and paste the path C:\apache-maven-3.6.3\bin.
- Go to the command prompt and type the command mvn –version to see if Maven is configured.
- To get the latest version of Allure Binaries, go to https://docs.qameta.io/allure/# installing a commandline and click Maven Central under Manual Installation, then download the latest version 2.13.0 by clicking on the ZIP folder allure.commandline-2.13.0.zip.
- Go to the bin folder, click on Extracted folder, copy the path, and set the path in environment variables.
- Right-click on My PC and select Properties. Select Advanced System Settings. Select Environment Variables. Under System Variables, click Path and then Edit -> Copy the path C:\allure-2.13.0\bin and paste it in the New.
- Go to the command prompt and type the command allure –version to see if Allure is configured.
Step 3: Create TestNG Test Cases and run them through TestNG.XML.
- Create a New Package (allureReports)
- Create a New Class (Tests)
Package allureReports;

import java.util.concurrent.TimeUnit;
import org.openqa.selenium.By;
import org.openqa.selenium.WebDriver;
import org.openqa.selenium.chrome.ChromeDriver;
import org.testng.Assert;
import org.testng.SkipException;
import org.testng.annotations.AfterClass;
import org.testng.annotations.BeforeClass;
import org.testng.annotations.Test;
import io.github.bonigarcia.wdm.WebDriverManager;

Public class Tests {
WebDriver driver;
@BeforeClass
Public void setup()
{
WebDriverManager.chromedriver().setup();
driver = new  ChromeDriver();
driver.manage().timeouts.implicitywait(10,TimeUnit.SECONDS);

driver.get(“https://demo.nopcommerce.com/”);
driver.manage().window().maximize();
}
@Test(priority=1)
Public void logoPresence()
{
Boolean disstatus = driver.findElement(By.xpath(“//div[@class=’header-logo’]//a//img”)).isDisplayed();
Assert.assertEquals(disstatus, true);
}
@Test(priority=2)
Public void loginTest()
{
driver.findElement(By.linkText(“Log in”)).click();
driver.findElement(By.id(“Email”)).sendKeys(“xxxabc@gmail.com”);
driver.findElement(By.id(“Password”)).sendKeys(“xxxabc”);
driver.findElement(By.xpath(“//input[@class=’button-1 login-button’]”)).click();
Assert.assertEquals(driver.getTitle(), “nopCommerce demo store”);

}
@AfterClass
Public void teardown()
{
driver.quit();
}
}
Step 4: Make a file called TestNG.xml.
Right-click your Testcase(Tests) and select Go to TestNG, then Convert to TestNG, then Finish.
<?xml  version “1.0” encoding-“UTF-8”?>
<!DOCTYPE suite SYSTEM http://testng.org/testng-1.0.dtd>
<suite name = “Suite”>
<test thread-count=”2” name=”Test”/>
<classes>
<class name = “allureReports.Tests”/>
</classes>
</test> <!- - Test- - >
</suite> <!- - Suite - - >
- Right-click the TestNG.xml file and select Run As. Then go to TestNg Suite
- You'll notice a new folder allure results if you refresh your project. You can see json files if you expand the allure results. To view the allure reports generated for a test case using TestNG.xml, run the command allure serve.
- After right-clicking on the allure results folder, go to Properties – > Copy the Location
- Type the command in the Command prompt:
Allure serve C:\Users\admin\eclipse-workspace\AllureReporting\allure-results
- The Allure Reports will be generated automatically.
Read More, Locators in Selenium
Frequently Asked Questions
-
Why use TestNG with Selenium?
Default Selenium tests do not produce test results in a consistent format. We can generate test results in Selenium using TestNG.
-
What are the advantages of TestNG over JUnit?
TestNG has three significant advantages over JUnit:
- Annotations make things clearer.
- It is easier to group test cases.
- It is possible to test in parallel.
-
What is Annotation in TestNG?
Annotations in TestNG are lines of code that control the execution of the method below them.
-
To view the allure reports generated for a test case using TestNG.xml, which command should we run?
Type the command in the Command prompt:
Allure serve C:\Users\admin\eclipse-workspace\AllureReporting\allure-results
-
What does the reporter class do?
The reporter class in TestNG aids in the storage of logs within user-generated or system-generated reports so that we can view the logs directly from the report rather than having to rerun the test case in the future.
Conclusion
In this article, we learned about TestNG Report Generation, the three methods used for it, and practical examples.
We hope that this blog has helped you enhance your knowledge regarding TestNG Report Generation and if you would like to learn more about Automation Testing, JUnit and TestNG, and TestNG Report Generation, check out our articles on Coding Ninjas Studio. Do upvote our blog to help other ninjas grow. Happy Coding!


 9+ registered

