Do you think IIT Guwahati certified course can help you in your career?
Introduction
Pytorch is an open source Python framework used to build machine learning models for image recognition and natural language processing. Transformers in PyTorch are a type of neural network model that translate and write text. These models are mainly based on the concept of self attention and learn from the different patterns in the text. They are, in fact, an important part of Natural Language Processing (NLP).
In this article, we will discuss transformers in PyTorch in detail, along with their implementation.
Understanding Transformers
Transformers in PyTorch are a class of neural network models that are used widely in Natural language processing (NLP). The flexible framework of PyTorch is very useful in building and training transformer models. Software like BERT, GPT3, and T5 are based on transformers. They are mainly used in NLP tasks like text classification, machine translation, analysis of emotions, etc.
Encoder in Transformer Model
The encoder is a part of the transformer model which is made up of three parts. They are the linear layer, the multi-headed attention with eight heads, and the feed-forward neural network. The encoder's job is to process the input sequence and record all the useful information. This is done by using different attention focuses on different parts of the sequence.
The dimension of the input layer at the encoder side is 2048, and that at the output side is 512.
Decoder in Transformer Model
The decoder is used in the transformer model to generate texts and translate languages. It works in a just opposite way to the encoder. The decoder also consists of many layers with the two important one being the self attention and the feed forward neural network. It takes in two inputs:
It takes the output from the encoder as input for multi-headed attention.
Target sentence embeddings are also taken as input in the decoder.
Hugging Face Transformer API
Transformers in PyTorch can be implemented using the Hugging Face API. The Hugging Face Transformer API is a library in Python that provides a user-friendly interface to work on transformer-based models in NLP.
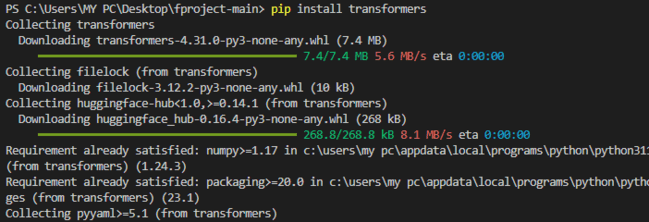
To install the Hugging face transformer, we can use the command:
Code
pip install transformers
You can also try this code with Online Python Compiler
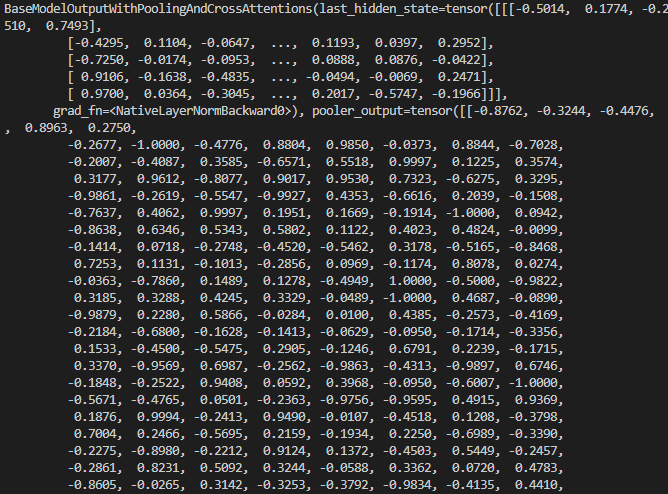
To download a pre-trained model, we can type the code as given below:
Code
from transformers import AutoTokenizer, AutoModel

# The tokenizer corresponding to a pre-trained model
tokenizer = AutoTokenizer.from_pretrained("bert-base-uncased")

# Instantiating the weights from a pre-trained model
model = AutoModel.from_pretrained("bert-base-uncased")
inputs = tokenizer("Introduction to transformers", return_tensors="pt")
outputs = model(**inputs)
print(outputs)
You can also try this code with Online Python Compiler
For different tasks, we can write the code as given below.
Code
from transformers import AutoTokenizer, AutoModelForSequenceClassification
import torch

# Tokenizer and model instances
tokenizer = AutoTokenizer.from_pretrained("bert-base-cased-finetuned-mrpc")
model = AutoModelForSequenceClassification.from_pretrained("bert-base-cased-finetuned-mrpc")

# Two possible outcomes
classes = ["not paraphrase", "is paraphrase"]

# sequences to classify
sequence_0 = "The company Coding Ninjas is based in India"
sequence_1 = "AMangoes are good for your health"
sequence_2 = "Coding Ninjas headquarters are situated in Gurugram"

# Getting tokenizer outputs
paraphrase = tokenizer(sequence_0, sequence_2, return_tensors="pt")
not_paraphrase = tokenizer(sequence_0, sequence_1, return_tensors="pt")

# Outputs from the tokenizer are fed into the model object
paraphrase_classification_logits = model(**paraphrase).logits
not_paraphrase_classification_logits = model(**not_paraphrase).logits

# get the probability scores
paraphrase_results = torch.softmax(paraphrase_classification_logits, dim=1).tolist()[0]
not_paraphrase_results = torch.softmax(not_paraphrase_classification_logits, dim=1).tolist()[0]

# Should be paraphrased
for i in range(len(classes)):
    print(f"{classes[i]}: {int(round(paraphrase_results[i] * 100))}%")

# Should not be paraphrased
for i in range(len(classes)):
    print(f"{classes[i]}: {int(round(not_paraphrase_results[i] * 100))}%")
You can also try this code with Online Python Compiler
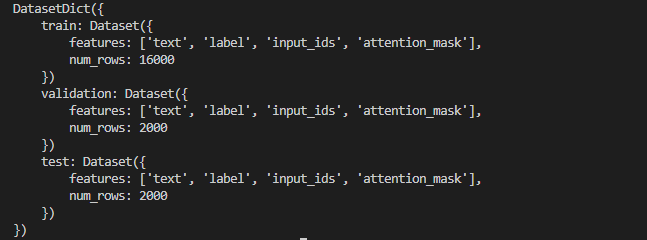
Now, the dataset library offers many datasets for different tasks. The Hugging Face API can be used to access the datasets. Here we will use the emotions dataset with the help of the load_dataset function.
Code
from datasets import load_dataset
emotion = load_dataset("emotions")
print(emotion)
You can also try this code with Online Python Compiler
The 'AutoTokenizer' class in the transformers library makes the process of loading tokenizers for our pre-trained models in very easy way. In this example, we will be using the distill-BERT version. This provides a ready-to-use model and creates a tool that breaks the text into smaller parts. The code below is the implementation of the same.
Code
from transformers import AutoModel, AutoTokenizer
import torch
model_checkpoint = "distilbert-base-uncased"
device = torch.device('cuda' if torch.cuda.is_available() else 'cpu')
tokenizer = AutoTokenizer.from_pretrained(model_checkpoint)
model = AutoModel.from_pretrained(model_checkpoint).to(device)
You can also try this code with Online Python Compiler
Here, we will be using a pre-trained model to understand and get the features from the text. The final hidden state generated from the input fed at the transformer model is used to classify texts. We will produce the last hidden states while operating within the 'torch.no_grad' mode.
Now we will map the encoded_emotions object to receive the states.
Code
def extract_hidden_states(input_batch):
"""Transfering input dictionary values to the specified device and computes model output/last hidden states."""
inputs = {key: value.to(device) for key, value in input_batch.items() if key in custom_tokenizer.model_input_names}
with torch.no_grad():
last_hidden_state = custom_model(**inputs).last_hidden_state
return {"hidden_state": last_hidden_state[:, 0].cpu().numpy()}
encoded_emotions.set_format("torch", columns=["input_ids", "attention_mask", "target_label"])
emotions_hidden_states = encoded_emotions.map(extract_hidden_states, batched=True)
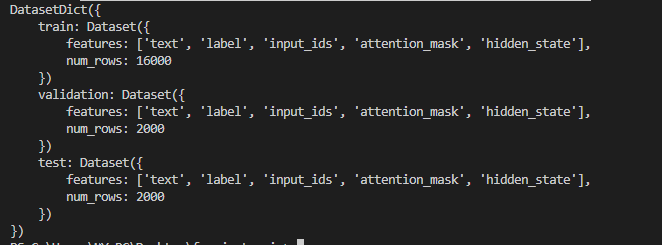
print(emotions_hidden_states)
You can also try this code with Online Python Compiler
Next, the hidden_state column and numpy and pandas are used to create the dataset.
Code
import numpy as np

# Extract the hidden states from the mapped dataset
X_train_features = np.array(custom_emotions_hidden['train']['hidden_state'])
X_valid_features = np.array(custom_emotions_hidden["validation"]["hidden_state"])
y_train_labels = np.array(custom_emotions_hidden["train"]["label"])
y_valid_labels = np.array(custom_emotions_hidden["validation"]["label"])

# Check the shapes of the extracted features
print("Shape of training features:", X_train_features.shape)
print("Shape of validation features:", X_valid_features.shape)
You can also try this code with Online Python Compiler
Next, we will be creating our custom PyTorch dataset class to load the dataset objects.
Code
class CustomDataset(torch.utils.data.Dataset):

    def __init__(self, dataframe):
        # Assign the dataframe to a class attribute
        self.dataframe = dataframe
        # Extract the feature columns and target column
        x_features = dataframe.iloc[:, 0:768].values
        y_targets = dataframe.iloc[:, 768].values
        # Convert feature and target arrays to tensors
        self.features = torch.tensor(x_features, dtype=torch.float32)
        self.targets = torch.tensor(y_targets, dtype=torch.int32)

    def __len__(self):
        # Return the length of the dataset (number of samples)
        return len(self.targets)

    def __getitem__(self, idx):
        # Retrieve the feature and target for a specific index
        feature_sample = self.features[idx]
        target_sample = self.targets[idx]
        return feature_sample, target_sample
You can also try this code with Online Python Compiler
We will define a PyTorch model to design a feed-forward neural network.
Code
# Check if GPU is available, otherwise use CPU
device = torch.device('cuda' if torch.cuda.is_available() else 'cpu')

# Define input size, number of classes, learning rate, batch size, and epochs
input_feat_size = 768
num_output_classes = pd.Series(emotions['train']['label']).unique().size
learn_rate = 0.001
batch_size_val = 64
num_epochs = 3

# Prepare training dataset and data loader
training_dataset = MyDataset(train_data)
train_data_loader = DataLoader(dataset=training_dataset, batch_size=batch_size_val, shuffle=True)

# Utilize the validation portion as the test set in this context
testing_dataset = MyDataset(validation_data)
test_data_loader = DataLoader(dataset=testing_dataset, batch_size=batch_size_val, shuffle=True)

# Create an instance of the neural network model and move it to the designated device (GPU or CPU)
nn_model = NeuralNetwork(input_feat_size, num_output_classes).to(device)

# Define the loss criterion for the classification task
loss_criterion = nn.CrossEntropyLoss()

# Set up the Adam optimizer to update the model parameters
model_optimizer = optim.Adam(nn_model.parameters(), lr=learn_rate)
You can also try this code with Online Python Compiler
Creating database objects for parallel batched loading of data examples.
Code
# Check if GPU is available, otherwise use CPU
device = torch.device('cuda' if torch.cuda.is_available() else 'cpu')

# Define input size, number of classes, learning rate, batch size, and epochs
input_feat_size = 768
num_output_classes = pd.Series(emotions['train']['label']).unique().size
learn_rate = 0.001
batch_size_val = 64
num_epochs = 3

# Prepare training dataset and data loader
training_dataset = MyDataset(train_data)
train_data_loader = DataLoader(dataset=training_dataset, batch_size=batch_size_val, shuffle=True)

# Utilize the validation portion as the test set in this context
testing_dataset = MyDataset(validation_data)
test_data_loader = DataLoader(dataset=testing_dataset, batch_size=batch_size_val, shuffle=True)

# Create an instance of the neural network model and move it to the designated device (GPU or CPU)
nn_model = NeuralNetwork(input_feat_size, num_output_classes).to(device)

# Define the loss criterion for the classification task
loss_criterion = nn.CrossEntropyLoss()

# Set up the Adam optimizer to update the model parameters
model_optimizer = optim.Adam(nn_model.parameters(), lr=learn_rate)
You can also try this code with Online Python Compiler
Next we will group all the parts and define a loop for our transformer model. We will also write a function to check the degree of correctness of the results.
Code
for current_epoch in range(total_epochs):
    for batch_idx, (input_data, true_labels) in enumerate(training_loader):
        input_data = input_data.to(device=device)
        true_labels = true_labels.to(device=device)
        true_labels = true_labels.to(torch.int64)
        predicted_scores = classification_model(input_data)
        batch_loss = loss_criterion(predicted_scores, true_labels)
        optimizer_instance.zero_grad()
        batch_loss.backward()
        optimizer_instance.step()
    num_correct_predictions = 0
    num_total_samples = 0
    model_instance.eval()
    with torch.no_grad():
        for batch_input, batch_labels in data_loader:
            batch_input = batch_input.to(device=device)
            batch_labels = batch_labels.to(device=device)
            batch_input = batch_input.reshape(batch_input.shape[0], -1)
            batch_scores = model_instance(batch_input)
            _, batch_predictions = batch_scores.max(1)
            num_correct_predictions += (batch_predictions == batch_labels).sum()
            num_total_samples += batch_predictions.size(0)
        accuracy_percentage = float(num_correct_predictions) / float(num_total_samples) * 100
        print(f'Accuracy: {accuracy_percentage:.2f}')
    model_instance.train()

# Evaluate accuracy on both training and test data
assess_accuracy(training_loader, classification_model)
assess_accuracy(test_loader, classification_model)
You can also try this code with Online Python Compiler
What is the use of self-attention in transformers in PyTorch?
Self Attention in transformers is used to calculate the importance of different words in a text sequence and the relation between them. This is done by giving more attention to certain words, which in turn improves the model by increasing its ability to figure out the meaning of the sentence.
What is the Hugging face transformer API?
Transformers in PyTorch can be built with the help of the Hugging Face API. The Hugging Face Transformer API is a powerful library in Python that provides an interface that can be easily used to work on transformer-based models in NLP.
What are tokens in Tokenization?
With the help of Tokenization, the text is divided into different units called tokens. These tokens can be either words or characters. These tokens allow transformers in PyTorch to process and understand the language efficiently.
What are transformers in Pytorch?
Transformers in PyTorch are a set of neural network models that are used in Natural language processing (NLP). Software like BERT, GPT3, and T5 are based on transformers that are used in classifying texts, analyzing sentiments, etc.
Conclusion
Kudos on finishing this article! We have discussed how the Hugging Face library can be used to classify texts with the help of transformers in PyTorch. This not only reduces the complexity but also increases the efficiency of the NLP models.
We hope this blog has helped you understand transformers in PyTorch better. Keep learning! We suggest you read some of our other articles related to PyTorch:
But suppose you are just a beginner and are looking for questions from tech giants like Amazon, Microsoft, Uber, etc. For placement preparations, you must look at theproblems, interview experiences,andinterview bundles.


 9+ registered

