Do you think IIT Guwahati certified course can help you in your career?
Introduction
ReadyAPI is an API testing platform. It allows developers to automate testing.
It can be used for different types of testing -
⭐ Functional Testing - You can set tests for each application's functionality and check if your service works as expected. You can also test the security of your service and verify that it can resist the most common attacks.
⭐ Performance Testing - You can test the performance of the service against various situations.
Virtualization allows you to test the performance of API in real-world scenarios. It imitates real-world experiences and runs your API against them.
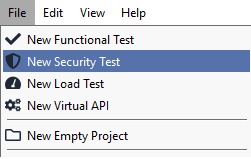
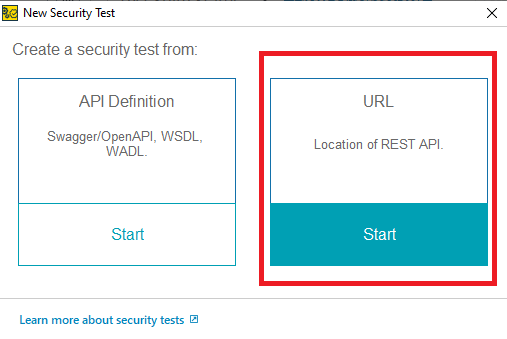
Any API needs to be protected from malicious attacks. ReadyAPI provides several security tests that will test your API against these attacks.
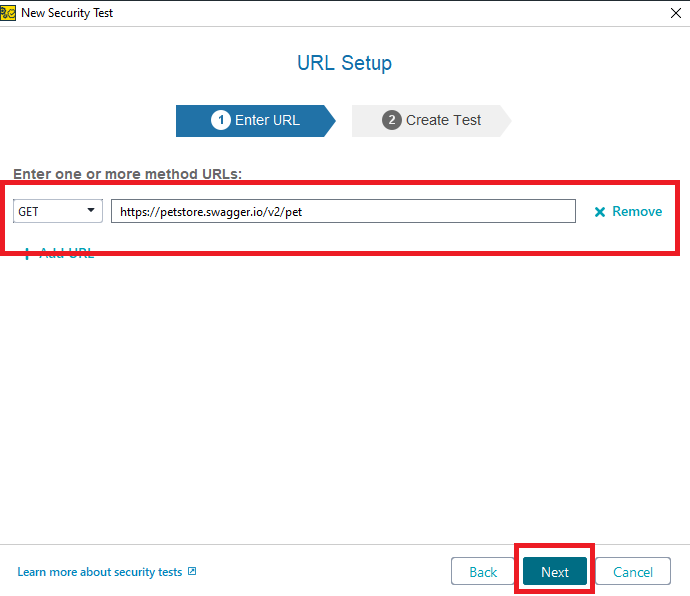
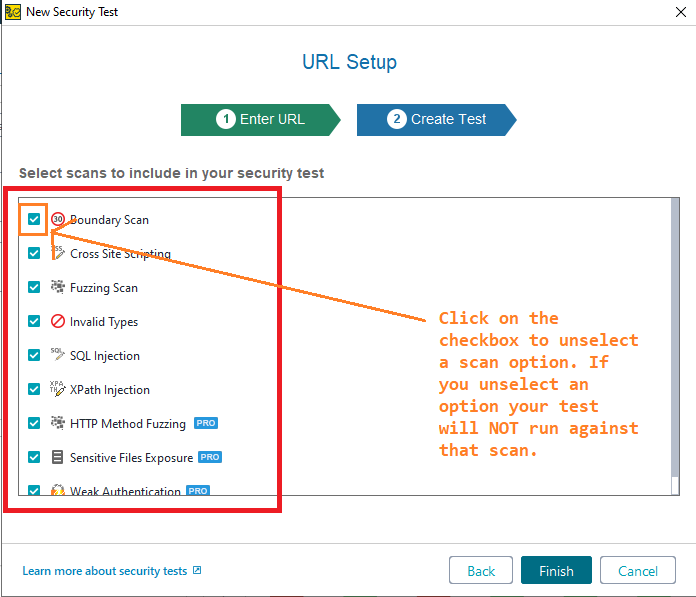
You can choose to test your API against any scans. Select the scans you want to test your API for and click Finish. If you want to add your own security scan code, click on Add Scan.
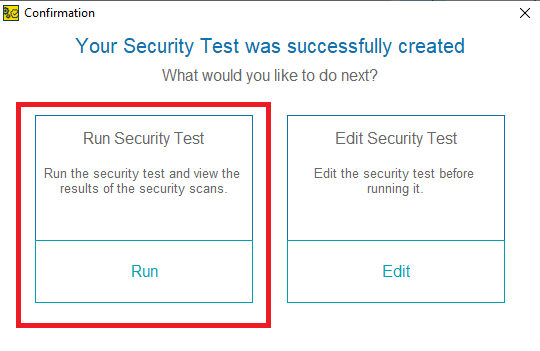
🐻 You can run the test as it is or if you can run it after editing it. Since, we do not want to edit anything, let’s click on Run Security Test.
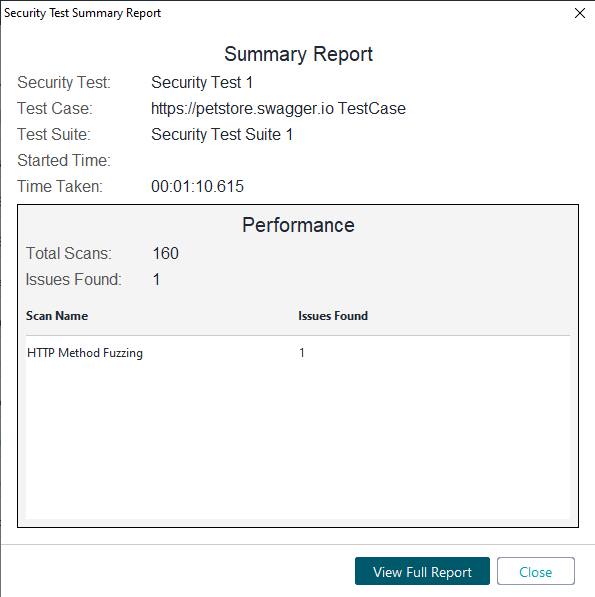
🐻 Results will be displayed after the run is over.
Viewing Test Results
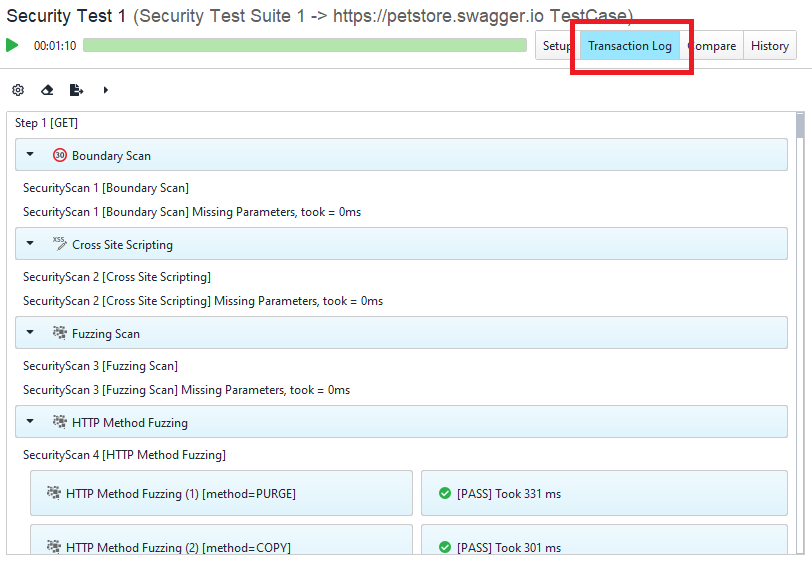
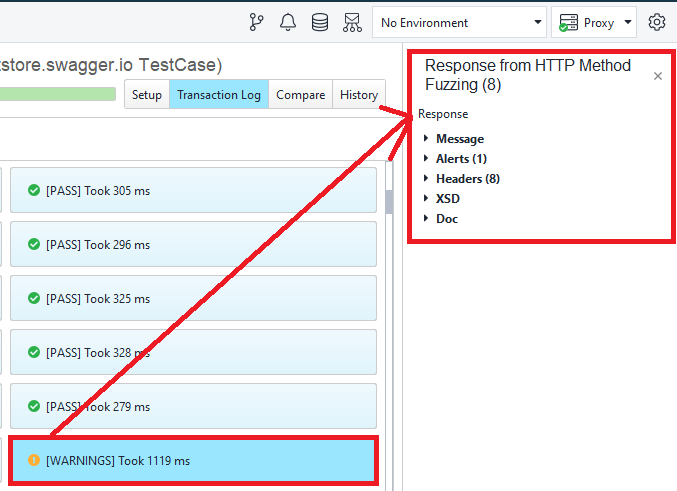
You will see a window with a progress bar at the top.
If the progress bar is Green, it means that all the tests have passed.
If the progress bar is Orange, it means that some tests did not pass.
Switch to Transaction Logs tab. Here you can see details about all the scans.
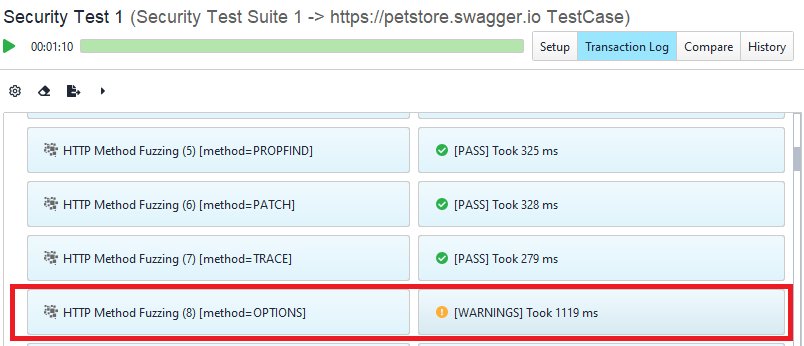
Left hand side shows the information about the scan and right hand side shows information about the time taken for the scan to finish. All the successful scans will show PASS and the failed one will show FAIL. There can be some warning signs. These warning signs do not necessarily mean that a test failed but it means that something is lagging.
Right-click on the failed scan log or the scan log with warning sign to see where the errors occur. Any response from the service can be seen from the messages section.
If you want to save the log in a file, click on and save the file.
Adding Assertions to Security Scans
You can add many assertions. These assertions will check scans for vulnerabilities in the service.
You can read about assertions here.
🐻 Switch to the Setup tab.
🐻 Click on the response for any of the scan type.
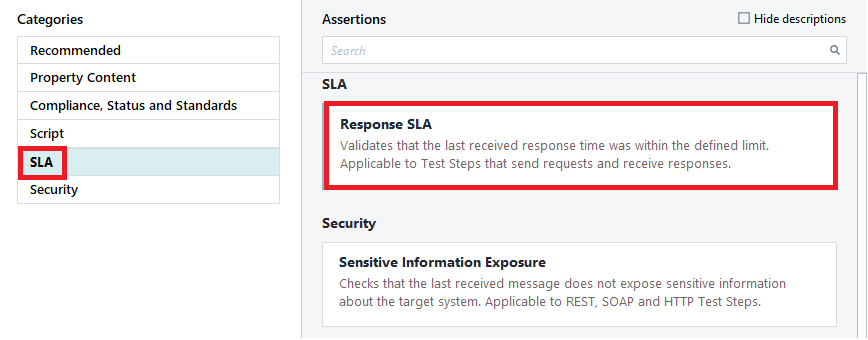
🐻 Click on + to add an assertion. In ReadyAPI, there are different types of assertions. The description of all the assertions is also given by the ready API. Click on the assertion to add it to the scan.
For example, the SLA assertion sets up a time limit for the response time. If the response of a test is not received within specified time, that particular test will fail.
Frequently Asked Questions
Why automate tests?
If all the testing is done by developers/testers, it wastes human resources. We can optimise these tests and automate them for similar tests. It is more efficient and saves a lot of resources.
How can we use SmartBear ReadyAPI?
To use ReadyAPI, download and install the product. There is a 14 days free trial of the product. After the free trial has ended you can buy the license to use the product for commercial use. There are two types of licenses- File Based and SmartBear ID based. These licenses are valid for 1-3 years.
What is the difference between ReadyAPI and Postman?
Since Postman is designed to work with each individual API endpoint, it is nearly hard to manage and monitor end-to-end testing over time. Since each test case is customised for ReadyAPI, tests may include a variety of endpoints, resources, or data sets. Then, inside a Test Suite and, ultimately, a Test Project, each test case can be added, copied, or deleted. As a result, managing and keeping up with test cases is easy.
Conclusion
Congratulations🎉 for finishing this article. In this article, we discussed how to scan our API for security attacks. We discussed how to create these scans. We also discussed how to view the report of the scans and how to add assertions which will check our scan for vulnerabilities.
Do not stop learning! We recommend you read some of our ReadyAPI articles -


 9+ registered

