Do you think IIT Guwahati certified course can help you in your career?
Introduction
You have heard of the term ‘cookie’ many times during surfing, but did you ever wonder why these are used? Why do you find notifications for accepting cookies when you open certain websites?
A cookie can enable a website to retrieve information about you and your preferences and use them when you revisit their page.
Now, the question arises what will happen without cookies?
When there are no cookies, you will have to log in every time you visit the website, the items waiting in your shopping cart will be lost, and you will have to rebuild that. In this blog, we will try to learn and understand how to use cookies in Postman.
Using Cookies in Postman
A Computer Cookie is also known as an HTTP Cookie, a web cookie, an internet cookie, or a browser cookie. The term cookie is a smaller version of “magic cookie”, a term used for a data packet that a system receives and sends it back without changing or altering the data inside the packet. There are two pieces of information that a cookie can contain, that are, a unique ID for each user and a site name.
Cookie Manager
The Cookie Manager of Postman will enable you to view and edit cookies that are associated with various domains. You have the option to manually create cookies for any domain, or you can just capture the cookies using the Postman Proxy and Postman interceptor.
In order to use Cookie Manager, open any request and select Cookies present on the right top corner. The Manage Cookies Window will appear in front of you. This window will display a list of domains and every cookie associated with it.
Creating Cookies
In order to add a new cookie for any domain, select Add Cookie option. This will create a pre-generated cookie string compliant with the following HTTP State Management standards.
The above string compliant six necessary attributes without which a cookie cannot be created. That are cookieName or cookieValue, Domain, Path, HttpOnly, Secure, and Expires. After that, select Save to save that cookie to the chosen cookie store and under the relevant domain.
Adding a Domain
In case you want to view or add a domain that is not present in the Cookie Manager, you can always do that. To add a new domain, enter the domain name in the box specified and select Add Domain.
Updating a Cookie
To update any cookie, you need to select that cookie first. You will be presented with some properties. Select any property you want to edit. After that, select Save to update.
Deleting a Cookie
To delete any domain and cookies associated with it, select the cross symbol next to the domain. After that, confirm your choice. To delete any particular cookie, select the cross symbol next to that cookie.
Accessing Cookies
You can access only those cookies whose domains are in the allowlist. When you add any domain to the allowlist, its cookies can always be accessed in scripts.
To add a domain in the allowlist, open a request and then select Cookies. The Manage Cookies window will appear, from which you have to select Domains Allowlist. Now, enter the domain name that is supposed to be allowed and select Add.
Creating Cookies Programmatically
You always have the option to create and delete cookies programmatically instead of depending only on the Graphical Interface. Hence, this gives users a greater sense of control over the cookies.
You need to follow the steps mentioned below to create some cookies programmatically.
You need to create a cookie jar using the pm.cookies.jar() method using the following code snippet.
const cookieJar = pm.cookies.jar();
2. Now, you can create a cookie using the .set() function and place them in the cookie jar created above. There are two ways in which you can create a cookie. The code snippets for both of these are given below.
To get all the cookies, use the .clear() function in the way mentioned below.
cookieJar.clear(URL, callback (error));
Syncing Cookies
Cookies can be captured from any browser or any client application using the Postman Proxy or Postman Interceptor. After proper configuration, Postman continues to capture cookies for the domains specified by you. These captured cookies are automatically synced to your cookie jar.
Syncing Cookies with Postman Proxy
Before getting straight to the point, first, let us understand what Proxy is. A Proxy behaves like an intermediation between a Client Application and a Server. The Postman has an in-built proxy that can capture any cookie passing between a Client and a Server.
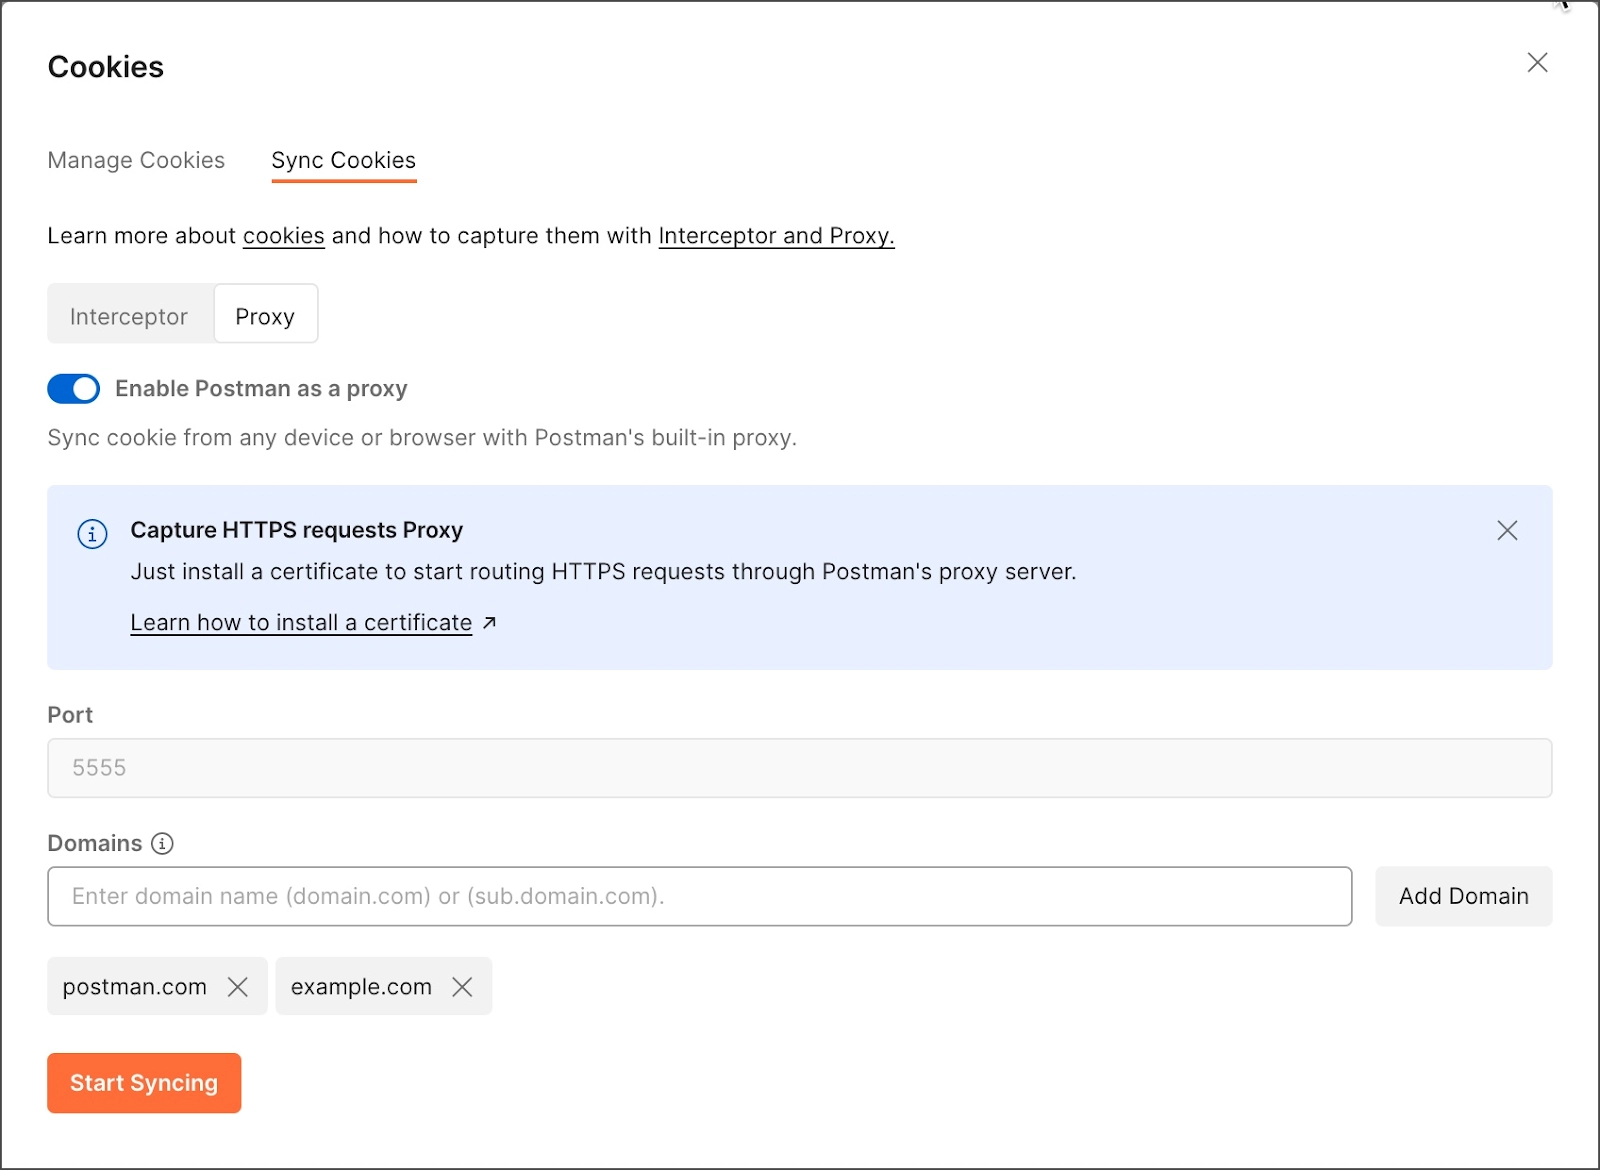
To synchronize cookies using the Postman Proxy, follow the steps mentioned below.
Firstly, select the Cookies option from the Postman Footer.
A window will appear. From the window, select the Sync Cookies tab.
Select the Proxy option from the options available.
Enter the Port Number there.
After that, you need to turn on the toggle next to Enable Postman as a Proxy option.
Enter the required domains and click on Start Syncing.
Before getting straight to the point, first, let us understand what Postman Interceptor is. The Postman Interceptor is an extension by Google Chrome that allows you to capture network requests directly from the Chrome Browser and saves them to Postman. Once configured properly, you can use the Postman Interceptor to continuously sync the cookies to the cookie jar.
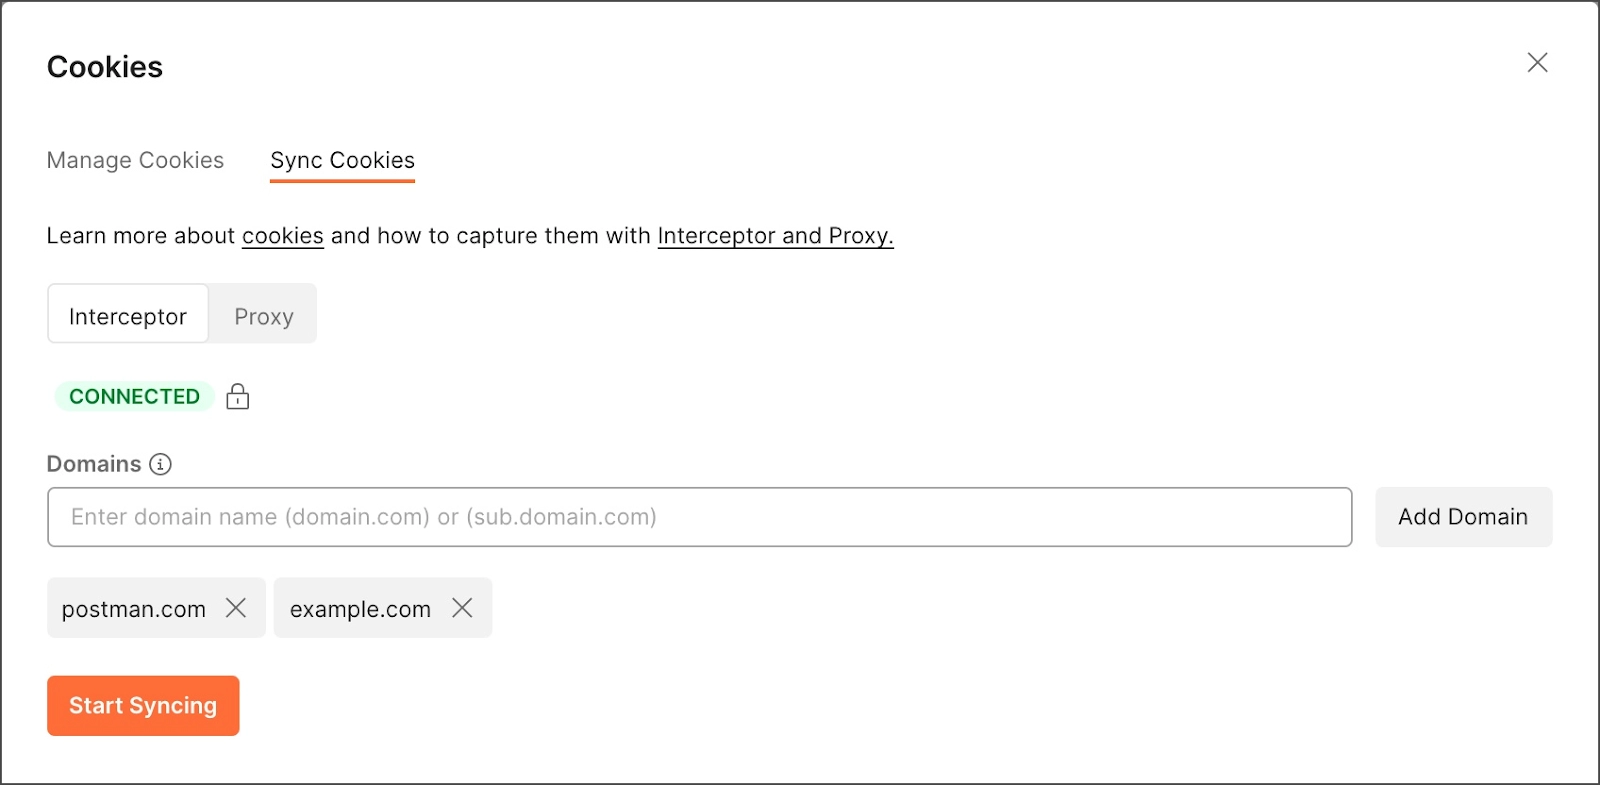
To synchronize cookies using the Postman Interceptor, follow the steps mentioned below.
Firstly, you need to install the Postman Interceptor Chrome Extension.
Now, select the Cookies option from the Postman Footer.
A window will appear. From the window, select the Sync Cookies tab.
Select the Interceptor option from the options available.
Enter the required domains and click on Start Syncing.
A Session in Postman is a newly introduced feature in Postman, that is, after version 6.2, whose need was ever there. It has solved the issue of sharing some crucial information used in the project with teammates who may be present, close, or distant.
A Session has provided an additional transient layer that holds collections, environments, and variables. This layer has become a great advantage for all Postman users in the way that it holds your variable values related to the currently working instance so that you are allowed to work with certain variables that are local to your scope.
Simply put, a session will hold variable values to make them accessible locally to the users. One quite good example of this is you change the value of a few variables as per your requirements and continue to work in your system. These changed values need not be shared with your team even if you have shared your work. These values would not be shared even if you share the collection, hence, these remain local and personal to you in every possible way.
How to use Sessions in Postman?
To use Session variables, you need to follow the steps mentioned below.
Firstly, you need to create a new environment Imgur containing a variable URL.
Now, create one more variable token that will contain the token values you fetched earlier.
Visit back to the Postman and under the Header section, see if the authorization is hard coded. In such a case, if we add any other authorization, we get a prompt from Postman.
Afterward, go to the Authorization Tab and select No Auth from the Authorization Type Tab.
Move back to the Header Tab and enter the Authorization key with Bearer {{Token}} value.
Place the mouse over that value and see the values mentioned. There you will see both the Current and the Initial values mentioned.
Frequently Asked Questions
Mention a few advantages of Session Variables.
A few advantages of Session Variables are mentioned below in the list.
Change of Values remains local.
Allows changing initial and current values separately.
Allows you to work with many people in your workspace.
Explain the HttpOnly attribute of Postman used while creating cookies.
If this attribute is present, then the cookie won't be accessible to the client-side scripts that run on the page. In such a situation, the cookie will only be added to the cookie header in requests.
What is the process of sending cookies with a request?
If you have requested any domain that has added a cookie, that cookie appears automatically in your request Headers Tab.
If the cookie is not visible, select the Hidden option to see some autogenerated headers.
Do you know anything about the Secure attribute of Postman?
The Secure attribute of Postman is used while creating a cookie in Postman. If this attribute is present, it ensures that the cookie is only sent when the URL begins with https://. If not, that connection will be considered insecure, and a cookie won’t be sent over it.
Conclusion
In this article, we have extensively discussed what cookies are, how to create and access cookies, and how to use a cookie manager. We also saw how to sync cookies in Postman and how session variables have increased the importance of using cookies.


 9+ registered

