Introduction
Vertex AI Pipelines helps automate, monitor, and control ML systems by orchestrating serverless ML workflows and storing workflow artifacts using Vertex ML metadata. In this article, you will learn about Vertex AI Pipelines in detail.
Vertex AI Pipelines
Machine Learning Operations (MLOps) is the practice of applying DevOps strategies to Machine Learning (ML) systems. A DevOps strategy enables you to efficiently build and release code changes and monitor your system to ensure reliability goals are met. MLOps extends this practice to help ensure that the time it takes from ingesting data to deploying models in production is reduced in a way that you can monitor and understand your ML systems.
Vertex AI Pipelines helps automate, monitor, and manage ML systems by orchestrating serverless ML workflows and storing workflow artifacts using Vertex ML metadata. By storing your ML workflow artifacts in Vertex ML metadata, you can analyze the lineage of your workflow artifacts. For example, an ML model's lineage may include the training data, hyperparameters, and code used to build the model.
Understanding ML pipelines
To orchestrate your ML workflow with Vertex AI Pipelines, you first need to describe your workflow as a pipeline. ML pipelines are portable and scalable ML workflows built on containers. An ML pipeline consists of a set of input parameters and a list of steps. Each step is an instance of a pipeline component.
With ML pipelines, you can:
Apply MLOps strategies to automate and monitor repeatable processes.
Experiment by running ML workflows with different hyperparameter sets, number of training steps or number of iterations, etc.
Reuse the workflow of the pipeline to train a new model.
Vertex AI Pipelines can be used to run pipelines built with the Kubeflow Pipelines SDK or TensorFlow Extended. Learn more about choosing the Kubeflow Pipelines SDK and TFX here.
Before you use Vertex AI Pipelines to orchestrate your machine learning (ML) pipelines, you must set up your Google Cloud project. To Configure your project please visit here
Building a pipeline
Vertex AI Pipelines enable serverless orchestration of machine learning (ML) workflows. To enable Vertex AI Pipelines to orchestrate your ML workflow, you need to describe your workflow as a pipeline. ML pipelines are portable and scalable ML workflows based on containers and Google Cloud services.
This guide shows you how to get started building ML pipelines.
Which pipelines SDK should I use?
Vertex AI Pipelines can run pipelines built with the Kubeflow Pipelines SDK v1.8.9+ or TensorFlow Extended v0.30.0+.
-
If you use TensorFlow in a Machine Learning workflow that processes terabytes of structured or text data, we recommend building a pipeline with TFX.
- Follow the TFX getting started tutorial for more information on creating a TFX pipeline.
- For more information on how to run TFX pipelines using Vertex AI Pipelines, follow the TFX on Google Cloud tutorial.
- For other use cases, we recommend using the Kubeflow Pipelines SDK to build pipelines. By creating pipelines with the Kubeflow Pipelines SDK, you can create custom components or reuse prebuilt components such as Google Cloud Pipeline components to implement your workflows. The Google Cloud Pipeline component makes it easy to use Vertex AI services like AutoML in your pipeline.
This article also shows you how to create pipelines using the Kubeflow Pipelines SDK.
Before you begin
Use the following guides to set up your Google Cloud project and development environment before building and running your pipeline.
- To prepare your cloud project to run your ML pipeline, follow the steps in the guide to configure your cloud project.
- To build pipelines using the Kubeflow Pipelines SDK, install Kubeflow Pipelines SDK v1.8.9 or higher.
- To use the Vertex AI Python client with the pipeline, install Vertex AI Client Library v1.7 or higher.
- To use the Vertex AI service in your pipeline, install the Google Cloud Pipelines component.
Getting started building a pipeline
To orchestrate your ML workflow with Vertex AI Pipelines, you first need to describe your workflow as a pipeline. The following example shows how to use Google Cloud pipeline components to create a dataset with Vertex AI, train a model with AutoML, and deploy the trained model for prediction.
Define your workflow using the Kubeflow Pipelines DSL package
The kfp.dsl package contains a domain-specific language (DSL) that you can use to define and manipulate pipelines and components. The
Kubeflow pipeline component is a factory function that creates pipeline steps. Each component describes the inputs, outputs, and implementation of the component. For example, in the code example below, ds_op is a component.
components are used to create a pipeline step. When the pipeline runs, the steps are executed when the data they depend on becomes available. For example, a training component could take her CSV file as input and use it to train a model.
import kfp
from google.cloud import aiplatform
from google_cloud_pipeline_components import aiplatform as gcc_aip

project_id = PROJECT_ID
pipeline_root_path = PIPELINE_ROOT

# Define the workflow of the pipeline.
@kfp.dsl.pipeline(
    name="automl-image-training-v2",
    pipeline_root=pipeline_root_path)
def pipeline(project_id: str):
    # The first step of the workflow is a dataset generator.
    # This step takes a Google Cloud pipeline component, providing the necessary
    # input arguments, and uses the Python variable `ds_op` to define its
    # output. The value
    # of the object is not accessible at the dsl.pipeline level, and can only be
    # retrieved by providing it as the input to a downstream component.
    ds_op = gcc_aip.ImageDatasetCreateOp(
        project=project_id,
        display_name="flowers",
        gcs_source="gs://cloud-samples-data/vision/automl_classification/flowers/all_data_v2.csv",
        import_schema_uri=aiplatform.schema.dataset.ioformat.image.single_label_classification,
    )

    # The second step is a model training component. It takes the dataset
    # outputted from the first step, supplies it as an input argument to the
    # component (see `dataset=ds_op.outputs["dataset"]`), and will put its
    # outputs into `training_job_run_op`.
    training_job_run_op = gcc_aip.AutoMLImageTrainingJobRunOp(
        project=project_id,
        display_name="train-iris-automl-mbsdk-1",
        prediction_type="classification",
        model_type="CLOUD",
        base_model=None,
        dataset=ds_op.outputs["dataset"],
        model_display_name="iris-classification-model-mbsdk",
        training_fraction_split=0.6,
        validation_fraction_split=0.2,
        test_fraction_split=0.2,
        budget_milli_node_hours=8000,
    )

    # The third and fourth step are for deploying the model.
    create_endpoint_op = gcc_aip.EndpointCreateOp(
        project=project_id,
        display_name = "create-endpoint",
    )

    model_deploy_op = gcc_aip.ModelDeployOp(
        model=training_job_run_op.outputs["model"],
        endpoint=create_endpoint_op.outputs['endpoint'],
        automatic_resources_min_replica_count=1,
        automatic_resources_max_replica_count=1,
    )
Replace the following:
- PROJECT_ID: The Google Cloud project that this pipeline runs in.
- PIPELINE_ROOT_PATH: Specify a Cloud Storage URI that your pipelines service account can access. The artifacts of your pipeline runs are stored within the pipeline root.
- The pipeline root can be set as an argument of the @kfp.dsl.pipeline annotation on the pipeline function, or it can be set when you call create_run_from_job_spec to create a pipeline run.
Compile your pipeline into a JSON file
After the workflow of your pipeline is defined, you can proceed to compile the pipeline into a JSON format. The JSON file will include all the information for executing your pipeline on Vertex AI Pipelines.
from kfp.v2 import compiler
compiler.Compiler().compile(pipeline_func=pipeline,
        package_path='image_classif_pipeline.json')
Submit your pipeline run
Once your pipeline workflow is compiled into JSON format, you can use the Vertex AI Python client to submit and run your pipeline.
import google.cloud.aiplatform as aip

job = aip.PipelineJob(
    display_name="automl-image-training-v2",
    template_path="image_classif_pipeline.json",
    pipeline_root=pipeline_root_path,
    parameter_values={
        'project_id': project_id
    }
)

job.submit()
In the preceding example:
- Kubeflow pipelines are defined as Python functions. The function is annotated with the @kfp.dsl.pipeline decorator and given the pipeline name and root path. The pipeline root path is where the pipeline artifacts are stored.
- Pipeline workflow steps are built using Google Cloud Pipeline components. By using the output of one component as the input of another component, you define the workflow of your pipeline as a diagram. Example: training_job_run_op depends on dataset output from ds_op.
- You compile the pipeline using kfp.v2.compiler.Compiler.
- Use the Vertex AI Python client to create pipelines that run on Vertex AI Pipelines. You can override the pipeline name and pipeline root path when running the pipeline. Pipeline runs can be grouped by pipeline name. Overriding the pipeline name helps distinguish between production and experimental pipeline runs.
- To learn more about building pipelines, read the building Kubeflow pipelines section, and follow the samples and tutorials
Accessing Google Cloud resources in a pipeline
If you don't specify a service account when you run your pipeline, Vertex AI Pipelines uses Compute Engine's default service account to run your pipeline. Vertex AI Pipelines also uses the pipeline execution's service account to authorize the pipeline to access Google Cloud resources. Compute Engine's default service account has the Project Editor role by default. This can give your pipeline excessive access to Google Cloud resources in your Google Cloud project.
It is recommended that you create a service account to run your pipeline and grant that account fine-grained permissions on the Google Cloud resources that your pipeline needs to run.
Learn how to use Identity and Access Management to create service accounts and manage the access granted to service accounts.
Run a pipeline
Vertex AI Pipelines enables serverless execution of machine learning (ML) pipelines built with the Kubeflow Pipelines SDK or TensorFlow Extended. This document describes how to run ML pipelines and schedule regular pipeline runs. If you haven't created an ML pipeline yet, see Build a pipeline.
Before you begin
Before running a pipeline with Vertex AI Pipelines, use the below instructions to set up Google Cloud project and development environment.
- To get your Cloud project ready to run Machine Learning pipelines, follow the instructions given in the guide to configure Cloud project.
-
You must use one of the following SDKs, to author a pipeline using Python
- Install the Kubeflow Pipelines SDK.
- Install TFX.
-
Install the Vertex SDK, to run a pipeline using the Vertex AI SDK for Python
- Install the Vertex AI SDK.
Create a pipeline run
Use the below instructions to run a Machine Learning pipeline using the console.
- Go to Pipelines, in the console, in the Vertex AI section
- Select the region where you want to create a pipeline from the Region drop-down list,
- To open the Create pipeline run pane, Click + Create run
-
Specify the following Run details.
- Click Choose to open the file selector, in the File field. Now, Navigate to the compiled pipeline JSON file and select the pipeline that you want to run, and click Open.
- The name that you defined in the pipeline definition is going to be your default pipeline name or you can also specify a different name.
- Specify a Run name to uniquely identify this pipeline run.
- Click Advanced options to specify that this pipeline run uses a custom service account, a customer-managed encryption key, or a peered VPC network.
Use the below-given instructions to configure advanced options such as a custom service account.
- From the Service account drop-down list, Select a service account to specify a service account,
- Vertex AI Pipelines runs the pipeline using the default Compute Engine service account, If you have not specified a service account.
View more on configuring a service account for use with Vertex AI Pipelines.
- Select Use a customer-managed encryption key to use a customer-managed encryption key (CMEK). Now a customer-managed key drop-down list pops on the screen. Now, select the key that you want to use from the Select a customer-managed key drop-down list that has appeared.
- In the Peered VPC network box, enter the VPC network name to use a peered VPC network in this pipeline run.
6. Click Continue.
The pipeline run parameters pane appears.
7. If your pipeline has parameters,specify your pipeline run parameters.
8. Click Submit to create your pipeline run.
Configure execution caching
When Vertex Artificial Intelligence Pipelines runs a pipeline, it checks to see whether or not an execution exists in Vertex Machine Learning Metadata containing the interface (cache key) for each pipeline step.
A step interface is defined as a combination of the following elements:
- Pipeline step input. These inputs include input parameter values (if any) and input artifact IDs (if any).
- Pipeline step output definition. This output definition includes the output parameter definition (name, if any) and the output artifact definition (name, if any).
- Component Specifications. This specification includes images, commands used, arguments, environment variables, and order of commands and arguments.
Also, only pipelines with the same pipeline name share the cache.
If there is a run that matches the Vertex ML metadata, the output of that run is used and the step is skipped. This allows you to reduce costs by skipping computations completed in previous pipeline runs.
To disable task-level execution caching, set:
eval_task.set_caching_options(False)Allows you to disable execution caching for the entire pipeline job. When running a pipeline with PipelineJob(), you can use the enable_caching argument to indicate that caching should not be used for running that pipeline. All steps in a pipeline job do not use caching. Learn more about creating pipeline executions.
Use the following example to disable caching.
pl = PipelineJob(
   display_name="My new pipeline",

   # Whether or not to enable caching
   # True = enable the current run to use caching results from previous runs
   # False = disable the current run's use of caching results from previous runs
   # None = defer to cache option for each pipeline component in the pipeline definition
   enable_caching=False,

   # Local or Cloud Storage path to a compiled pipeline definition
   template_path="pipeline.json",

  # Dictionary containing input parameters for your pipeline
   parameter_values=parameter_values,

   # Cloud Storage path to act as the pipeline root
   pipeline_root=pipeline_root,
)
The following limitations apply to this feature:
- Cached results have no time to live (TTL) and can be reused unless the entry is removed from the Vertex ML metadata. Once the entry is removed from the Vertex ML metadata, the task will run again to regenerate the results.
Visualize and analyze pipeline results
Vertex AI Pipelines enables serverless execution of machine learning (ML) pipelines built with the Kubeflow Pipelines SDK or TensorFlow Extended. This document describes how to visualize, analyze, and compare pipeline executions using Vertex AI Pipelines. For more information about running and scheduling
pipelines, see How Pipelines Run.
Visualizing Pipeline Runs Using the Google Cloud Console
Using the below steps to learn how to visualize pipeline executions using the Google Cloud Console.
- Open Vertex AI Pipelines in Google Cloud Console.
- Under Select Recent Projects, click the project tile.
- Click the run name of the pipeline run you want to analyze.
The pipeline execution page appears, showing the pipeline's runtime graph. A summary of your pipeline is displayed in the Pipeline Execution Analysis pane.
The pipeline graph shows the workflow steps of a pipeline.
A pipeline summary shows basic information about a pipeline run and the parameters used in that pipeline run.
4. For more information about a pipeline step or artifact, click the step or artifact in the runtime graph
The Pipeline Execution Analysis panel shows information about this pipeline step or artifact.
- For pipeline steps, this information includes execution details, input parameters passed to the step, and output parameters passed to the pipeline by the step.
To see details for this Pipeline Step:
- Click View Jobs to view the job details.
The job details page contains information such as the type of machine used to run this step, the container image on which the step is run, and the encryption key used by this step.
- Click View Logs to view the logs generated by this Pipeline Step.
The log pane is displayed. Use the logs to help debug the behavior of your pipeline.
Compare pipeline runs using the Google Cloud console
Use the below instructions to compare pipeline runs in the Google Cloud console.
- Open Vertex AI Pipelines in the Google Cloud console.
- Select the check boxes of the pipeline runs to compare.
- In the Vertex AI Pipelines menu bar, click Compare_arrows Compare.
- The Run Comparison pane is displayed.
- The Run Comparison pane lists pipeline parameters and metrics.
- This information is useful for performing analysis when analyzing how different groups of hyperparameters affect model metrics.
Track the lineage of pipeline artifacts
When you run a pipeline in Vertex AI Pipelines, the pipeline execution artifacts and parameters are saved along with the Vertex ML metadata. Vertex ML Metadata saves you the trouble of tracking pipeline metadata, making it easier to analyze the lineage of pipeline artifacts.
An artifact's lineage includes all factors that contributed to its creation, as well as artifacts and metadata derived from that artifact. For example, a model lineage might include:
- Training, testing, and evaluation data are used to create the model.
- Hyperparameters were used during model training.
- metadata recorded from the training and evaluation process. B. Model accuracy.
- artifacts derived from this model such as batch prediction results.
If you are new to Vertex Machine Learning Metadata, read the introduction to Vertex ML Metadata.
For a step-by-step tutorial on analyzing artifacts and metadata generated across your Vertex Artificial Intelligence Pipelines executions, see the Using Vertex ML Metadata with Vertex AI Pipelines codelab.
Using the Google Cloud console to analyze the lineage of your pipeline artifacts
Use the below instructions to view the lineage graph for a pipeline artifact in the Google Cloud console.
- Go to the Metadata page in the console, in the Vertex AI section.
- The Metadata page lists the artifacts that have been created in the default metadata store.
- Select the region that your run was created in the Region drop-down list.
- Click the Display name of an artifact to see its lineage graph.
- A static graph showing the executions and artifacts that are a part of this lineage graph appears.
- Click on execution or artifact to learn more about it.
Output HTML and Markdown
Vertex AI Pipelines provides a set of predefined visualization types (Metrics, ClassificationMetrics, etc.) for evaluating the results of pipeline jobs. However, there are many cases where custom visualizations are required. Vertex AI Pipelines offers two main approaches for outputting custom visualization artifacts. A Markdown file and an HTML file.
Import required dependencies
In the development environment import the necessary dependencies.
from kfp.v2 import dsl
from kfp.v2.dsl import (
    component,
    Output,
    HTML,
    Markdown
)
Output HTML
To export an HTML file, define a component with the Output[HTML] artifact. Also, you need to write the HTML content in the artifact's path. This example uses a String variable to represent the HTML content.
@component
def html_visualization(html_artifact: Output[HTML]):
    public_url = 'https://user-images.githubusercontent.com/37026441/140434086-d9e1099b-82c7-4df8-ae25-83fda2929088.png'
    html_content = \
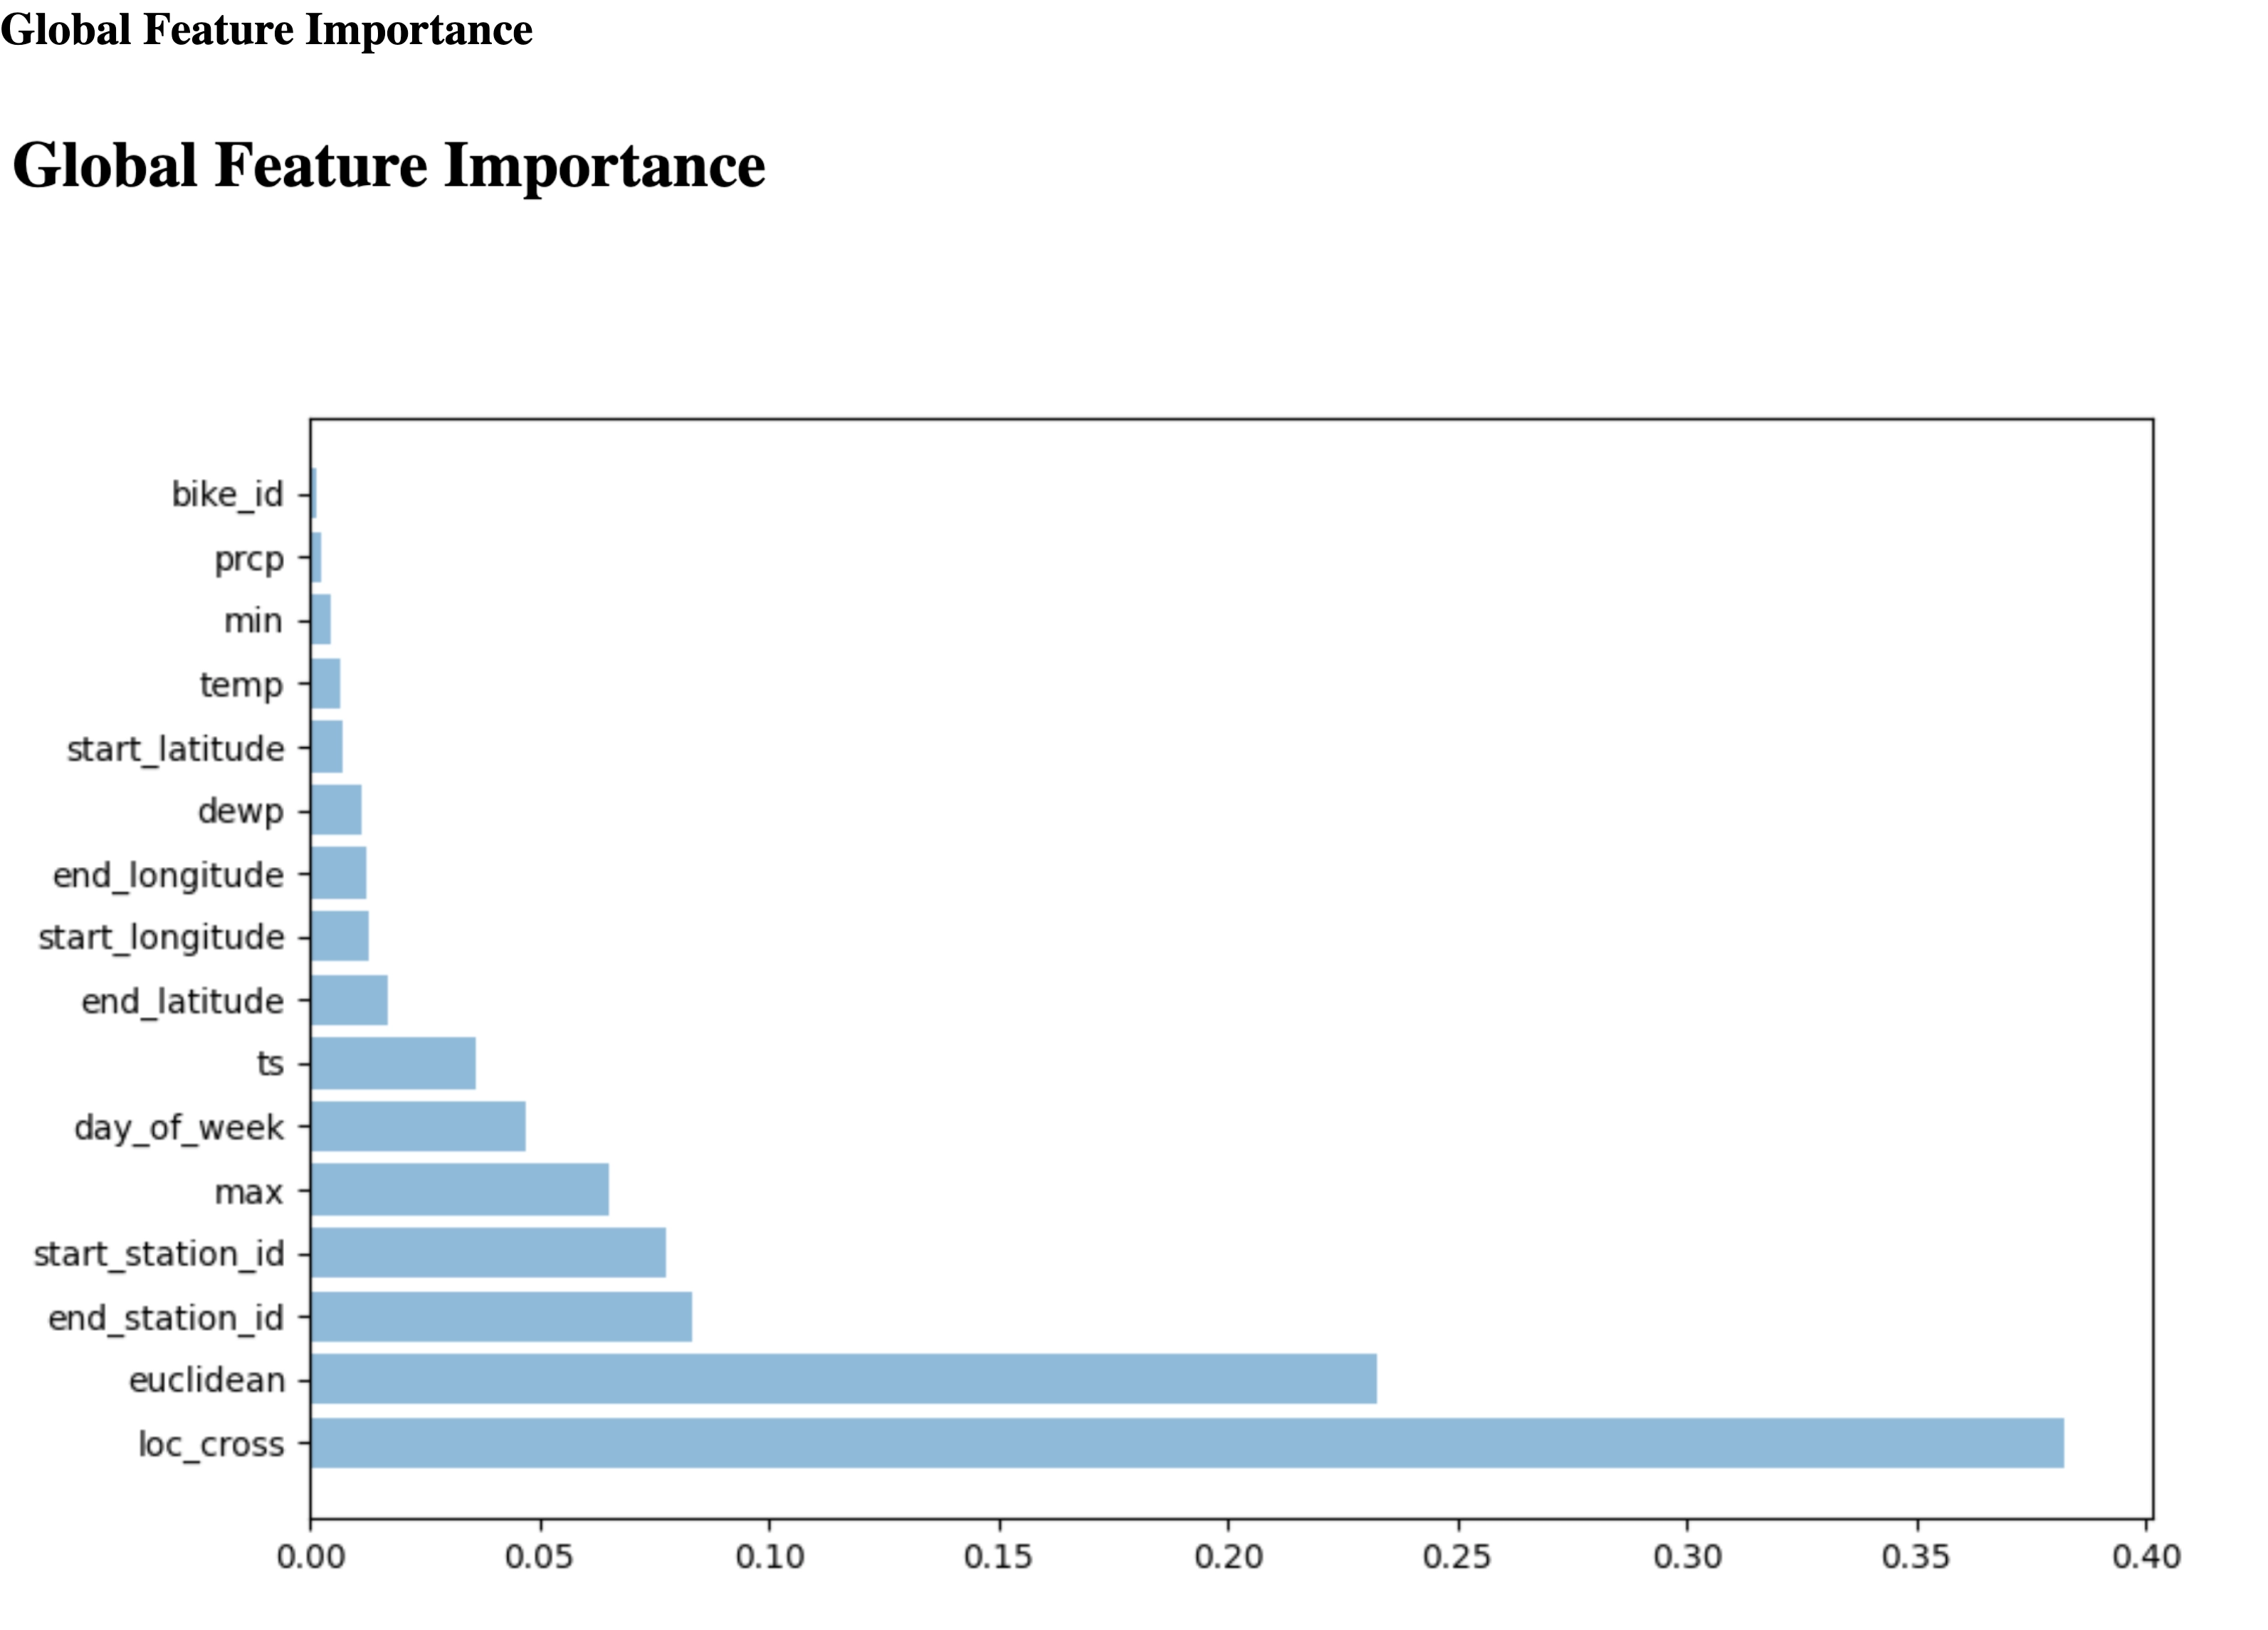
      '<html><head></head><body><h1>Global Feature Importance</h1>\n<img src="{}" width="97%"/></body></html>'.format(public_url)
    with open(html_artifact.path, 'w') as f:
        f.write(html_content)
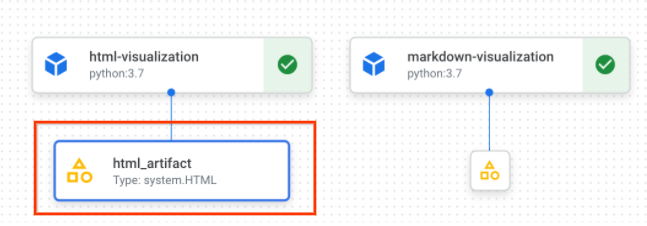
HTML artifact in the console:

HTML artifact information in the console:

Click "View HTML" to open HTML file on a new tab

Output Markdown
To export a Markdown file, define a component with the Output[Markdown] artifact. You also must write Markdown content to the artifact's path. In this example you use a string variable to represent Markdown content.
@component
def markdown_visualization(markdown_artifact: Output[Markdown]):
    import urllib.request

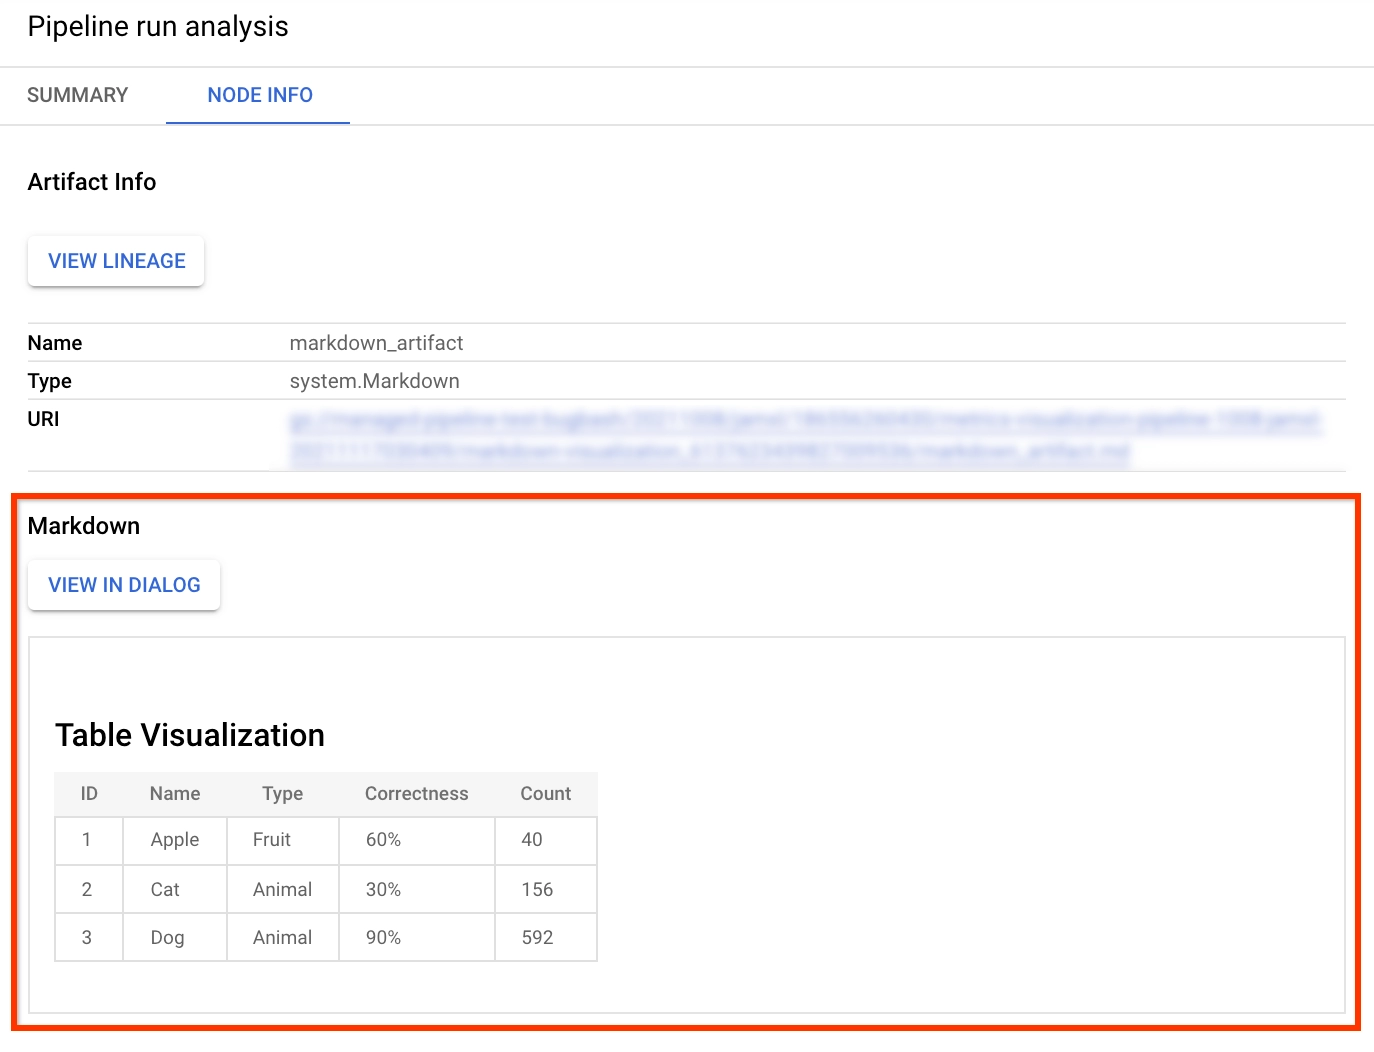
    with urllib.request.urlopen('https://gist.githubusercontent.com/zijianjoy/a288d582e477f8021a1fcffcfd9a1803/raw/68519f72abb59152d92cf891b4719cd95c40e4b6/table_visualization.md') as table:
        markdown_content = table.read().decode('utf-8')
        with open(markdown_artifact.path, 'w') as f:
            f.write(markdown_content)
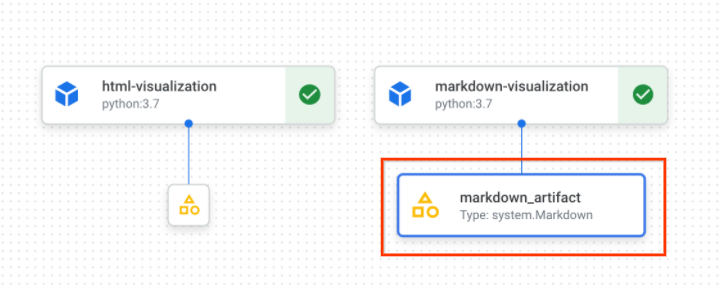
Markdown artifact in the console:

Markdown artifact information in the console:

Create your pipeline
After we have defined your component with the HTML or Markdown artifact create and run a pipeline that uses the component.
from kfp.v2 import dsl, compiler
@dsl.pipeline(
   name=f'metrics-visualization-pipeline')
def metrics_visualization_pipeline():
   html_visualization_op = html_visualization()
   markdown_visualization_op = markdown_visualization()
After submitting a pipeline run, we can view graphs for that run in the Google Cloud console. This diagram includes HTML and Markdown artifacts declared in corresponding components. We can select these artifacts to see detailed visualizations.


