Introduction
The installation and setup of Selenium WebDriver is divided into five steps:
1. Java 11 or above must be downloaded and installed.
2. Install and setup IntelliJ idea or any other Java IDE you choose.
3. Download Selenium WebDriver Java Client
4. Configure Selenium WebDriver.
5. Writing our first test case.
Let's get started with the setup and writing our first test case in the world of automation testing.
Getting Started
Here are few steps which are need to be followed to install the the software onto your system successfully
1. The article assumes that you've previously installed Java 11 or higher on your PC and set up the environment variables you'll need to execute and build Java programmes. With the respective os of your choice.
After you've downloaded and installed the most recent version of Java, you'll need to define your path or adjust your system's environment variables. To learn how to set path and setup environment variables in Java, click the link below:
Setting up the Environment
2. Assuming that you have previously installed intellij, if not, you can follow the respective instructions accordingly, which are mentioned in intellij website on how to install the software on respective os from the official website.
Download IntelliJ IDE
3. After that if you have covered the above two steps it is time to install the web drivers for the system you can choose the chrome web driver for chrome or gecko web driver for firefox. This article is specific about installation of chrome web driver however you are independent of having your hands dirty by trying different web drivers of your choice.
3.1 Check the version of chrome that you are using before installing the web driver. Go to the chrome setting and click on the about chrome icon given below:

3.2 After that check the version of the chrome. And install the web driver accordingly.
4. After that install the Java client from the link given below :
Download Selenium JDK
4.1 Now download the Selenium server(GRID) stable version: 4.1.3 as showman in figure if it changes in the future download accordingly.

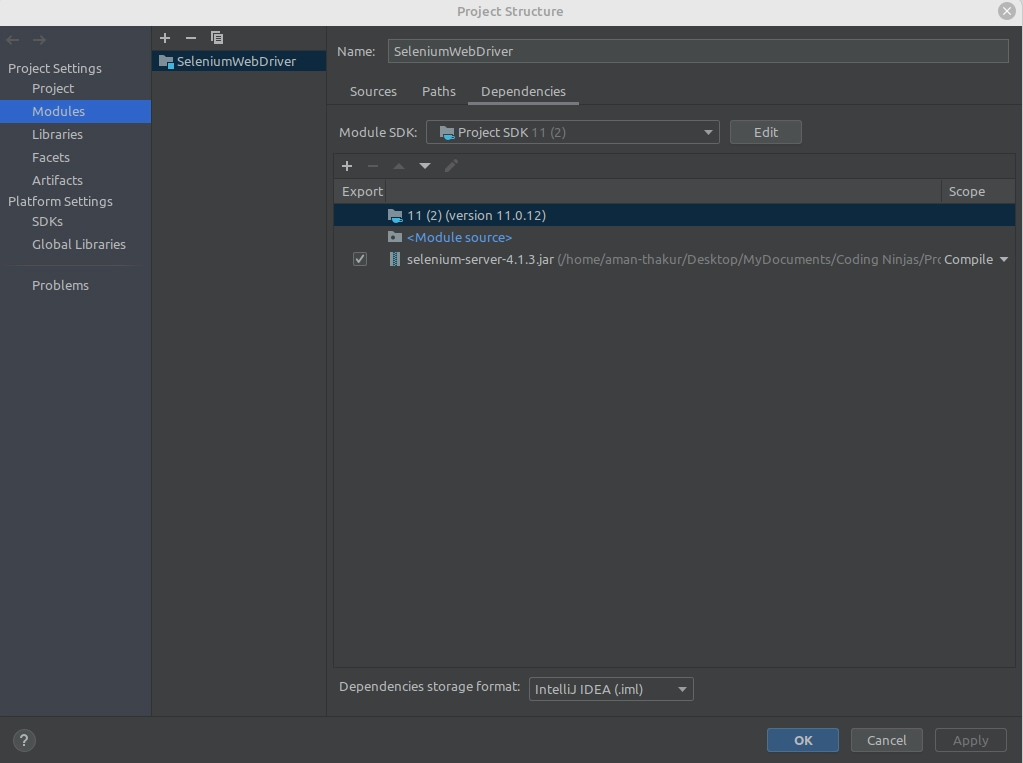
5. Now create a simple java project in intellij and add the external jar file which you have downloaded in step 4.1 to the current project.
File > Project Structure > Modules > Dependencies

Click on + button on to link the downloaded jar file to this project and then click on apply and then ok.


