Do you think IIT Guwahati certified course can help you in your career?
Introduction
Tableauis a business intelligence software that is used for data-visualization and data-analysis. Tableau software helps us to create interactive components with the help of graphs, charts, reports, etc. This makes it easier to visualize data, observe and analyze the trends in the data. Tableau offers an extended range of features and tools and supports various data formats like spreadsheets, databases, etc. These features help in making the analysis and visualization easier for the user.
Introduction to Alias
Aliases in Tableau refer to user-defined names assigned to fields and dimensions in the data. These aliases help us customize the fields' terms and hence customize the display without changing the data component in Tableau. Aliases are generally used in Tableaus to add context to the fields so the user can know what data each field stores. Aliases help to present the data in a more precise and understandable manner.
Generally, we have different data types placed under various fields in a dataset. Say we have a dataset containing the sales of different categories of items in a supermarket. The data is stored under Electronics & Appliances, Sports and Games, Home and Kitchen Essentials, etc. These long category names can make the dataset look cluttered and difficult to read. Using aliases, we can create shorter names for these categories like Electronics, Sports, Home & Kitchen. This makes the dataset easier to read, visualize and analyze.
Features of an Alias in Tableau
Aliases offer several valuable tools and features that improve Tableau's data visualization and analysis process. Some of these key features are discussed below in brief.
Customized Naming - Aliases allow users to give alternate names to fields in the dataset. This helps the users to customize the field names according to their convenience, which helps in visualization.
Aggregation - Aliases allow users to group similar fields for better analysis and visualization. Users can create groupings by assigning aliases which helps in easier comparison and analysis between different fields.
Simplification - As seen in the previous section, aliases can simplify the naming of the fields. Big names and fields can make the data look cluttered and difficult to read. Hence, using aliases, we can provide shorter terms to the data fields.
Dynamism - Aliases can also be assigned dynamically in Tableau. We can dynamically set and change the aliases given to data fields based on how the user interacts with the field. A typical example is when a user clicks on a particular field, only the alias of the specific field gets updated.
Easy Management - Tableaus provides a very user-friendly method for managing and editing aliases in Tableaus. Aliases can be easily added, deleted, or edited as the user requires. Moreover, the changes made to the aliases are instantly reflected in Tableau upon update.|
Providing Context - Aliases can also include additional information regarding the field labels. This context helps the user quickly understand the data in that particular field.
Creating an Alias in Tableau
We learned about aliases and their key features in Tableau in the previous sections. This section will discuss all the required steps in creating aliases in Tableau.
Step 1: Login to Tableau online
To use the Tableau software online, you can head over to the Tableau website and log in using your credentials.
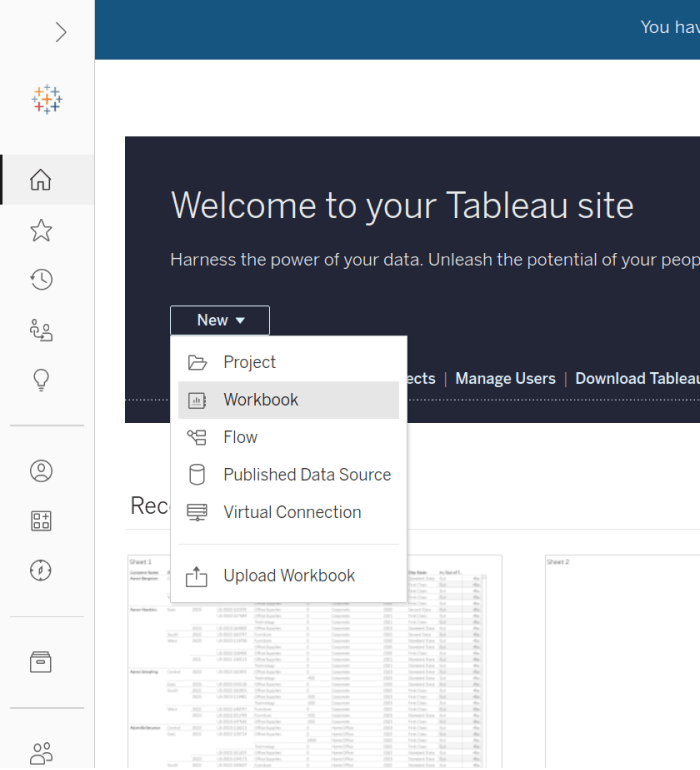
Step 2: Create a new Workbook
To create a new Workbook, click the New dropdown and select the Workbook option.
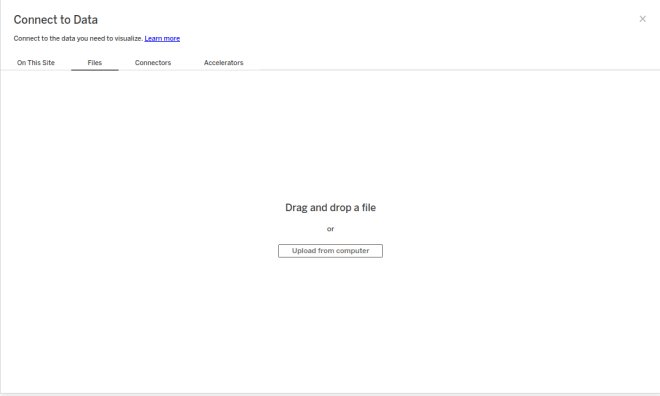
Step 3: Connect the data to the workbook
After completing the above steps, we must connect the workbook with the data to be visualized in Tableau.
To connect your data, select the files section and then add your data file from your local system.
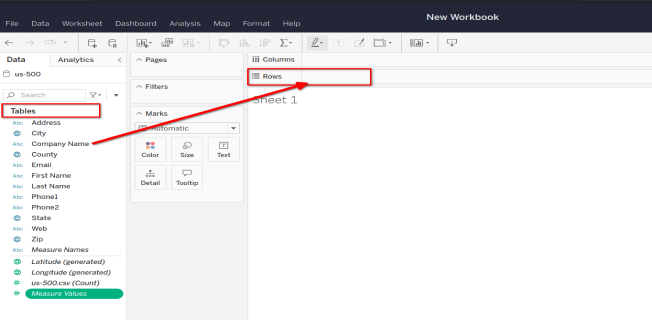
Step 4: Add the data to the view
After you have connected your data with the workbook, you can drag and drop the data fields from the Tables section to the Rows section in the workbook.
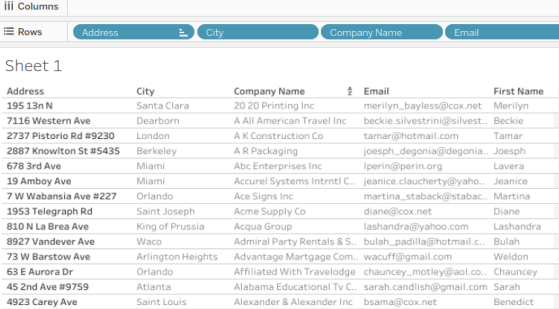
The Rows section will look like this after adding all the necessary rows to the table.
Step 5: Creating the Alias
Now that we have prepared all the data, we can create aliases.
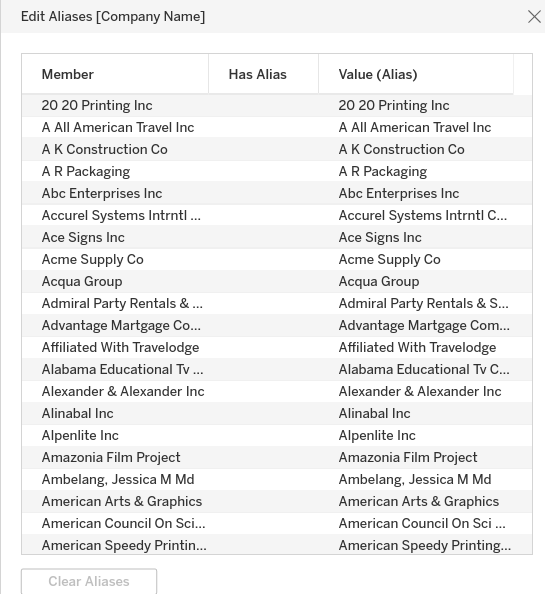
To create an alias, click the dropdown of the particular field in the Rows section and select the Edit Aliases option.
A popup window containing all the entries and their aliases will appear.
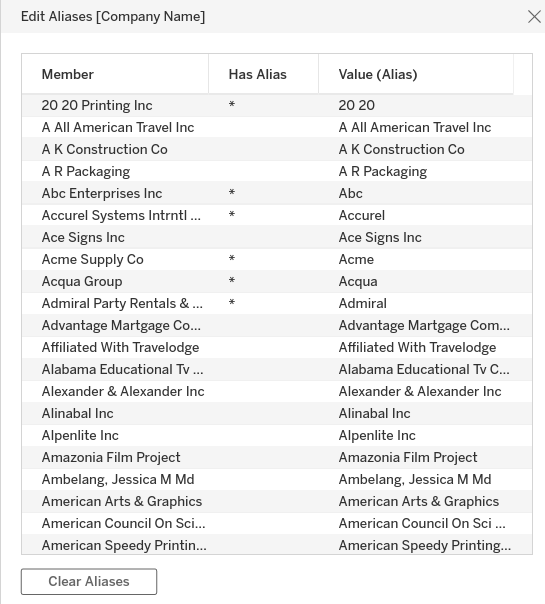
We have taken the Company Name field from the table in this example. You can now set the aliases of any field according to your needs.
Performing Data Blending using Alias
Data blending in Tableau means aggregating data from multiple sources to create a combined view for analysis. Alias provides alternate names and labels to data. Hence it does not directly impact data blending but affects the display and labeling of data within Tableau.
When data blending between two different sources, we can use aliasing to re-alias the matching values in a data source by using the values in the fields from another data source. Let us understand this through an example.
Suppose we take the same data source, us-500, and one additional source Employee Sample Data. Now we want to blend the two data sources using the "city" data field in both sources.
Step 1: Adding the sources to the workbook
Add both sources to the workbook using the Files section and select the required files from your system.
Step 2 : Add the required fields to the view
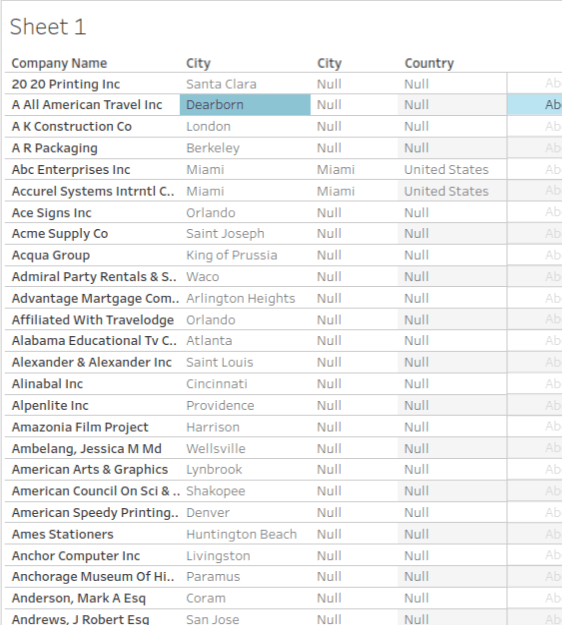
Now we can add the required fields to the view by dragging them from the Tables section and moving to the Rows section.
The view will now look something like this.
Step 3: Aliasing the secondary data
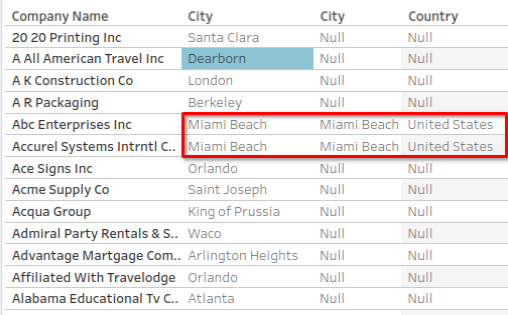
We can see that the primary and secondary data are blended through the City field in both data sources.
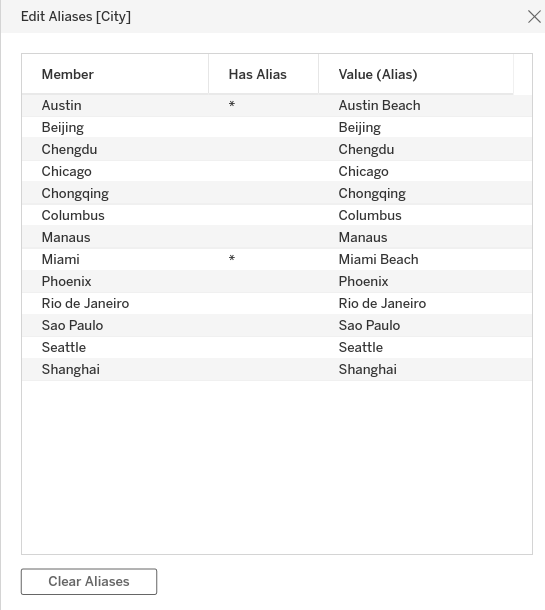
We can use this data-blending to realize the data in the City field of the primary source. Select the aliasing option from the City field of the secondary data and alias its values.
We see that the alias values in the secondary data source have replaced the field values in the primary data source.
Benefits and Limitations of Aliases in Tableau
Aliases provide several benefits while working in Tableaus, but aliases also have several limitations also. In this section we will discuss each of them in brief.
Benefits
Customization - Aliases provide the functionality to give alternate names to the data values as well as the data fields in the dataset. This helps in better customization of the dataset.
Simplification - Aliases are generally used to shorten the data fields or to provide better names to them. This helps to make the data look less cluttered and easier to read.
Contextualization - With the help of aliases we can include some additional information about the field labels. This helps the user to easily understand the data present in the particular field.
Limitations
Confusion - The ability of aliases to give alternate names to the data values can also prove to be confusing sometimes. Hence it is important to remember that aliases only display values, not the actual values.
Consistency - Aliases need to be used consistently across multiple data fields. Assigning different aliases to a particular value across different fields can cause confusion for the users.
Limited Functionality - Aliases are mainly used to rename data fields and data values in Tableaus. These do not have other significant use other than renaming.
Frequently Asked Questions
How are Aliases useful in Tableaus?
Aliases are a helpful feature in Tableau as they allow users to create custom alternative labels for data values and data fields without changing the actual data. These custom fields make the data easier to read, visualize and analyze.
How can we create Aliases in Tableaus?
An alias can be created very quickly and straightforwardly in Tableau. To create an alias for data in a particular field, click on the dropdown on the field name and edit the alias from the Edit Alias option.
Can we use Aliases in calculations in data blending?
An alias can be used in calculations during data blending. We can refer to the required fields by their aliases and use those names to perform calculations to create new calculated fields and other valuable purposes for analyzing data.
Conclusion
In this article, we discussed aliases in tableaus. We discussed some key features and the steps required to create aliases in Tableau. In the end, we concluded by discussing how to perform data blending using aliases. So now that you have learned about aliases in tableaus, you can also refer to similar articles.


 8+ registered

