


Introduction👨✈
In ReadyAPI, you can create projects, open existing project files or pack your project into a zip package. You can also see details about projects in project properties, and if needed, there are ways to configure various project settings and scripts. All these things fall under project management. Cool! Are you wondering about project management in ReadyAPI❓

Fine! So let us learn about project management in ReadyAPI.💫
Project Management in ReadyAPI✅
Project management in ReadyAPI includes creating projects, importing and exporting projects and project properties and settings. Alright! Let us learn all these one by one.
Creating Projects🧶
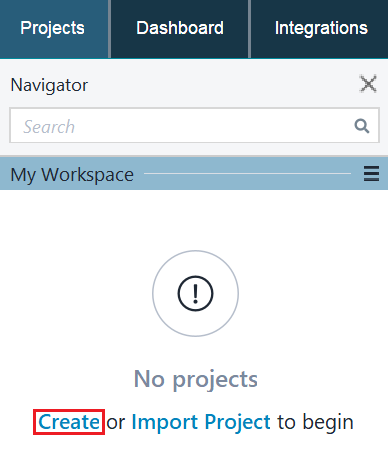
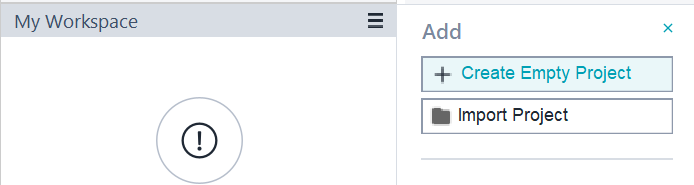
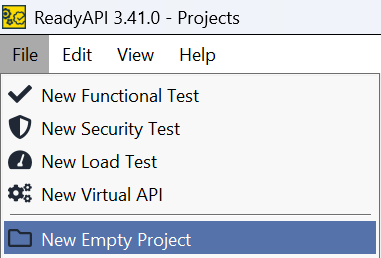
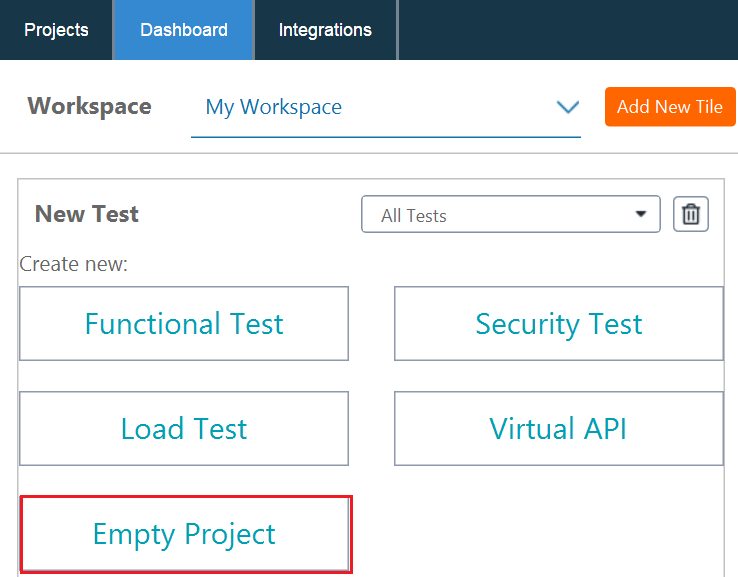
There are four ways to create an empty ReadyAPI project.
1️⃣Click on "Create" in the "Navigator" panel.➡️
2️⃣Click on the burger menu next to the workspace name and select "Create Empty Project".➡️
3️⃣Click on the "File" and select "New Empty Project".➡️
4️⃣On the "Dashboard", click on the "Empty Project" on the "New Test" tile.➡️
After you create a new project, ReadyAPI offers you to add API to it.
Importing and Exporting Projects⬇️⬆️
You can open existing project files and add them to your workspace. This process is called importing.
Import a Local Project⬇️
The local projects are stored on the same computer as ReadyAPI.

📌Project File
➼Click on "Import Project" to import a project file. Specify the ".xml" project file and click on "Open".
📌Composite Project
➼Click on "Import Composite Project" to import a composite project. Now select the root folder of the composite project and click on "Select Folder".
📌Packed Project
➼Click on "Import Packed Project" to import a packed project. Now specify the ".zip" archive with the packed project and click on "Open". And then specify the folder where you want to unpack the project.
Note⚠️ - The packed project should not be in the composite format, and the project ".xml" file should end with "-soapui-project.xml".
Import a Remote Project⬇️
You can import projects using the HTTP protocol. Using this feature, you can publish projects (like demonstrations, tutorials or bug reports) on a website and then import projects to a different computer.
1️⃣Click on the "Import Remote Project" to import a remote project.
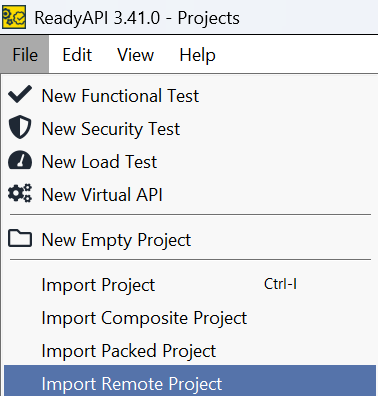
2️⃣Specify the remote URL to import the project file from a resource. And click on "OK".

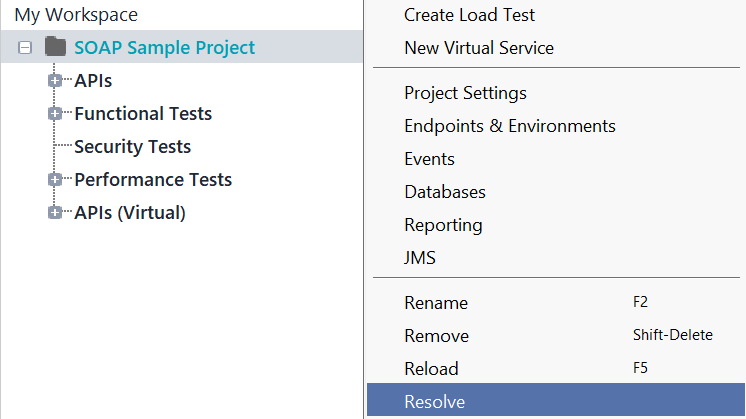
Resolve Import Issues✅
ReadyAPI resolves a project. It means ReadyAPI automatically checks consistency when you import a test case or project. It also checks whether it has all necessary external dependencies available. During the resolving process, you can check if the resources in your project or test case have unique identifiers or not. If your project contains errors, you will see the "Resolve Project" dialogue. There you have the option to choose an action to resolve the errors listed in the dialogue.
➼To manually resolve a project, right-click on the project in the "Navigator" panel and select "Resolve".
Reload Project🔄
📌To reload a project in the workspace.
➼Right-click on a project in the "Navigator" panel, or you can click on the "Project" in the menu bar and select "Reload".

➼Now select the ".xml" project file you want to reload and click on "Open".
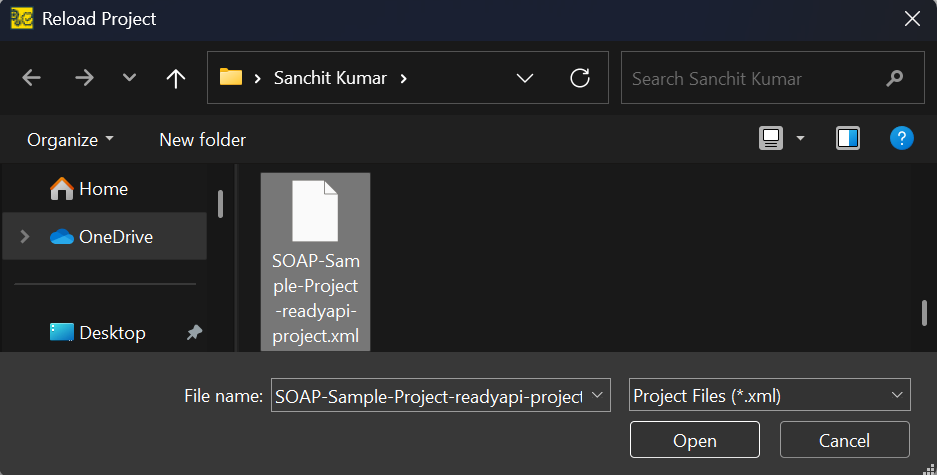
Note ⚠️- When you reload a project, ReadyAPI closes your project, discards the changes, and reopens the project file.
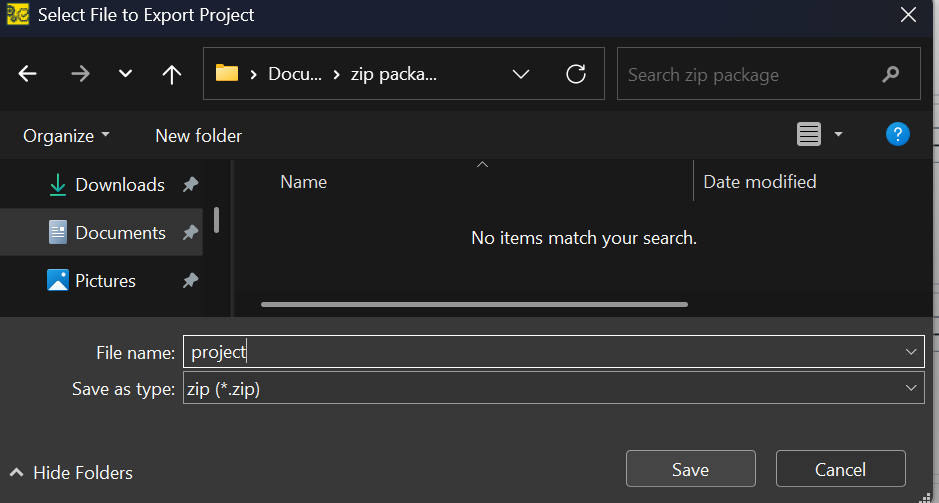
Export Project⬆️
ReadyAPI packs the project into a zip file when you export a project. Besides the project file, the package will contain all external dependencies, such as attachments, certificates, or external data sources. It is useful when you run the project or if you want to send your project to TestEngine.
📌To export a project.
➼Right-click on a project in the "Navigator" panel and select "Export".
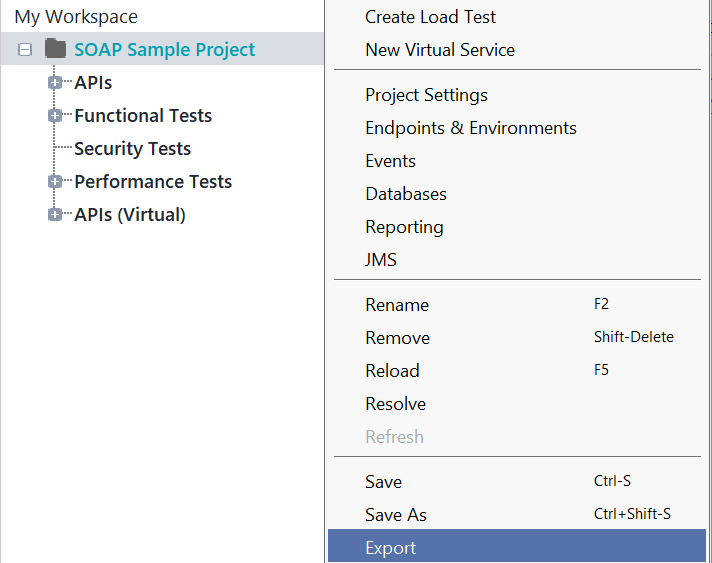
➼Now select a folder where you want to save the zip package. And click on "Save".
Project Properties🔗
You can see the project properties at the bottom of the "Navigator" panel.
Property is given on the left-hand side of the table. And property's corresponding value is given on the right. For example, "Name", "Description", "File", etc. are all default properties.
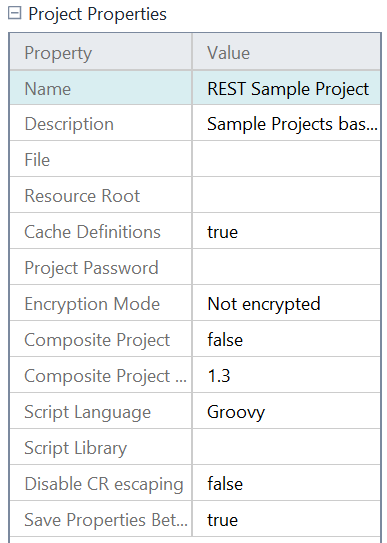
⚠️ReadyAPI supports two scripting languages.
📌Groovy (ver. 2.4.17) – It is the default scripting language in ReadyAPI.
📌Rhino JavaScript (ver. 1.7.10) – JavaScript Rhino engine by Mozilla Foundation.
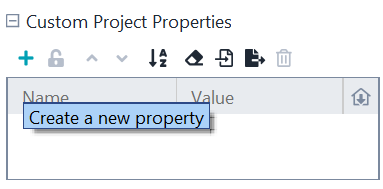
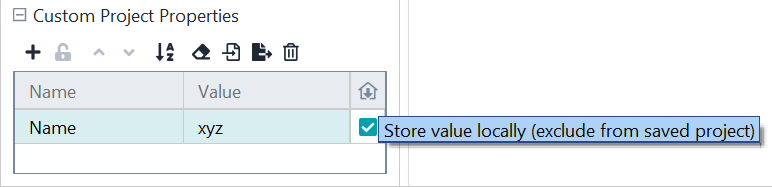
Custom Project Properties
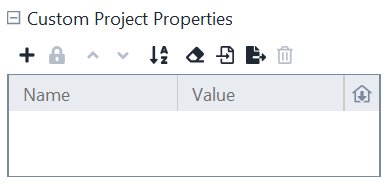
You can create any number of properties using the "Custom Project Properties" tab in the "Navigator" panel. These custom properties are available to all other entities in the project, such as test cases and test suites. You can hover over the toolbar icon to see that option's use.
You can store "Custom Project Properties" locally in your workspace file by selecting the checkbox on the right.
Project Settings⚙️
The "Project Settings" dialogue allows you to configure various project settings and scripts.
📌To open the "Project Settings" dialogue.
➼Right-click on a project in the "Navigator" panel, or you can click on the "Project" in the menu bar and select "Project Settings".
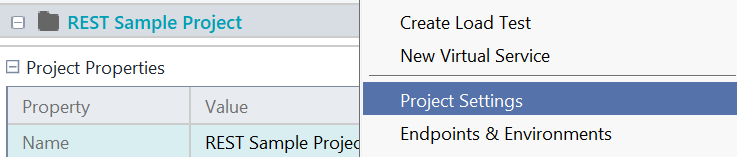
➼It will open the "Project Settings" dialogue.
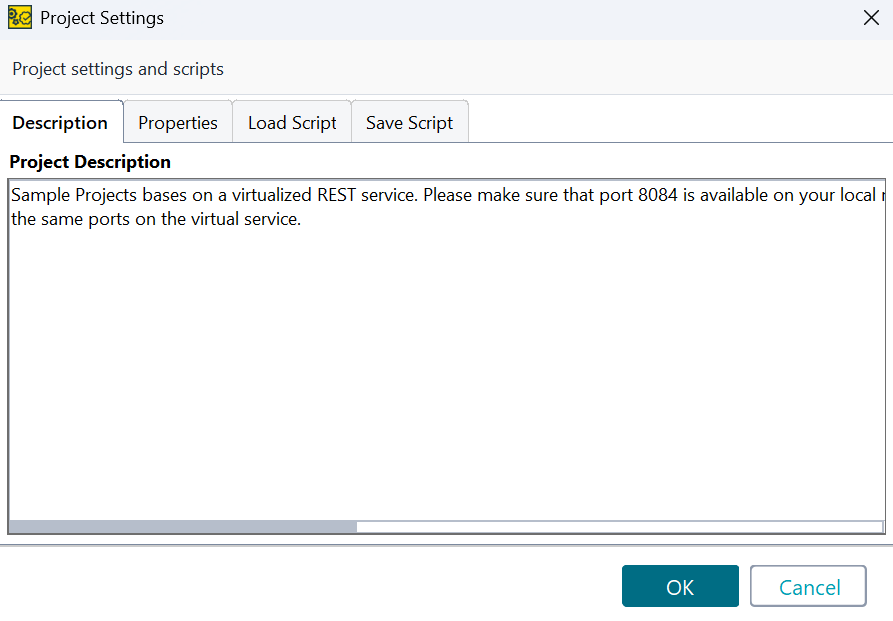
Here you have the "Description" tab, "Properties" tab, "Load Script" tab and "Save Script" tab.
➼In the "Description" tab, you can enter the project description.

➼In the "Properties" tab, you can configure the project "Custom Properties".

➼You can use the "Load Script" to import the external data or to create shared objects. It is run when the project is imported.

➼You can use the "Save Script" to store the external information used in the project. It is run when you save the project.

We hope you understand project management in ReadyAPI.


 8+ registered

