Do you think IIT Guwahati certified course can help you in your career?
Introduction
The .htaccess file is used by your WordPress site by default to manage the permalink structure, but many plugins also use it for other things like
To improve the efficiency of caching content, add special rules
Establish automatic rerouting
Switch from HTTP to HTTPS
based on IP addresses, block or restrict access
Boost the maximum upload size
So, let’s understand the WordPress .htacsess file in detail.
What is an .htaccess file in WordPress?
A .htaccess file in WordPress is a configuration file used to control various aspects of the web server's behavior for the specific directory where it's located. In WordPress, this file is primarily used to configure URL rewriting and manage website redirects. It allows site administrators to define rules for customizing the appearance and structure of URLs, improving SEO, and enhancing site security.
.htaccess file is commonly used to create clean and user-friendly permalinks, set up redirects for old URLs, and protect sensitive directories. The .htaccess file can be edited manually or configured through WordPress plugins to modify the site's behavior without altering the core WordPress code.
How to Use the .htaccess File in WordPress
WordPress saves some of its settings in the .htaccess File by default. When it rewrites URLs to make them more readable by humans and search engines, for example, it uses .htaccess.
WordPress automatically rewrites your .htaccess File to handle the URL structure you select when you go to Settings » Permalinks and select the URL structure for your blog.
W3 Total Cache, for example, will change your .htaccess File to configure the caching and optimisation tools included in the plugin.
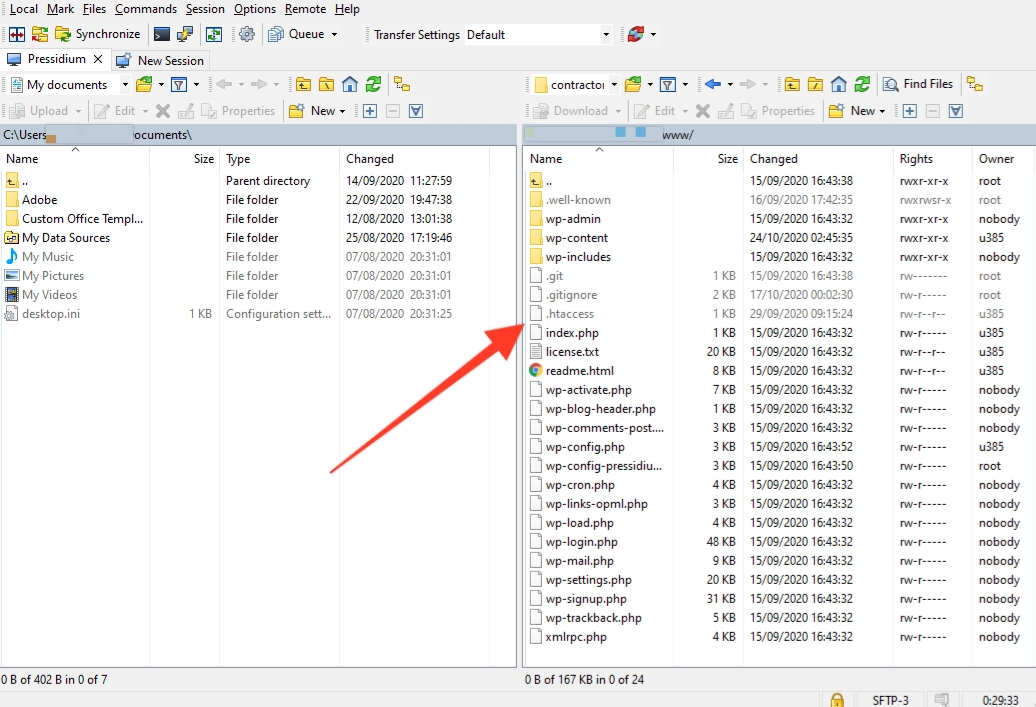
To locate the .htaccess file in WordPress, we need to follow these steps:
Step 1: Access our server
We need access to our web server's files. This can be done through various methods, such as FTP (File Transfer Protocol) or using your hosting provider's file manager in your control panel.
Step 2: Enable show hidden files option
We know that, by default, the .htaccess file is a hidden file. In our FTP client or file manager, make sure we have the option to show hidden files enabled. This setting is usually found in the preferences or settings section of our file management tool.
Step 3: Navigate to the WordPress root directory
Now, we need to go to the root directory of our WordPress installation to locate .htaccess. In this root directory, we can find main WordPress files, like wp-config.php.
How to Edit the .htaccess File in WordPress?
To edit the .htaccess file in WordPress, we need to follow these steps:
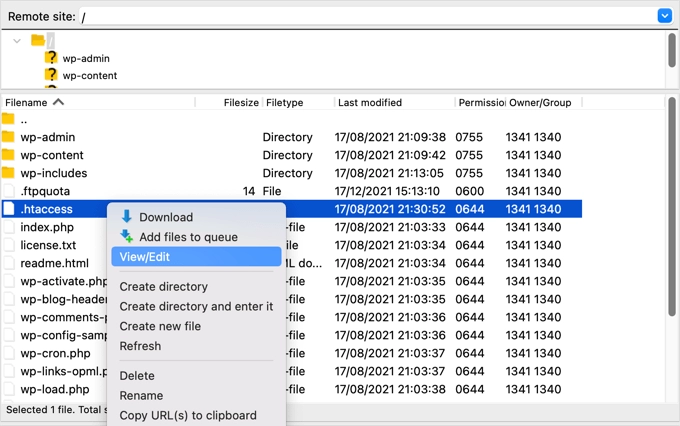
Step 1: Access our server
We need to use an FTP client (e.g., FileZilla) or our hosting provider's file manager to connect to our web server. We need login credentials for this.
Step 2: Locate the .htaccess file
Then we need to navigate to the root directory of our WordPress installation to locate the .htaccess file.
Step 3: Backup the .htaccess file
Now, we need to right-click on the .htaccess file before making any changes. Then choose "Download," and save a copy to our local computer. This serves as a backup in case anything goes wrong.
Step 4: Edit the .htaccess file
Then right-click on the .htaccess file on our server and choose an option to edit it. We can use a text editor (like Notepad++) or an integrated code editor if our FTP client provides one.
Step 5: Make changes
Now, we can add, modify, or delete the directives in the .htaccess file according to our needs. Common tasks include configuring custom permalinks, setting up redirects, or enhancing security. Be cautious when editing, as incorrect configurations can disrupt our website.
Step 6: Save the .htaccess file
Then after making changes, save the .htaccess file. If we're using a code editor within our FTP client, there is a "Save" button.
Step 7:Check our website
Now, visit our website to ensure that it's functioning correctly. Test various URLs and functionality to confirm that our changes haven't caused any issues.
Step 8: Upload the edited .htaccess file
If everything is working as expected, we can upload the edited .htaccess file back to our server, replacing the old one.
Step 9: Set permissions
Ensure that the .htaccess file has the correct permissions on our server. Typically, it should have permissions set to 644 (readable by owner, group, and others) to ensure it's secure.
Step 10: Test again
After uploading the edited file and setting permissions, test the website one more time to verify that it continues to work as intended.
How to Edit the .htaccess File Manually
Manually editing the .htaccess File is risky because, if configured incorrectly, it can result in significant server errors. We recommend you save a backup of your .htaccess file to your computer. If something goes wrong, you can use that File.
WordPress will occasionally be unable to write to the .htaccess File and will prompt you to do so manually. Make sure you only copy the exact contents that WordPress provides.
You can also check out our guide to the most useful .htaccess tricks for WordPress, which contains code snippets that allow you to customise your website. We'll show you how to secure your WordPress admin area with a password, set up redirects, block suspicious IP addresses, and more.
How to Use The .htaccess File
You'll need an FTP client or the file manager option in your WordPress hosting control panel to get to the .htaccess File. If you've never used FTP before, check out our tutorial on uploading files to WordPress using FTP.
.htaccess can be found in the root directory of your WordPress site. However, because file names that begin with a period are considered hidden by the server, your FTP client may not show the File at first.
What Your WordPress .htaccess File Can Do
Some of the important features of WordPress .htaccess files are:
Deny Access to Parts of Your Site
Denying access to certain pages and files is one of the most valuable things you can do with .htaccess. There are a few files you should consider hiding in this way for security reasons, such as your wp-config.php File. The following code can be added to accomplish this, but anyone attempting to read the file will receive a 404 error:
<Files ~ "/wp-config.php">
Order Allow,Deny
Deny from All
</Files>
Restricting access to a directory can be helpful in situations where sensitive data needs to be hidden. Your site may be vulnerable because many WordPress sites use the same folder structure. The default directory listing functionality is disabled if you add the following line:
Options-Indexes
Users and robots will be unable to see your folder structure due to this. Anyone attempting to access it will be greeted with a 403 error page.
URL redirection and rewriting
You can use redirects to send users to a specific page automatically. This is especially useful if a page has been moved or removed, and you want users who try to access it to be directed elsewhere. You can do this with a plugin like Redirection, but you can also do it manually by editing the .htaccess file.
You've probably figured out what's going on. The first part is the URL you want visitors to be redirected to, and the second is the path to the old File.
With HTTPS, you can force your website to load safely
If you have an SSL certificate installed on your domain, it's a good idea to make your site load using HTTPS, such as DreamHost's free Let's Encrypt certificate.As a result, your site will be safer for both you and your visitors.
To make it happen, add the following code:
RewriteEngine On
RewriteCond %{HTTPS} !=on
RewriteRule ^(.*)$ https://%{HTTP_HOST}%{REQUEST_URI} [L,R=301]
Any HTTP requests to your site will now be automatically redirected to HTTPS. If a user visits http://www.example.com, they will be automatically redirected to https://www.example.com.
Modify the Caching Options
Browser caching makes web pages load faster by temporarily storing specific website files on a visitor's local device. You can change the time your files are stored in the browser cache before being updated with new versions by using WordPress .htaccess.
Several options exist for doing so, including, but we'll use mod headers in this example. For all jpeg, png, jpg, and gif files, the following code changes the maximum caching time:
<ifModule mod_headers.c>
<filesMatch "\\.(jpg|jpeg|png|gif)$">
Header set Cache-Control "max-age=2592000, public"

</filesMatch>
We've set the maximum time limit to 2592000 seconds, or 30 days. If you want, you can change the amount and the file extensions that will be affected. Add more mod header functions if you want to add different settings for different extensions.
Script Injection Attacks Can Be Prevented
Script injection (also known as 'code injection') attacks attempt to alter how a website or application operates by injecting malicious code. Someone could, for example, paste a script into a text field on your site and submit it, causing your site to execute the script.
To defend against specific kinds of script injection, include the following code:
Your website should now be able to detect and prevent script injection attempts, redirecting the offender to your index.php page.
It's important to note that this example won't protect you from all types of injection attacks. While this code is undoubtedly valid, you should not rely on it as your only defence against this attack.
Stop enumeration attacks on user names
The process of harvesting usernames from your site by looking at each user's author page is known as username enumeration. This is especially problematic if someone manages to discover your admin username, which makes bots' access to your site much more accessible.
By adding the following code, you can help prevent username enumeration:
Attempts to enumerate usernames will be blocked, and a 403 error page will be displayed instead. Remember that this will not stop all enumeration attempts, and you should thoroughly test your security. We also advise adding Multifactor Authentication to your login page to make it even more secure.
Hotlinking of images should be avoided
When images from your server are displayed on another website, this is known as image hotlinking. The following code should be added to your WordPress .htaccess file to stop this from happening:
If example.com is changed to your own domain, this code will prohibit images from loading on any other websites. Instead, the last line will load the image you specified. This can be used to send an alternative image to websites that are attempting to display images from your server.
Maintain control over your file extensions
Although there are many things you can do with this functionality, including executing files as PHP, for the time being, we'll stay with a straightforward example.
The following code removes the file extension from PHP files when they are loaded. Any file type can be used as long as all instances of PHP are replaced with the desired extension:
This will load all PHP files without displaying their extension in the URL. For example, the index.php file will be renamed to index.php.
Force Downloading of Files
Instead of being downloaded to the visitor's computer if you are hosting an audio file, it will begin playing in their browser. Use the following code to achieve this:
AddType application/octet-stream mp3
We've used mp3 files in this example, but the same function can be used with txt, mov, or any other relevant extension.
Frequently Asked Questions
What is the default .htaccess file?
The default .htaccess file is a file that is created by WordPress for us. This file is used for enabling the URL rewriting feature in WordPress. It allows WordPress to create clean and user-friendly URLs.
In WordPress, what does htaccess mean?
The .htaccess is a WordPress configuration file that allows you to control how your server handles your website. On your WordPress site, the .htaccess file is one of the most powerful configuration files, allowing you to control 301 redirects, SSL connections, password protection, the default language, and more.
Is .htaccess modified by WordPress?
WordPress will automatically modify the contents of your site's .htaccess File based on File permissions by default. It does this multiple times, adding and updating the rewrite rules needed for WP's permalink functionality.
In WordPress, how many .htaccess files should I have?
In your web host root folder – the folder (usually /public HTML or /www) that holds the content of your website – there should be one .htaccess File. On your hosting account, you can have multiple. htaccess files, but only once for each directory or folder.
What is the .htaccess file in PHP?
The htaccess file is a web server configuration file that uses the Apache server software. The Apache server software recognises and executes the .htaccess file when placed in a directory loaded by the Apache web server.
Conclusion
The .htaccess file is an essential component of the WordPress core. As seen in this blog, it is regularly used to add, change, and override server-level customisations, security, and performance parameters.
But suppose you have just started your learning process and are looking for questions asked by tech giants like Amazon, Microsoft, Uber, etc. In that case, you must look at the problems, interview experiences, and interview bundle for placement preparations. Please look at this YouTube tutorial if you want to explore the preparation strategy for SDE placements.


 8+ registered

