Do you think IIT Guwahati certified course can help you in your career?
Introduction
The autocomplete="off" attribute in HTML is used to disable the browser’s autofill feature for form fields. This is commonly applied to sensitive input fields, such as passwords or payment details, to prevent automatic suggestions. However, some modern browsers may still override this setting for security reasons.
In this article, you will learn about the syntax of the autocomplete attribute, its use cases, and how to implement it effectively.
Description
Autocomplete is a browser feature that stores input history and suggests data when users fill forms. While this can be helpful, it may pose security risks, especially for sensitive fields like passwords, payment details, or personal information.
Turn Off Autocomplete
To disable autocomplete in an HTML form or input field, use the autocomplete attribute and set its value to off. This prevents browsers from storing and suggesting previously entered data.
Autocomplete is controlled by the `autocomplete` attribute in HTML. This attribute can be added to form elements or individual input fields. When set to "off," it stops the browser from storing or suggesting previously entered values. This is particularly useful for forms that handle sensitive information, like payment details or personal identification numbers.
To disable autocomplete, you need to add the `autocomplete="off"` attribute to either the `<form>` tag or specific `<input>` fields. Here’s how you can do it:
Example
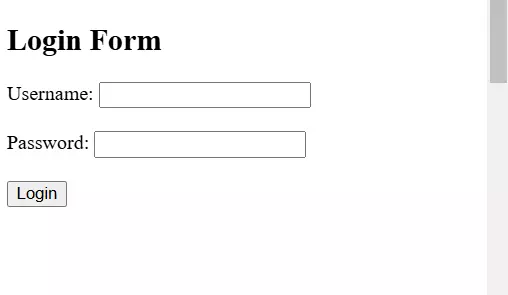
Example 1: Disabling Autocomplete for an Entire Form
Autocomplete is disabled only for the name field, while the phone number field may still show suggestions.
Why Disable Autocomplete?
Turning off autocomplete is essential in scenarios where security is a priority. For example, banking websites often disable autocomplete to prevent browsers from saving sensitive data like account numbers or PINs. Similarly, admin dashboards or systems handling confidential information benefit from disabling this feature.
However, there’s a trade-off. While disabling autocomplete enhances security, it might slightly inconvenience users who rely on autofill for faster form completion. Therefore, it’s important to use this feature wisely based on the context of your website.
Reasons to Disable Autocomplete
Security Concerns: Prevents browsers from storing and exposing sensitive data.
Improved User Experience: Avoids incorrect autofill suggestions.
Privacy Protection: Ensures confidential information is not saved.
Dynamic Forms: Forms that change dynamically may not work well with autocomplete.
Understanding Autocompletion and Autofill
Autocompletion
Autocompletion suggests previously entered values in form fields. When enabled, browsers offer input suggestions based on past entries.
Example: If you have previously entered "JohnDoe@gmail.com" in an email field, the browser might suggest it when you start typing "J".
Autofill
Autofill is a broader feature where browsers automatically fill in known user details like name, address, or credit card information.
Example: When filling a checkout form, the browser may autofill your shipping address and payment details.
Managing Autofill for Login Fields
Autofill is a feature closely related to autocomplete but focuses specifically on filling out login fields like usernames & passwords. While autocomplete suggests previously entered data, autofill automatically populates fields based on saved credentials in the browser. This can be convenient for users but may pose security risks if misused.
To manage autofill for login fields, you can use the same `autocomplete` attribute with specific values tailored to control how browsers handle these inputs. Let’s understand this step by step.
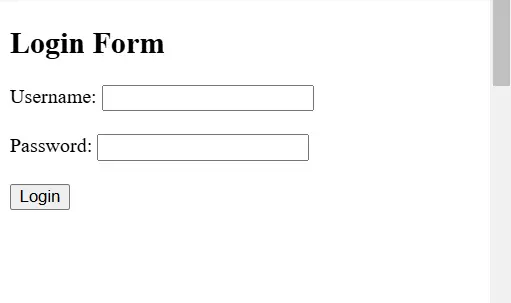
Example 1: Preventing Autofill for Login Forms
If you want to stop browsers from autofilling login details, you can set the `autocomplete` attribute to "off" for both the username & password fields. Here’s an example:
In this code, both the username & password fields have `autocomplete="off"`. This ensures that the browser won’t suggest or populate saved credentials for these fields.
Example 2: Allowing Autofill for Username but Not Password
Sometimes, you might want to allow autofill for the username field while disabling it for the password. This strikes a balance between user convenience & security. Let’s see how you can implement this:
Here, the `autocomplete="on"` attribute is applied to the username field, allowing the browser to suggest or autofill saved usernames. However, the password field has `autocomplete="off"`, ensuring no saved passwords are populated automatically.
Why Manage Autofill?
Managing autofill is crucial for balancing usability & security. For public websites where users frequently log in, enabling autofill for usernames can improve user experience. On the other hand, disabling autofill for passwords ensures sensitive information isn’t exposed, especially on shared devices.
It’s also worth noting that some modern browsers override the `autocomplete="off"` setting for password fields to enhance user convenience. In such cases, additional measures like server-side validation or multi-factor authentication (MFA) should be implemented to ensure security.
Practical Applications
This technique is commonly used in banking apps, admin panels, & e-commerce checkout pages. For instance, an online store might disable autofill for credit card details while allowing it for shipping addresses. Similarly, educational platforms often disable autofill for exam login forms to prevent unauthorized access.
Browser Compatibility
The autocomplete="off" attribute is supported by most modern browsers. However, some browsers may override this setting for specific fields, such as passwords.
Browser
Supports autocomplete="off"
Chrome
Yes, but ignores for passwords
Firefox
Yes
Edge
Yes
Safari
Yes
Opera
Yes
Frequently Asked Questions
Does autocomplete="off" work on all fields?
Not always. Some browsers ignore this setting for login credentials due to security policies.
Is autocomplete="off" necessary for security?
Yes, it prevents unauthorized access to stored user input data.
How do I ensure autocomplete is fully disabled?
Use autocomplete="new-password" for password fields, as some browsers ignore off.
Conclusion
In this article, we learned about using the autocomplete="off" attribute in HTML to disable autofill for input fields. This feature helps improve security and user experience by preventing browsers from storing and suggesting input values. Understanding how and when to use it allows developers to create better forms while ensuring data privacy and control.


 9+ registered

