


Introduction
Azure is a public cloud computing platform by Microsoft that provides a range of cloud services, including computing, analytics, storage, and networking. A user can choose from these services provided to either develop and scale new applications or run existing applications in the public cloud.
Redis is an open-source, in-memory data store, cache, streaming engine, and message broker which is used as a database by millions of developers. Azure Cache for Redis provides an in-memory data store that is based on Redis. Redis helps in improving the performance and scalability of an application that uses backend data stores heavily. It keeps frequently accessed data in the server memory, which can be written to and read quickly so that it can process large volumes of application requests. It is a low-latency and high-throughput data storage solution for modern applications.
Azure Cache for Redis has both the Redis open-source as well as Redis Enterprise as a managed service. It offers secure and dedicated Redis server instances and full Redis API compatibility. Microsoft operates this service which is hosted on Azure. It can be used by any application which is within or outside of Azure. It has the ability to be deployed as a standalone, or it can be deployed with other Azure database services such as Azure SQL.
Guide to Create an open-source Redis Cache
The user can start with an Azure Cache for Redis instance of any tier and size, and it even has the capability to scale it when required to meet the application's performance needs. Azure Cache provides a fully managed and complete open-source Redis within Azure only.
Creating a Cache
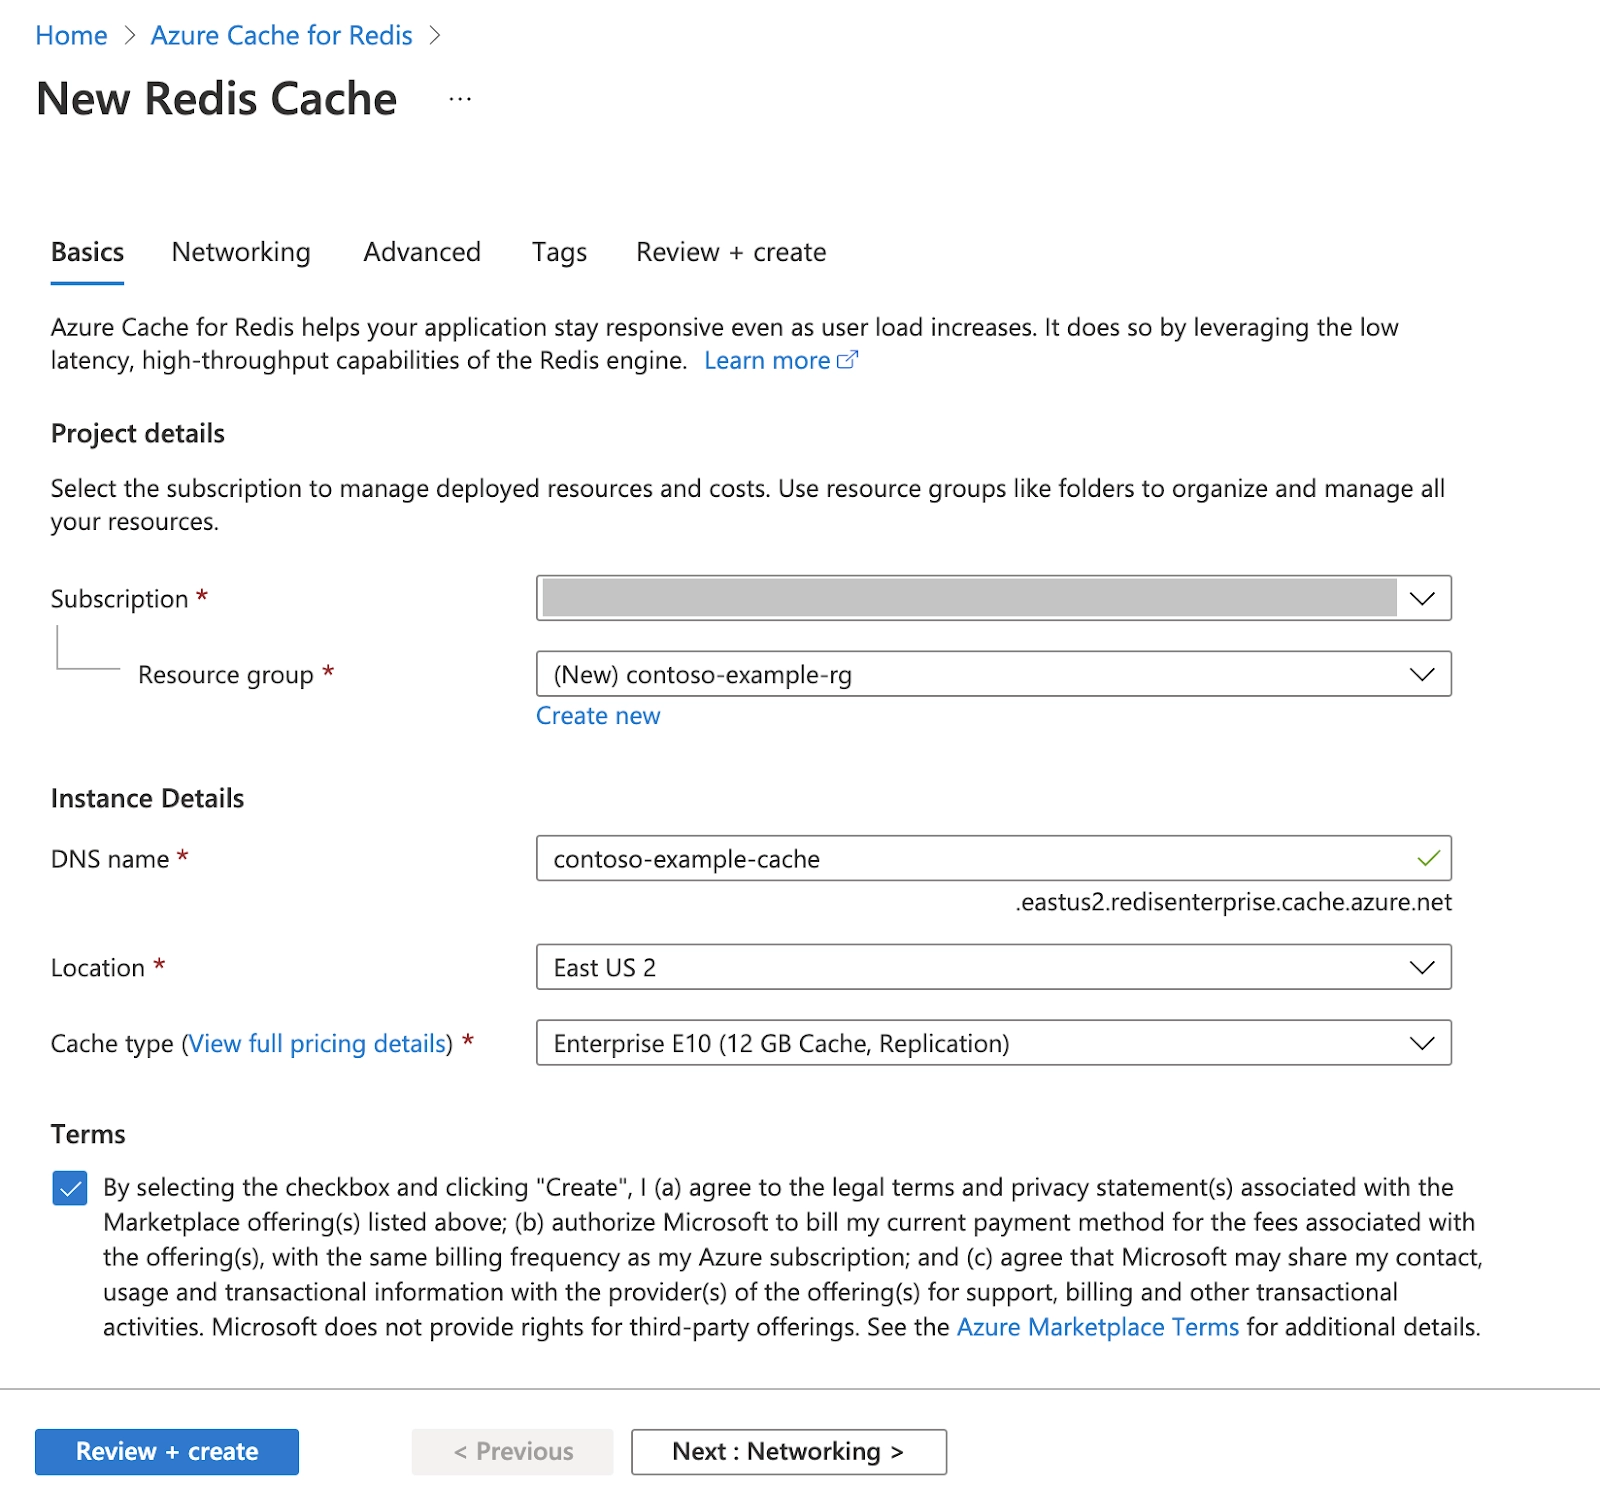
Follow the steps to create a Cache
- Sign in to the Azure portal and click on the Create a resource option.

- On the New page, click on the Databases option and select Azure Cache for Redis

- Configure the settings for the new cache as per demand on the New Redis Cache page.

- Click on the Networking button available at the bottom of the page.
- Choose a connectivity method in the Networking tab.
- Click on the Next: Advanced button available at the bottom of the page.
-
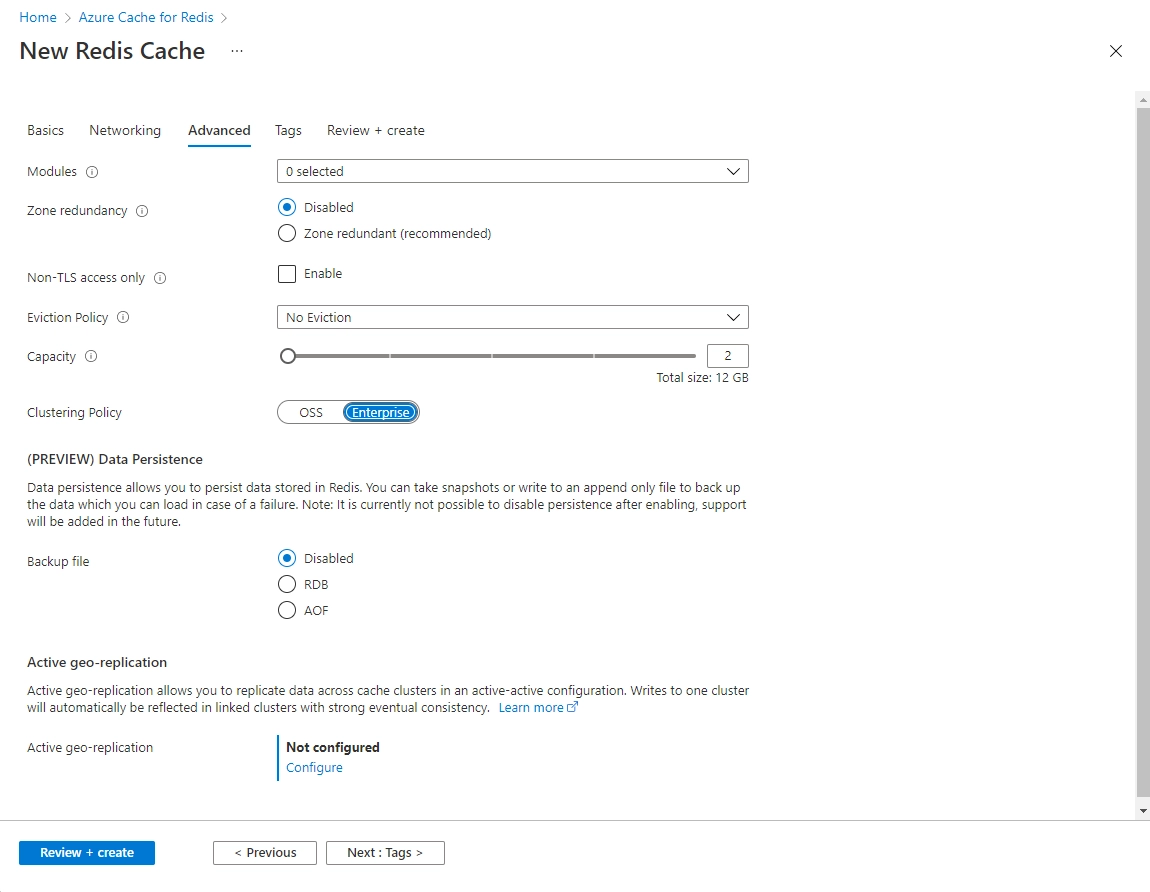
Enable the non-TLS port in the Advanced tab for basic or standard cache instances. It also allows you to choose which version of Redis you want to use

- The user can configure the settings for non-TLS port, clustering, and data persistence for premium cache instances inside the Advanced tab.
- Click on the Next: Tags button available at the bottom of the page.
- If you wish to categorize the resources, you can enter a name and value in the Tags tab.
- After selecting Review + create, the user is taken to the Review + create tab, where Azure validates the configuration.
-
Once the green Validation passed message appears, click on Create.
It takes some time to create a cache. The user can monitor the progress on the Azure Cache for the Redis Overview page. Once the status shows Running, it means that the cache is ready to be used.


 8+ registered

