


Introduction
Azure SQL virtual machines are lift-and-shift applications that require minimal or no changes to be migrated quickly to the cloud. For migration to Azure, SQL virtual machines offer full administrative control over SQL Server instances and underlying operating systems. In this article, we will learn how to create SQL Server on a Windows virtual machine in the Azure portal and with Powershell. Let us move further and look into the topic.
Create SQL Server on a Windows virtual machine in the Azure portal
The first thing to do is to take an Azure subscription. If you don't have one, create a free account before you begin.
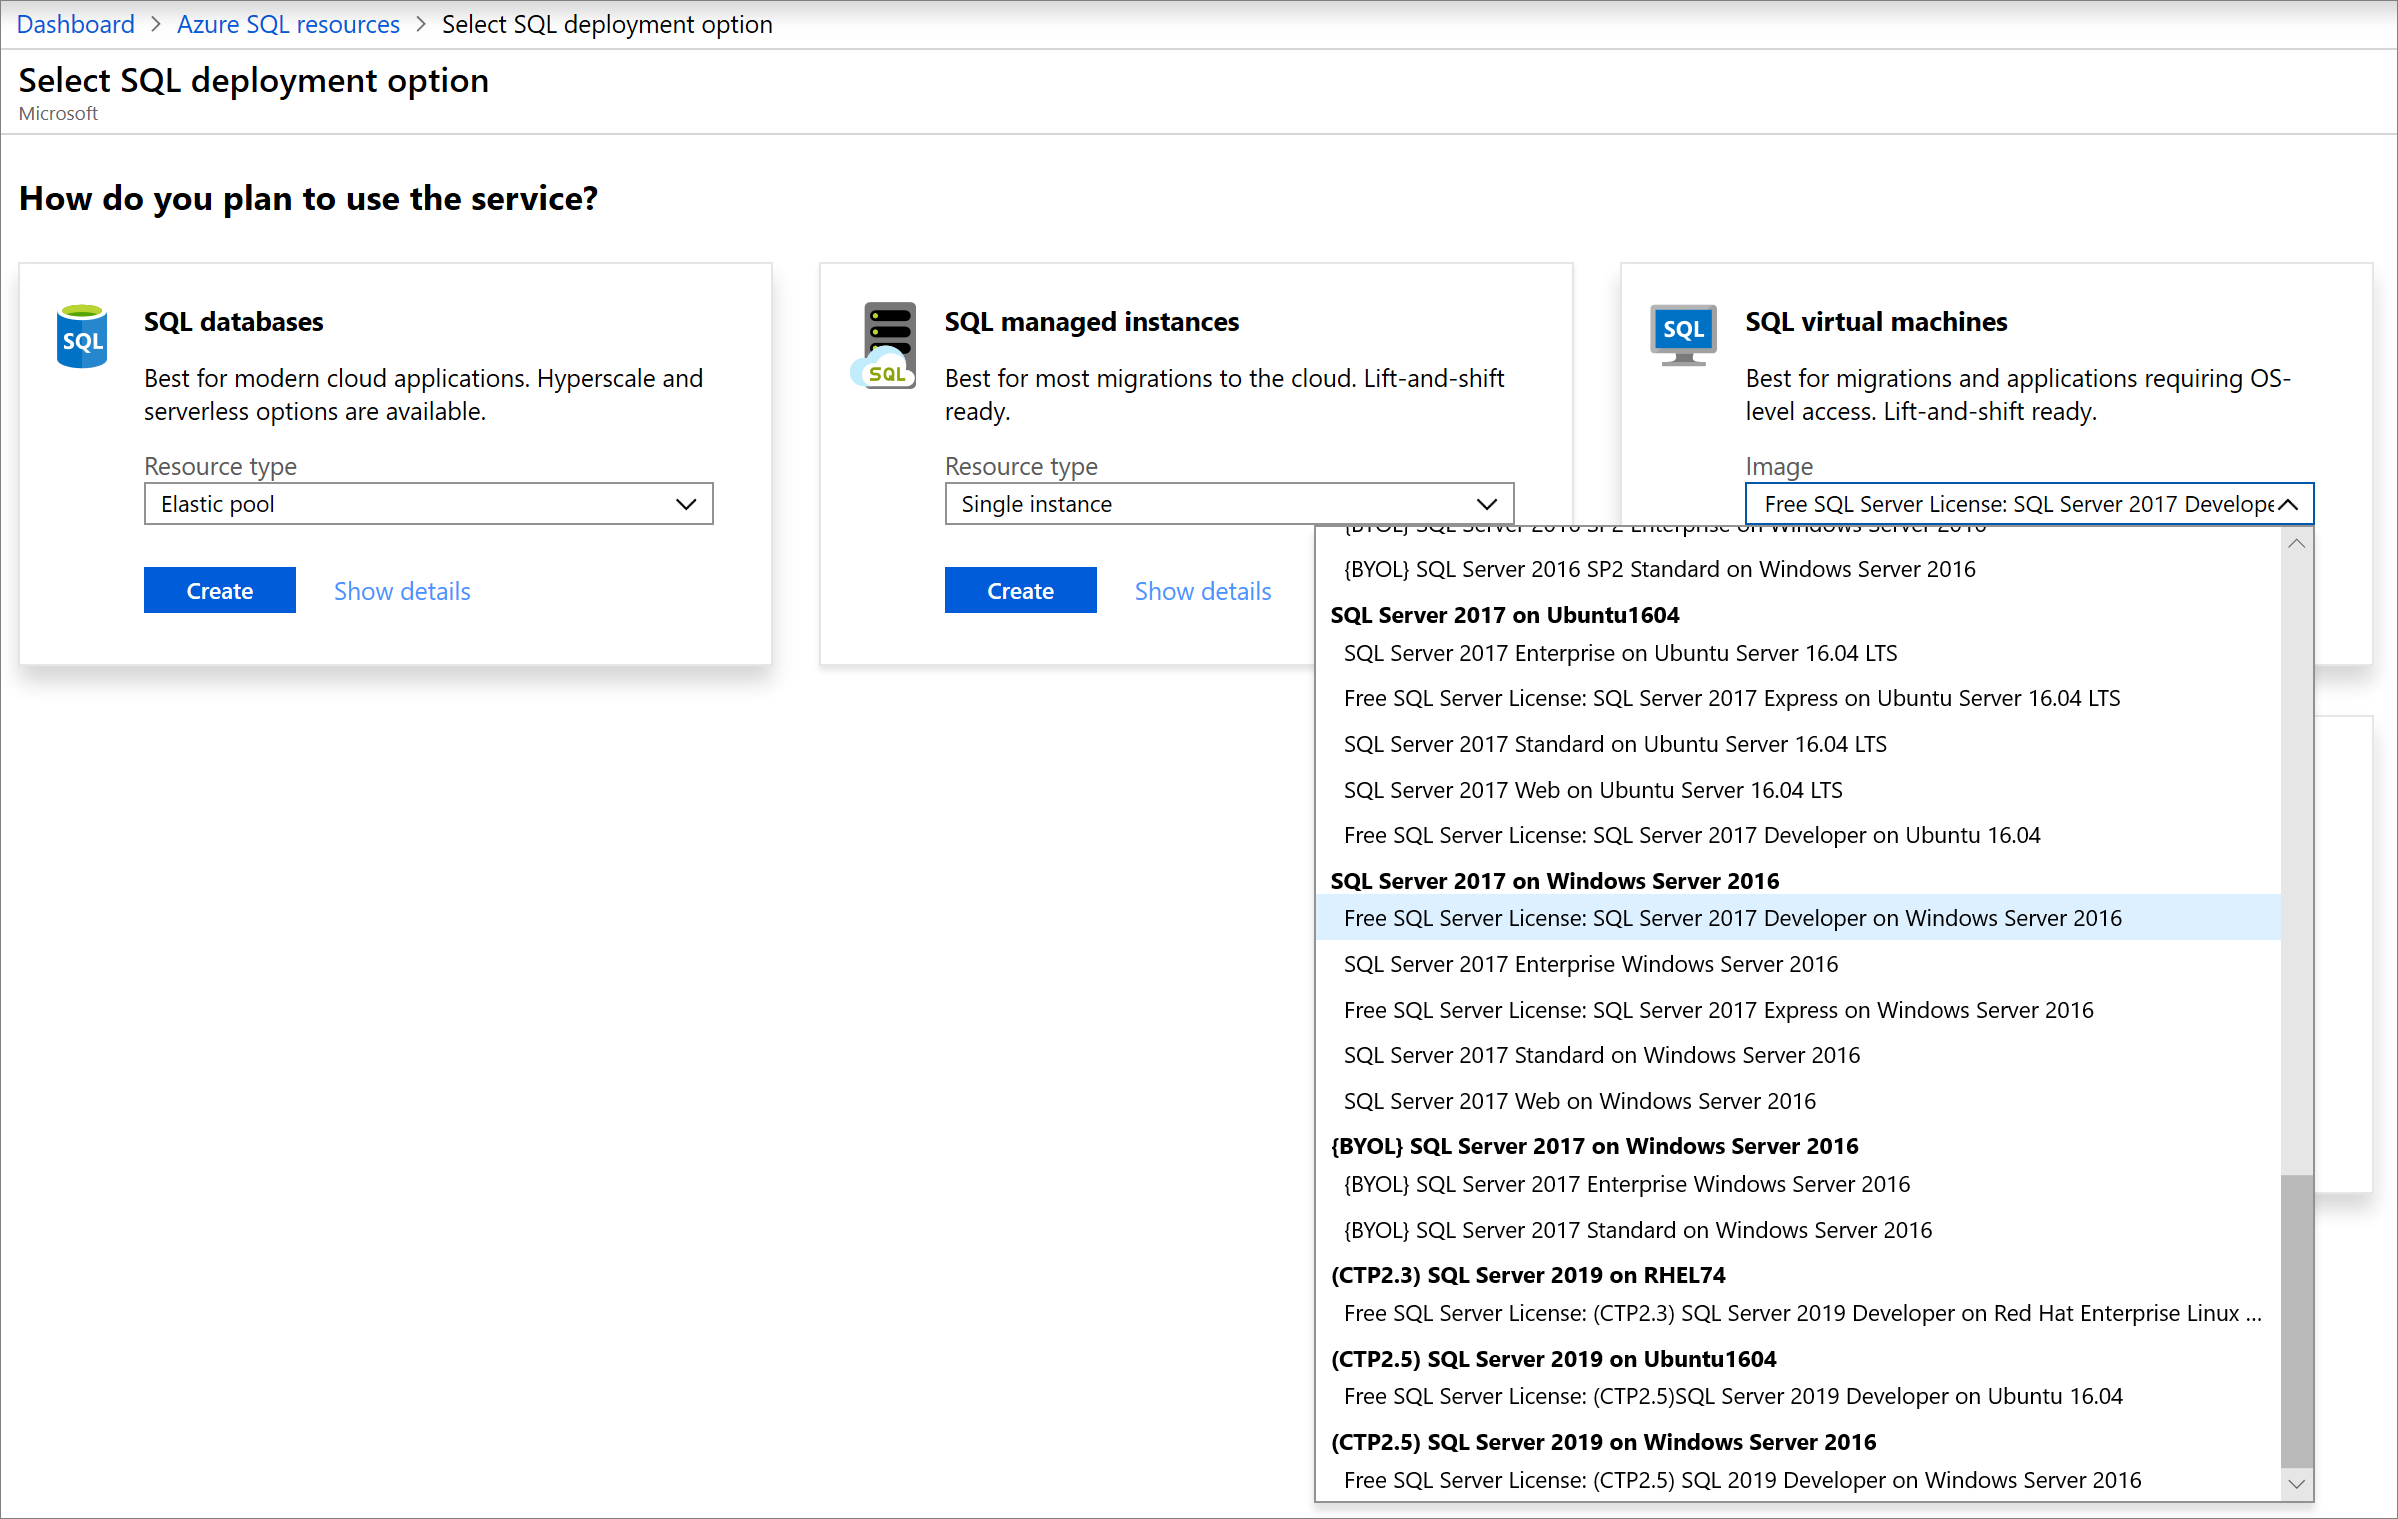
Select a SQL Server VM image
- Sign in to your Azure account.
- Select Azure SQL present in the left-hand menu of the Azure portal. If it is not in the list, select All services and type Azure SQL in the search box.
- Choose +Add to open the Select SQL deployment options page. By choosing Show details on the SQL virtual machines, you can view additional information.
- Select one free SQL Server License version from the dropdown and select Create.
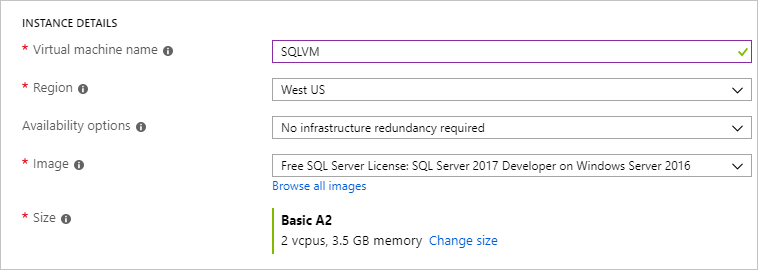
Provide basic details
On the Basics tab, provide the following information:
- Select your Azure subscription in the Project Details section and then select Create new to create a new resource group. Type SQLVM-RG for the name.

2. Under Instance details:
- Type SQLVM for the Virtual machine name.
- Choose a location for your Region.
- For this quickstart, leave Availability options set to No infrastructure redundancy required.
- Select the image with the SQL Server version in the Image list you want.
-
Change size for the size of the virtual machine and select the A2 Basic offering. Clean up your resources once you're done with them to prevent unexpected charges.

3. Under the Administrator account, provide a username, such as azure user, and a password.

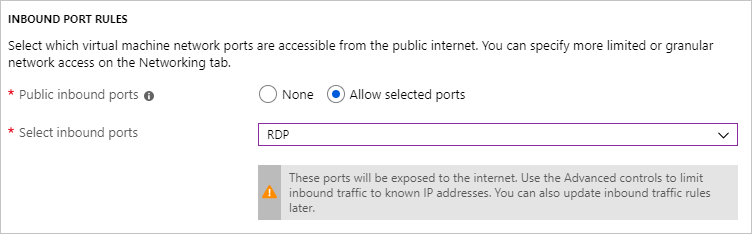
4. Choose Allow selected ports and select RDP (3389) from the dropdown under Inbound port rules.
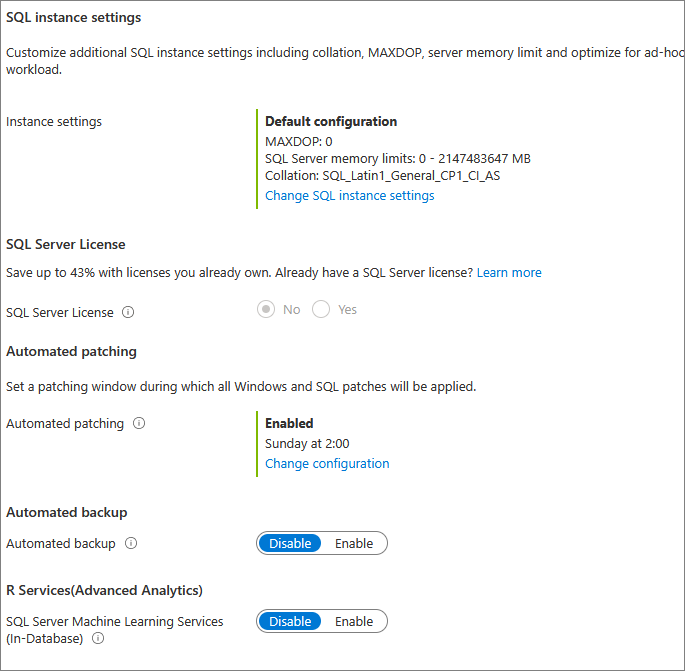
SQL Server settings
Configure the following options on the Sql Server settings tab:
- Select Public for SQL Connectivity under Security & Networking, and change the port to 1401.
- Select Enable under SQL Authentication. The SQL login credentials are set to the same user name and password that you configured for the VM. Use the default setting for Azure Key Vault integration.

3. Change other settings if needed, and then select Review + create.
Create the SQL Server VM
Review the summary on the Review + create tab, and select Create to create SQL Server, resource group, and resources specified for this VM.
The deployment can be monitored from the Azure portal. The Notifications button at the top screen shows the deployment's basic status. Deployment can take several minutes.
Connect to SQL Server
- In the portal, Search for the Public IP address of your SQL Server VM in the Overview section of your virtual machine's properties.
- On a different computer connected to the Internet, open SQL Server Management Studio (SSMS).
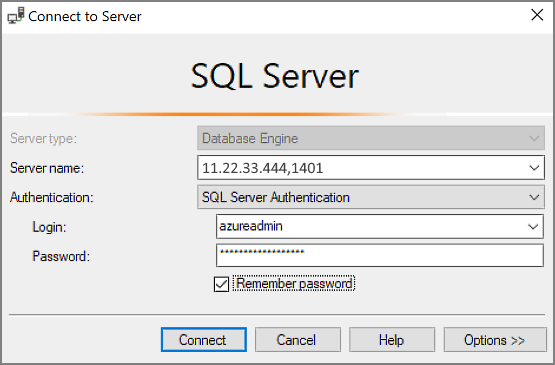
- In the Connect to Server or Database Engine dialog box, edit the Server name value. Enter your VM's public IP address. Then add a comma and the custom port (1401) you specified when configuring the new VM. For example, 11.22.33.444,1401.
- Select SQL Server Authentication in the Authentication box.
- Type the name of a valid SQL login in the login box.
- Type the password of the login in the Password box and select Connect.
Log in to the VM remotely.
The following steps can be used to connect to the SQL Server virtual machine with Remote Desktop:
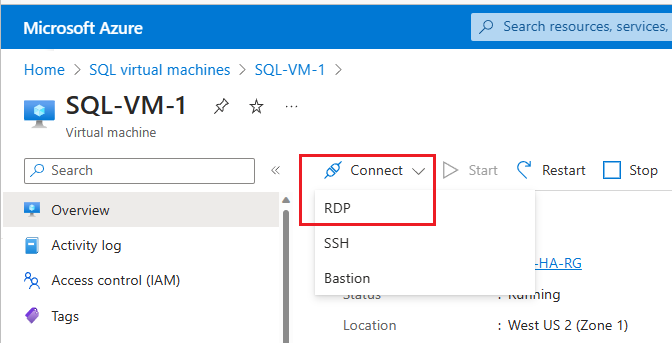
- After the Azure VM is created and is running, click the Virtual Machines icon in the Azure portal to view your VMs.
- Click the ellipsis, ..., for your new VM and click Connect.
- Open the RDP file that your browser downloads for the VM.
- There is no way to identify the publisher of the Remote Desktop Connection. Click Connect to continue.
- Click Use a different account in the Windows Security dialog. You would have to click More choices to see this. Specify the user name and password you configured when creating the VM.
- Click OK to connect.

Using your local administrator credentials, launch SQL Server Management Studio after connecting to the SQL Server virtual machine. You could use your SQL login and password to connect with SQL Server Authentication during provisioning.
It is possible to change the machine and SQL Server settings directly based on your requirements if you have access to the machine. For example, you can configure the firewall settings or change SQL Server configuration settings.


 9+ registered

