Textarea Binding
Let's look at a basic example to see how textarea binding works:
index.html file:
<html>
  <head>
     <title>Vue.js Data Binding</title>
     <link rel="stylesheet" href="index.css">
       <script src="https://cdn.jsdelivr.net/npm/vue/dist/vue.js"></script>
   </head>
   <body>
     <div id = "databinding">
        <h3>Textbox</h3>
        <input  v-model = "Message" placeholder = "Type Message.." />
        <h3>The Message is: {{Message}}</h3>
        <hr/>
        <h3>Text Area</h3>
        <textarea v-model = "longmessage" placeholder = "Write Long Message"></textarea>
        <h1><p>{{longmessage}}</p></h1>
        <hr/>
        <h3>Checkbox</h3>
        <input type = "checkbox" id = "checkbox" v-model = "checked"> {{checked}}
     </div>
     <script src="index.js"></script>
  </body>
</html>
index.js file:
var vm = new Vue({
   el: '#databinding',
   data: {
       Message:'',
       longmessage:'',
      checked : false
   }
})

You can also try this code with Online Javascript Compiler
index.css file:
html, body {
   margin: 5px;
   padding: 0;
}
The following output will appear after the program has been executed:
Output:
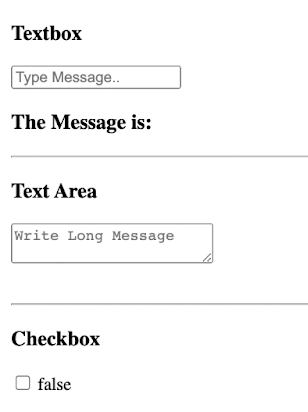
The textbox and text Area are now empty. The checkbox is unchecked as well, revealing the false value. Now put something in the textbox and textarea; the v-model will be given the value message, and the message will be displayed in {{message}}, which will show whatever is typed in the textbox. Similarly, the value entered in the textarea will be shown.
Output:

Radio and Select Binding
To show radio and select binding, consider the following example:
index.html file:
<html>
  <head>
     <title>Vue.js Data Binding</title>
     <link rel="stylesheet" href="index.css">
       <script src="https://cdn.jsdelivr.net/npm/vue/dist/vue.js"></script>
   </head>
   <body>
     <div id = "databinding">
        <h3>Subscribe?</h3>
        <input type = "radio" id = "yes" value = "Yes" v-model = "picked"> Yes
        <input type = "radio" id = "no" value = "No" v-model = "picked"> No
        <h3>Subscription choice clicked: {{picked}} </h3>
        <hr/>
        <h3>Select</h3>
        <select v-model = "languages">
           <option disabled value = "">Please select one</option>
           <option>Java</option>
           <option>PHP</option>
           <option>C</option>
           <option>C++</option>
           <option>JavaScript</option>
        </select>
        <h3>Your selected language is: {{ languages }}</h3>
        <hr/>
     </div>
     <script src="index.js"></script>
  </body>
</html>
index.js file:
var vm = new Vue({
           el: '#databinding',
           data: {
              picked : 'No',
              languages : "Java"
           }
        })
You can also try this code with Online Javascript Compiler
The following output will appear after the program has been run:
Output:

The default selected subscription Choice element is No, and the selected language is Java, as we can see. We can now adjust the value to whatever we like. Take a look at the output:
Output:

Modifier Binding
Let's look at an example that uses all three modifiers .trim, .number, and .lazy are all combined.
.number Modifier:
It's used when you want user input to be immediately typecast into a number. It simply allows you to type in numbers. Other than numbers, it does not accept any other input.
<input v-model.number = "age" type = "number">
.lazy Modifier:
It's used to show the content in the textbox only when the user has finished typing and exited the textbox. By default, the v-model synchronises the input with the data after each input event.
<input v-model.lazy = "msg">
.trim Modifier:
This modification is used to automatically clip whitespace from user input. It removes any gaps at the beginning and end of the sentence.
<input v-model.trim = "message">
index.html file:
<html>
  <head>
     <title>Vue.js Data Binding</title>
     <link rel="stylesheet" href="index.css">
       <script src="https://cdn.jsdelivr.net/npm/vue/dist/vue.js"></script>
   </head>
   <body>
     <div id = "databinding">
         <h3> The .number modifier example</h3>
         <span style = "font-size:20px;">Enter Count:</span> <input v-model.number = "count" type = "number">
         <br/>
         <br/>
         <hr/>
         <h3> The .lazy modifier example</h3>
        <span style = "font-size:20px;">Enter Message:</span> <input v-model.lazy = "msg">
        <h4>Display Message : {{msg}}</h4>
        <br/>
        <hr/>
        <h3> The .trim modifier example</h3>
        <span style = "font-size:20px;">Enter Message : </span><input v-model.trim = "message">
        <h4>Display Message : {{message}}</h4>
     </div>
     <script src="index.js"></script>
  </body>
</html>
index.js file:
var vm = new Vue({
           el: '#databinding',
           data: {
              count : 0,
              msg: '',
              message : ''
           }
        })
You can also try this code with Online Javascript Compiler
The following output will appear after the program has been run:
Output:

Every modifier is empty, as you can see. You can now enter any values to see the output as shown below.
Output:

FAQs
-
In Vue, how do we do form input bindings in Vue.js to bind a value to an input?
On form input, textarea, and select elements, we can use the v-model directive to build two-way data bindings.
-
In Vue.js, what is the v-model?
The Vue v-model directive allows for two-way data binding between an input and form data or between two components.
-
Can we use v-model with Components?
To use a v-model with components, the component must accept a value prop and emits an input event.
-
How does the v-model directive improve speed?
The v-model directive improves speed because we can easily keep tabs on our template section and data object.
Key Takeaways
We've learned about the importance and implications of form input bindings In Vue.js. Form input bindings in Vue.js using v-model are an excellent way to ease user input synchronization. To establish two-way binding in Vue, use the v-model directive. Trim,.number, and lazy are three types of modifier bindings we've learned about.
Don't stop here. If you liked this blog about form input bindings in Vue.js, check out our Learn Vue free course to learn Vue from scratch. Also, feel free to check out the blog Vue JS Vs React in 2021.


 8+ registered

