


A Student Registration Form in HTML is a user-friendly online form used to gather essential information from students for enrollment in a course or program. It typically includes fields for personal details such as name, age, address, and contact information, as well as academic information like previous education, desired course, and other relevant data. The form helps streamline the registration process by allowing students to submit their information electronically, ensuring that the data is easily accessible and manageable for educational institutions.

What will we Create?
We are going to create a student registration form with HTML. The form would have a title, a short description, some input fields, and a submit button.

The above image shows the final result of the form that we are going to create.
Steps to Create Student Registration Form in HTML
Below are the steps to create student registration form in HTML code.
1. Let’s first start by setting the basic template of an HTML webpage.
<!-- Html Document Begins-->
<!DOCTYPE html>
<html>
  <!-- Header Section-->
  <head>
    <meta charset="UTF-8" />
    <meta http-equiv="X-UA-Compatible" content="IE=edge" />
    <meta name="viewport" content="width=device-width, initial-scale=1.0" />
    <title> Student Registration Form </title>
  </head>
  <!--Body of the Webpage-->
  <body></body>
</html>
<!-- Html Document Ends-->
2. After this, let’s add a form tag. There are plenty of attributes for a form tag, but the most used are the action and the method attribute. The action defines where to send the form after submission, and the method specifies the HTTP method used to send the form. GET and POST are the two HTTP requests.
<form>
     // form elements goes here
 </form>
3. It’s now when we add headings and some description to our form. Create a <h2> tag and write “Student Registration form” inside it. Also, add a short description inside the <p> tag. Also, add a <br> tag at the end of <p> tag to create space before adding the next elements.
<form>
    <h2>Student Registration Form</h2>
    <p>Fill in this form to register</p>
    <br>
</form>
4. Woohoo!! We are now one step closer to reaching our final result. We now need to add some input fields and labels. <input> tag helps in collecting the information from the user, while <label> helps in labeling the input field. There are plenty of attributes present inside the <input> tag. Let's discuss some of the attributes which we are going to use:
- type: As the name suggests, this specifies the input type, i.e., number, text, email, etc.
- placeholder: It gives a short hint/description about the expected value of the input. This text disappears as one starts entering data in the input field.
- name: It specifies the reference to the form data after submission. It is used to refer to elements in JavaScript.
- required: This attribute makes an input field either mandatory or optional. It is a Boolean value. If the required attribute is present, that means the field is compulsory else; it is not.
Having done enough discussions on the <input> tag. Let's now create our first input field for the first name. We would make it required as it is the basic information needed for every user. Also, add a <br> tag at the end to create space before adding the next elements.
<form>
     <h2>Student Registration Form</h2>
     <p>Fill in this form to register</p>
     <br>

      <!--Input elements for form-->
      <label> First Name </label>
      <input type="text" placeholder="Enter your first name" name="first_name" required>
      <br>
</form>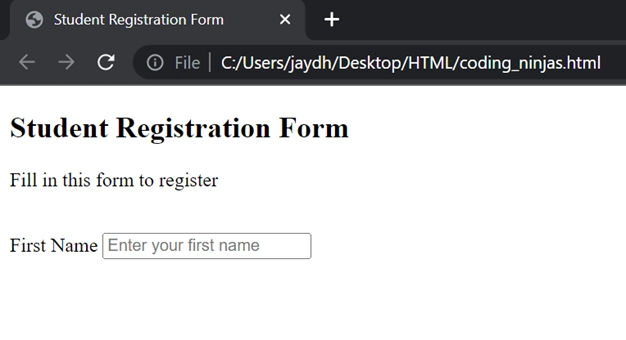
5. On a similar basis, let's add some more input fields. Make sure you set the type as date and password in the input fields for date and password, respectively. Also, keep adding <br> before and after every input tag so that it looks clean and spacious.
<form>
      <h2>Student Registration Form</h2>
      <p>Fill in this form to register</p>
      <br>

      <!--Input elements for form-->
      <label> First Name </label>
      <input type="text" placeholder="Enter your first name" name="first_name" required>
      <br>

      <br>
      <label> Last Name </label>
      <input type="text" placeholder="Enter your last name" name="last_name" required>
      <br>

      <br>
      <label> E-mail </label>
      <input type="email" placeholder="Enter your e-mail" name="email" required>
      <br>

      <br>
      <label> Date of Birth </label>
      <input type="date" name="dob" required>
      <br>

      <br>
      <label> Set Username </label>
      <input type="text" placeholder="Set Username" name="username" required>
      <br>

      <br>
      <label> Set Password </label>
      <input type="password" placeholder="Set password" name="password" required>
      <br>

 </form>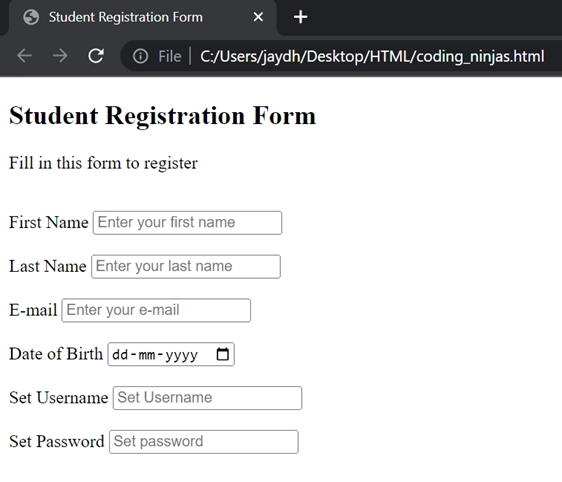
6. Did we miss some input fields that should be present here? Yes, you guessed it right, the Gender field is missing here. So should we create a text field for that, or should we put options for the user? As this field has predefined answers, it's better to provide alternatives to the user. For this, we need to keep the type as radio.
<br>
   <label>Gender</label><br>
   <input type="radio" name="gender" value="Male">

   <label for="Male">Male</label><br>
   <input type="radio" name="gender" value="Female">

   <label for="Female">Female</label><br>
   <input type="radio" name="gender" value="Others">

   <label for="Others">Others</label>
<br>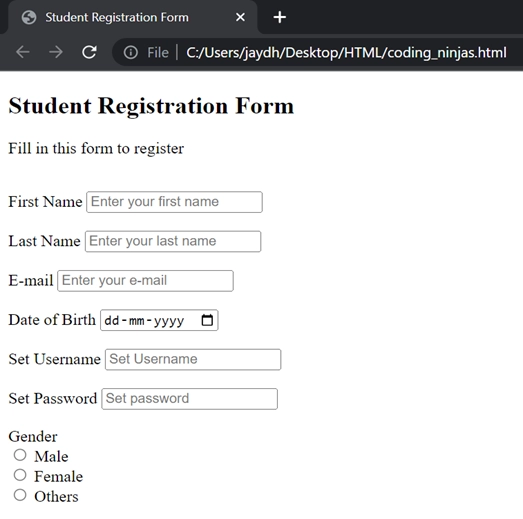
7. Congratulations!! We have come a long way already. We now finally have to add a drop-down of preferred courses. For this, we will use the <option> tag under the <select> tag.
<br>
 <label>Course :</label>

 <select>
     <option value="Course">Course</option>
     <option value="CS">Computer Fundamentals</option>
     <option value="AI">Artificial Intelligence</option>
     <option value="ML">Machine Learning</option>
     <option value="OOPS">Object Oriented Programming</option>
     <option value="DBMS">Database Management System</option>
 </select>

<br>

8. Finally, we just need to add the register button. For this, we just need to keep the input type as a button.
<br>
<input type="button" value="Register"/>
9. Kudos! We have now created a Registration form with proper input fields. Don’t you think the labels need to be bold to stand out? Let’s make the labels bold and align our form to the center. For making labels bold, just make the text in between the <b> tag.
For example:-
<label><b>First Name</b></label>Also, enclose the form tag inside a <div> tag making div as the parent of form and add styling as:
<div style="margin: auto;width: 30%;">This aligns the form and its elements to the centre.
10. In order to make the background color as orange. We just have to add the ‘bgcolor’ attribute to the body as:
<body bgcolor="orange">
Final Code
<!-- Html Document Begins-->
<!DOCTYPE html>
<html>
     <!-- Header Section-->
<head>
           <meta charset="UTF-8" />
           <meta http-equiv="X-UA-Compatible" content="IE=edge" />
           <meta name="viewport" content="width=device-width, initial-scale=1.0" />
 <title>
      Student Registration Form
 </title>
</head>

     <!--Body of the Webpage-->
<body bgcolor="orange">

          <!--Start of Form-->
          <div style="margin: auto;width: 30%;">
          <form>
             <h2>Student Registration Form</h2>
             <p>Fill in this form to register</p>
             <br>

           <!--Input elemets for form-->
             <label><b>First Name</b></label>
             <input type="text" placeholder="Enter your first name" name="first_name" required>
             <br>

             <br>
             <label><b>Last Name</b></label>
             <input type="text" placeholder="Enter your last name" name="last_name" required>
             <br>
             <br>
             <label><b>E-mail</b></label>
             <input type="email" placeholder="Enter your e-mail" name="email" required>
             <br>
             <br>
             <label><b>Date of Birth</b></label>
             <input type="date" name="dob" required>
             <br>
             <br>
             <label><b>Set Username</b></label>
             <input type="text" placeholder="Set Username" name="username" required>
             <br>
             <br>
             <label><b>Set Password</b></label>
             <input type="password" placeholder="Set password" name="password" required>
             <br>

             <br>
             <label><b>Gender</b></label><br>
             <input type="radio" name="gender" value="Male">
             <label for="Male">Male</label><br>
             <input type="radio" name="gender" value="Female">
             <label for="Female">Female</label><br>
             <input type="radio" name="gender" value="Others">
             <label for="Others">Others</label>
             <br>

            <br>
            <label><b>Course :</b></label>
                 <select>
                       <option value="Course">Course</option>
                       <option value="CS">Computer Fundamentals</option>
                       <option value="AI">Artificial Intelligence</option>
                       <option value="ML">Machine Learning</option>
                       <option value="OOPS">Object Oriented Programming</option>
                       <option value="DBMS">Database Management System</option>
                 </select>
           <br>
           <br>
           <input type="button" value="Register"/>
          </form>
     </div>
</body>
</html>
<!-- Html Document Ends-->
Output


 8+ registered

