Introduction
AWS stands for Amazon Web Services, which is a suite of cloud computing services that Amazon offers for businesses, enterprises, and even personal projects developed by people. It offers database management, user authentication, website hosting, analytic tools, artificial intelligence tools, etc. For every request made to any AWS service, AWS verifies the identity of the application sending the request using AWS Signature.
Postman is an API development tool. It is used to develop, test, design and use APIs (Application Programming Interface). It’s especially useful in testing APIs during development, since it can automate sending requests, and even the order in which they are sent.

In this blog, we will discuss how AWS Signature works, how we can use it in Postman, and see a demo implementation as well.
AWS Signature

Like any HTTP request, verifying the identity of the application sending the request is essential. Multiple authentication methods exist, such as Bearer Tokens, OAuth, etc. For AWS requests, Amazon has defined a customised, unique way to authenticate the requests so that they know they are coming from an authorised user.
All AWS services created after 2014 use AWS Signature 4 Verification method. Since this is the latest, most secure and state-of-the-art method designed by Amazon, we will discuss this in detail.
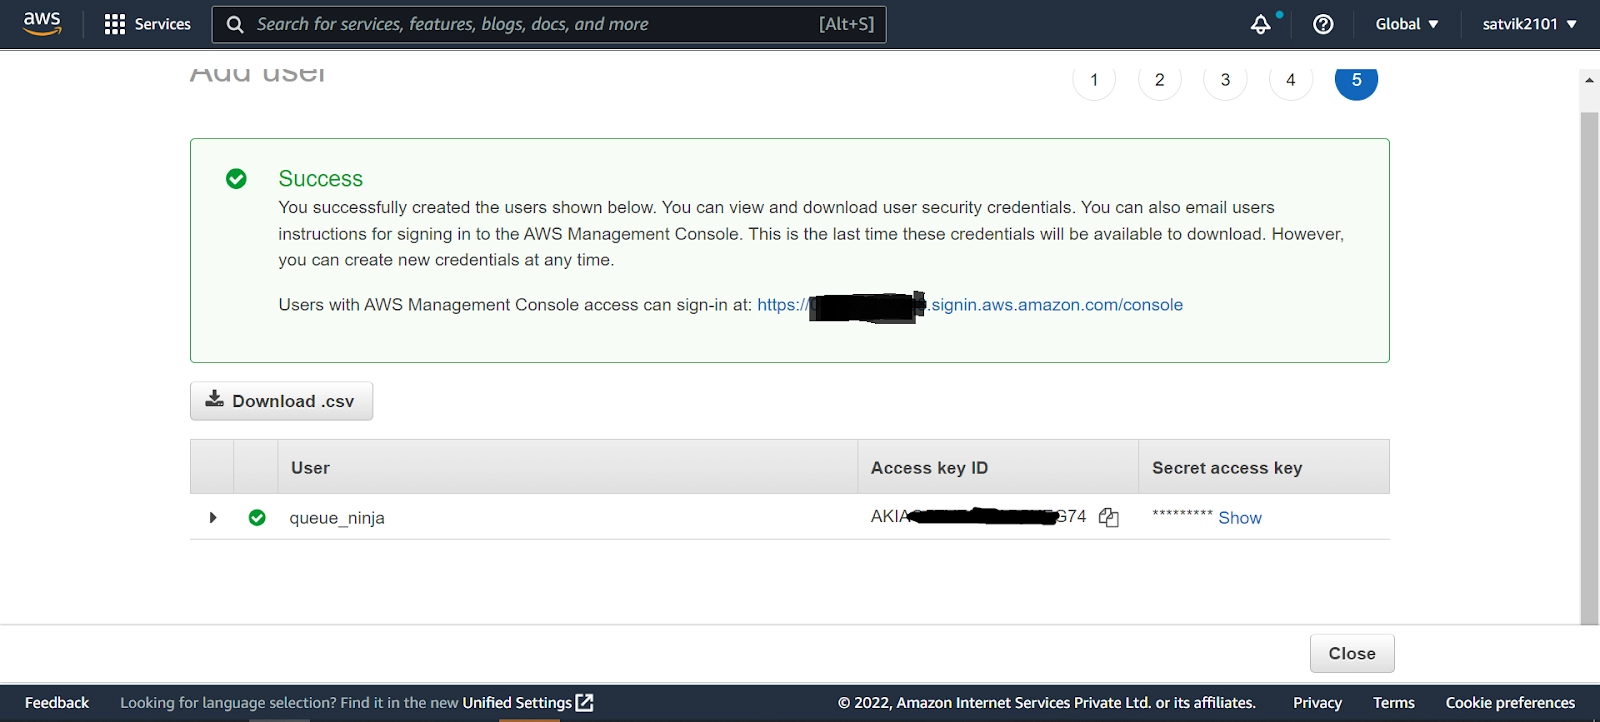
There are four steps to signing a request in AWS Signature 4. You must have your AWS AccessKey ID and Secret Access Key for these steps. You can take them from AWS IAM (Identity and Access Management) console. (If no access account exists, you must create one). The steps are:
- Create a canonical request using the specification described by AWS
- Use the canonical request and metadata, such as date, region of the AWS service, etc., to create a string.
- Use the AWS signing key and additional metadata, similar to the one used above, to create a signing key. Use the signing key and the string created in step 2 to create a signature.
- Attach the signature to the HTTP request and send the request!
Confused? Too many new terms at once? Don’t worry, we got you!
Let’s now look at all these steps in more detail.
Step 1: Creating a Canonical String
From the official AWS documentation, the canonical string is represented by:
CanonicalRequest = HTTPRequestMethod + '\n' +
				   CanonicalURI + '\n' +
				   CanonicalQueryString + '\n' +
				   CanonicalHeaders + '\n' +
				   SignedHeaders + '\n' +
				   HexEncode(Hash(RequestPayload))
Let us see these, one by one, without going into extreme detail.
-
HTTP Request Method - refers to the type of HTTP request it is, for example- POST,GET,PUT, etc.
-
CanonicalURI - This refers to the request URL, but only the data after the host.
For example, if your request URL is iam.amazonaws.com\user-8hdae1ac\service-accounts\
Then canonical URI should include only \user-8hdae1ac\service-accounts\
-
Canonical Query String - This consists of the query after the URL, for example:
?action=showData&user-type=admin&sort=asc
If this is empty, pass an empty string.
-
Canonical Headers - This includes all the headers in the form of key-value pairs separated by a new line.
For example:
content-type:application/x-www-form-urlencoded; charset=utf-8\n
-
Signed Headers- These are the list of headers that you want AWS to consider. Sometimes browsers and other services, such as proxy servers, might attach their own headers that you haven’t attached. AWS will ignore the headers not mentioned under signed headers.
- HexEncode(Hash(Payload)) - This sounds confusing, but it actually isn’t! Payload is simply the body of your HTTP request. Hashing is passing that body, in string form, to a hash function such as SHA-256 and getting the result. We convert the hash output to hexadecimal format using HexEncode.
This process creates our canonical string. Now, we hash this canonical string using the same hashing algorithm we used for the payload. The output of the hash function is our hashed canonical request. We will use this later.
Step 2: Use the canonical request and metadata to create a string
Again, we will go to the official AWS documentation for reference, which says:
StringToSign = Algorithm + \n +
			   RequestDateTime + \n +
			   CredentialScope + \n +
			   HashedCanonicalRequest
-
Algorithm - This is the hashing algorithm we are using. We need to match the hashing algorithm we use with the names specified in AWS. For example, for SHA-256, the Algorithm name in AWS is AWS4-HMAC-SHA256.
-
RequestDateTime- This is simply the date and time of the request in ISO8601 basic format.
NOTE: This Date value must be the same as we have used in previous steps or will use in future steps.
-
CredentialScope: This includes the date (in YYYYMMDD format), the region of the service you are targeting, the name of the service, and ending with the fixed string “aws4_request\n”, where \n is a newline character. It looks like this:
20180708/us-east1/iam/aws4_request\n
- HashedCanonicalRequest- This is the string that was generated at the end of Step 1 (after hashing)
This process generates our string, which we will now sign in our next step. We will call this string stringToSign.
Step 3: Create a signing key and signature
We do not sign our string directly with our secret key for extra security. To add additional layers of security, we generate a new signing key from our secret key and other data. Let us see what AWS documentation tells us to do.
kSecret = your secret access key
kDate = HMAC("AWS4" + kSecret, Date)
kRegion = HMAC(kDate, Region)
kService = HMAC(kRegion, Service)
kSigning = HMAC(kService, "aws4_request")
What’s this HMAC thing mentioned here?
HMAC is a function that takes two values - a secret key and the data to sign. Using complex cryptographic operations and a hash function, HMAC generates a hash output similar to the one SHA-256 generates.
When we send a message to a receiver, we send the data and the HMAC output. The receiver uses their copy of the secret key (same as the sender's) to generate an HMAC of the data at their end. If their HMAC matches ours, they will know that the data sent has not been tampered with, and is valid and secure. Otherwise, they will reject the message.
Here, we make repeated use of HMAC. The output of one step is used as the input to the next step as the key, and the data is kept as Date, Region, Service, and the fixed string “aws4_request”.
The final output becomes our signing key.
Now, to calculate the signature, we call HMAC again, with the signing key as the key and the stringToSign generated in Step 2 as data. We hex-encode the HMAC function's output, which becomes our final signature.
signature = HexEncode(HMAC(kSigning, string_to_sign))Step 4: Attach the signature to the request
Finally, just one step is left!
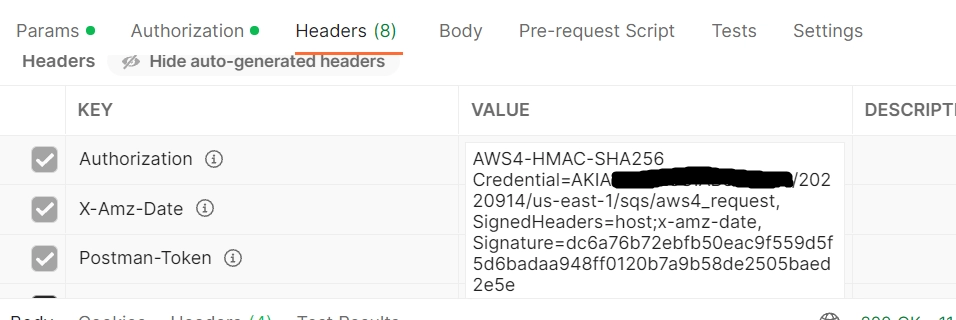
Now, we simply attach our signature to the Authorization header in our request in the following way:
Authorization: algorithm Credential=access key ID/credential scope, SignedHeaders=SignedHeaders, Signature=signature
The algorithm, credential scope and signed headers are the same as in Steps 1 and 2. The Access Key ID is your AWS Access Key ID (this is not the same as your secret key, be careful with it!). The signature is the signature that we calculated at the end of Step 3.
And that’s it! 🥳
But that’s a lot of work to understand and implement, isn’t it? Well, Amazon agrees.
That’s why their SDKs (Software Development Kits) for JavaScript, .NET, Java, Ruby, and many more - don’t require you to implement all this yourself. You simply give your secret key and access ID, and whenever you invoke a request to an AWS service, the SDK will do the rest for you.
So, if you’re making your backend server in any of these frameworks, you don’t need to bother about any of this.
But what if we want to add our AWS API to our Postman testing? Will we have to implement all this? Fortunately, the answer is no. Postman implements this for you. Let’s try it out!


 5+ registered