Introduction
ChefDK, which reached end-of-life at the end of 2020, was replaced by Chef Workstation, which was introduced in 2018. InSpec, Habitat, and a number of other resources, helpers, and testing tools are all included in Chef Workstation, the modern developer toolkit from Chef that makes it simpler than ever to automate infrastructure, application, and security testing. DevOps automators can produce codified artifacts within their preferred developer environment with Chef Workstation.
Here in this blog, we will discuss more how to install and set up the Chef workstation and how to configure it also. This article will give you a complete overview of the Chef workstation.
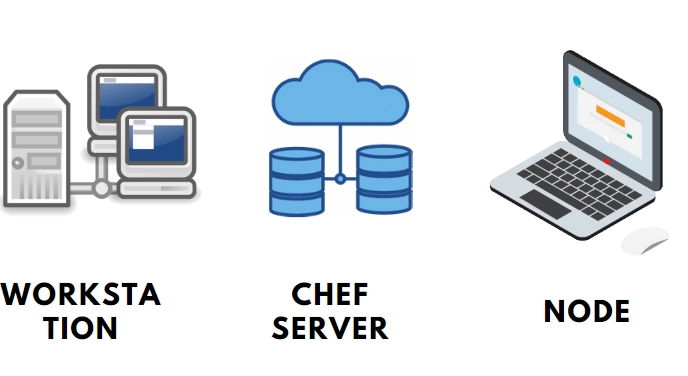
Chef Workstation
Everything you need to get started with Chef is included in the simple-to-install Chef Workstation package, including ad hoc remote execution, remote scanning, setup tasks, cookbook writing tools, and reliable dependency and testing software.

Everything else required to create recipes and submit them to the Chef Infra Server is included in the Chef Workstation, along with Chef Infra Client, Chef InSpec, Chef Habitat, chef and knife command line tools, and testing tools like Test Kitchen and Cookstyle.
Ad-hoc task support and the new Chef Workstation desktop application are only two of the new features that replace ChefDK in the Chef Workstation.
Chef Workstation Tools
All the tools needed to succeed with Chef Infra and InSpec are included in Chef Workstation. For popular operating systems, these utilities are packaged together with all the prerequisites you need to get started.

- Chef CLI, a tool for Chef Infra's workflow.
- Knife: A system administration tool for the Chef Infra Server.
- The agent who uses Chef Infra as a client.
- Chef InSpec: This tool for compliance as code may also be used to evaluate Chef Infra cookbooks.
- Cookstyle: A linting tool that finds and automatically fixes style, grammar, and logic errors in your code to help you produce better Chef Infra cookbooks.
Installing Chef Workstation
Installing Chef Workstation requires running as a privileged user.
On macOS, Linux, and Windows, Chef Workstation is installed at C:opscodechef-workstation and /opt/chef-workstation, respectively.
macOS Install
- Go to the Chef Workstation downloads page and choose the package that corresponds to the macOS version that you are using. The Download button should be chosen.
- Comply with the instructions to install the Chef Workstation after accepting the license.
Install Chef Workstation alternatively by using the Homebrew package manager: brew install --cask chef-workstation
Windows Install
- Go to the Chef Workstation downloads page and choose the package that corresponds to your Windows version. On the Download button, click.
- Comply with the instructions to install the Chef Workstation after accepting the license. The installer uses the C:opscodechef-workstation directory by default, but you will have the option to alter it.
Install Chef Workstation alternatively by using the Chocolatey package manager: choco install chef-workstation
Verifying the Installation
To verify the installation, run: chef -v
Setting Up Chef Workstation

Configure Ruby Environment
Step 1: Run the command echo $SHELL to find out your default shell.
Step 2: Add the content for Workstation initialization to the relevant shell rc file.
Step 3: Launch a fresh shell window and enter: which ruby
Setting up the Chef Repo
Everything you require to define your infrastructure using Chef Infra is kept in the chef-repo directory on your computer. To upload data from the chef-repo directory to the Chef Infra Server, use the chef and knife commands. Create your Chef Infra repository using the chef generate repo command.
Setting up Chef Credentials
You must manage users using the Chef Infra Server CLI or the Manage UI if you're configuring Chef Workstation as an administrator of the Chef Infra Server.
You must configure your special client private key, which corresponds to a client on the Chef Infra Server that your server administrator generates for you if you're setting up Chef Workstation as a Chef user.
To verify that Chef Workstation can connect to the Chef Infra Server, run the following command: knife client list
Configure Chef Workstation
Config. toml controls Chef Workstation App and chef-run configuration. The first time you use chef-run, Chef Workstation will build config. toml if it doesn't already exist. The default location is where Chef Workstation checks for the config. toml file.
Windows
Powershell: $env:USERPROFILE\.chef-workstation\config.tomlcmd.exe: %USERPROFILE%\.chef-workstation\config.tomlLinux and Mac
/home/$USER/.chef-workstation/config.tomlSettings
Enable: If accurate, Chef receives anonymous usage statistics and bug reports. Values are either true or false. The value is set to true by default.
Dev: Chef-run won't collect or deliver telemetry data when set to any value. Only set this if you have access to Chef's internal testing environment; otherwise, Chef won't be able to collect the telemetry data. Values are either true or false. The value is false by default.
Level: It identifies the messages that are logged locally and executes the commands on the Chef Workstation log file. The possible values are "debug," "warn," "info," "error," and "fatal." warn is the default setting.
Location: The location of the log file for the local Chef Workstation. A legitimate, writeable file path must be the value. "$USERHOME/.chef-workstation/logs/default.log" is the default setting.
Cache: It configures caching options.
Default_protocol: The default connection protocol to target hosts. The values "ssh" and "winrm". "ssh" is the default value.
Ssl_verify: Intended for usage in testing environments that make use of Windows node-based self-signed certificates. True and false are the values. True is the default setting.
Trusted_certs_dir: It explains how to locate the trusted certificates of Chef. used to make sure the chef-client running on target nodes is given trusted certs. A repository for trusted certificates that can be used with the Chef ecosystem. A repository for trusted certificates that can be used with the Chef ecosystem.
Url: URL of an endpoint for automated data collecting. a reliable endpoint for an autonomous data collector. There is no default value.


 5+ registered