Table of contents
1.
Introduction
2.
Understanding Email + Social Logins in Django
3.
Creating Project Environment
4.
Implementing Email + Social Logins in Django using Django-allauth
5.
Frequently Asked Questions
5.1.
Can I use both email and social logins in my Django project?
5.2.
How can I customise the templates for email and social logins?
5.3.
Is email verification supported by Django-allauth?
6.
Conclusion
Last Updated: Mar 27, 2024
Medium

Email + Social Logins in Django

Author Shiva
0 upvote

Introduction

Nowadays, websites and applications must allow users to establish accounts or log in using their email or social media accounts. The popular Python web framework Django offers a helpful package called Django-allauth that makes it simple to add these login choices. 

Users can register or log in using their email addresses or social network accounts because Django-allauth handles the technical aspects. Both users and developers find the procedure to be more user-friendly.

email + social logins in django

Let's examine the specifics and learn how to create email + social logins in Django.

Understanding Email + Social Logins in Django

This section will discuss the concepts of Email + Social Logins in Django and their significance in web applications.

  • Email Logins: Email logins are a traditional method where users provide their email address and password to access an application or website. This approach offers familiarity and security for users, as they can rely on their existing email credentials.
     
  • Social Logins: Social logins, on the other hand, allow users to sign in using their social media accounts, such as Facebook, Google, etc. This method eliminates the need for users to create new accounts and provides a streamlined login process. By leveraging social logins, you can increase user convenience and engagement.

Creating Project Environment

Here are the steps to create the project's environment and directory:

  • Ensure that Python and pip are installed on your system.
     
  • Create a virtual environment using either virtualenv or venv.
     
  • Activate the virtual environment.
     
  • Install Django using pip.
     
  • Create a new Django project using the "django-admin startproject" command.
     
  • Create a new Django app within the project using the "python manage.py startapp" command.
     
  • Add the new app to the INSTALLED_APPS list in the settings.py file.
     
  • Define the models for the app in the models.py file.
     
  • Create the database tables by running the "python manage.py makemigrations" and "python manage.py migrate" commands.
     
  • Configure the authentication backends in the settings.py file.
     
  • Include the allauth URLs in the urls.py file using the line "path('accounts/', include('allauth.urls'))".
     
  • Configure an email backend for email verification in the settings.py file.
     
  • Customise the templates in the templates/account/ directory to match the style of your site.
     
  • Start the Django development server and test the email and social logins using the "python manage.py runserver" command.


Let’s see the detailed implementation of email + social logins in django in the next section.

Implementing Email + Social Logins in Django using Django-allauth

This section will focus on implementing Email + Social Logins in Django using the Django-allauth package. We will cover the installation process, configuration steps, and customisation options.

Step 1: Install Django allauth using pip. Open your terminal or command prompt and run the following command:

django installation

Here’s what my directory looks like. Although yours will be entirely different here, we only focus on implementing email and social login in a Django project.

directory

Step 2: Add allauth to your Django project. Add it inside INTALLED_APSS in the settings.py file. Add the following lines. Please note these are easily available in the documentation.

'allauth',
'allauth.account',
'allauth.socialaccount',
'allauth.socialaccount.providers.google',
'allauth.socialaccount.providers.facebook',
'allauth.socialaccount.providers.github',


installed apps

Step 3: In settings.py, add the following line to the AUTHENTICATION_BACKENDS list. This is done to add allauth’s authentication backends.

allauth.account.auth_backends.AuthenticationBackend


authentication backends

Step 4: Include allauth URLs: In your project's urls.py file, include the allauth URLs by adding the following line:

urlpatterns = [
    path('admin/', admin.site.urls),
    path('home/', TemplateView.as_view(template_name='dashboard/home.html'), name='home'),
    path('accounts/', include('allauth.urls')),
]


urlpatterns

It includes the necessary URLs provided by the allauth package for authentication. It enables routing and inclusion of authentication-related URLs, such as login, registration, and password reset. This line ensures users can access the appropriate views and endpoints for email and social logins in a Django application using allauth.

Step 5: In the settings.py file of your Django project, add the appropriate settings and login information for the desired social media networks (such as Facebook and Google). Obtain credentials from social media platforms.  You will first need a client ID and secret key to create an application using either Google or Facebook. These credentials can be obtained by creating an app on either the Facebook Developer site or the Google Cloud Platform. Here are the respective links:


Then update settings.py with social media credentials. Add the following code to your file. 

It should be present in settings.py file.

SOCIALACCOUNT_PROVIDERS = {
    'facebook': {
        'APP': {
            'client_id': 'YOUR_FACEBOOK_CLIENT_ID',
            'secret': 'YOUR_FACEBOOK_CLIENT_SECRET',
            'key': ''
        }
    },
    'google': {
        'APP': {
            'client_id': 'YOUR_GOOGLE_CLIENT_ID',
            'secret': 'YOUR_GOOGLE_CLIENT_SECRET',
            'key': ''
        }
    },
}


Replace 'YOUR_FACEBOOK_CLIENT_ID', 'YOUR_FACEBOOK_CLIENT_SECRET' etc., with actual credentials obtained from the social media platforms.

Step 6: Run database migration to create the necessary database tables for allauth. Run the following command: 

python manage.py migrate


migration

Step 7: Customize the template provided by default by allauth, or you can create your own templates.

folder structure

Step 8:  Also, for email login, make sure the body of your login.html page should look similar to this: 

login.html

{% extends "account/base.html" %}
{% load i18n %}
{% load account socialaccount %}
{% load crispy_forms_filters %}
{% block head_title %}{% trans "Sign In" %}{% endblock %}
{% block content %}
 
<div class="text-center">
      
   <h1>{% trans "Sign In" %}</h1>
      {% get_providers as socialaccount_providers %}
      {% if socialaccount_providers %}
      
   <p>{% blocktrans with site.name as site_name %}Please sign in with one
         of your existing third party accounts.<br>Or, <a href="{{ signup_url }}">sign up</a>
         for a {{ site_name }} account and sign in below:{% endblocktrans %}
   </p>
      
   <div class="socialaccount_ballot">
           
      <div class="socialaccount_providers">
                {% include "socialaccount/snippets/provider_list.html" with process="login" %}
              
      </div>
           
      <div class="login-or border-top border-bottom my-3">{% trans 'OR' %}</div>
         
   </div>
      {% include "socialaccount/snippets/login_extra.html" %}
      {% else %}
      
   <p>{% blocktrans %}If you have not created an account yet, then please
         <a href="{{ signup_url }}">sign up</a> first.{% endblocktrans %}
   </p>
      {% endif %}
    
</div>
 
<div class="row">
      
   <div class="col-md-6 offset-md-3">
           
      <form class="login" method="POST" action="{% url 'account_login' %}">
                  {% csrf_token %}
                  {{ form|crispy }}
                  {% if redirect_field_value %}
                  <input type="hidden" name="{{ redirect_field_name }}" value="{{ redirect_field_value }}" />
                  {% endif %}
                  
         <div class="d-grid">
                       <button class="primaryAction mt-3 btn btn-dark" type="submit">{% trans "Sign In" %}</button><br>
                       <a class="button secondaryAction text-dark text-center" href="{% url 'account_reset_password' %}">{% trans "Forgot Password?" %}</a>
                     
         </div>
                
      </form>
         
   </div>
    
</div>
{% endblock %}


Suppose Home.html is the page you want to redirect the user after successful login. Your home.html file needs to look like this: 

home.html

{% extends 'account/base.html' %}
{% block content %}
   
<div class="text-center">
          
   <h2>Home</h2>
          
   <p>Hello {{ user.first_name }}!</p>
          
   <p>Your Username : {{ user }}</p>
          <a class="btn btn-dark" href="{% url 'socialaccount_connections' %}">Settings</a>
      
</div>
{% endblock %}


The "base.html" file serves as a template that acts as the base or foundation for other HTML templates in the project. It typically contains the structure, layout, and elements shared across multiple websites or application pages.

base.html

<!DOCTYPE html>
<html>
    
   <head>
         
      <title>{% block head_title %}{% endblock %}</title>
         
      <link href="https://cdn.jsdelivr.net/npm/bootstrap@5.0.1/dist/css/bootstrap.min.css" rel="stylesheet" integrity="sha384-+0n0xVW2eSR5OomGNYDnhzAbDsOXxcvSN1TPprVMTNDbiYZCxYbOOl7+AMvyTG2x" crossorigin="anonymous">
         
      <style>
              .form-group {
                margin-top: 10px;
              }
            
      </style>
         {% block extra_head %}
         {% endblock %}
       
   </head>
    
   <body>
         {% block body %}
         {% if messages %}
           
      <div class="p-2">
                {% for message in messages %}
                  
         <div class="text-center border-bottom">{{message}}</div>
                {% endfor %}
              
      </div>
         {% endif %}
         
      <div class="p-3 mb-3 bg-dark">
              
         <div class="container d-flex justify-content-between">
                     {% if user.is_authenticated %}
                     
            <div><a class="text-light" href="{% url 'account_email' %}">Change E-mail</a></div>
                     
            <div><a class="text-light" href="{% url 'home' %}">Home</a></div>
                     
            <div><a class="text-light" href="{% url 'account_logout' %}">Sign Out</a></div>
                     {% else %}
                     
            <div><a class="text-light" href="{% url 'account_login' %}">Sign In</a></div>
                     
            <div><a class="text-light" href="{% url 'account_signup' %}">Sign Up</a></div>
                     {% endif %}
                 
         </div>
            
      </div>
         {% block content %}
         {% endblock %}
         {% endblock %}
         {% block extra_body %}
         {% endblock %}
         <script src="https://cdn.jsdelivr.net/npm/bootstrap@5.0.1/dist/js/bootstrap.bundle.min.js" integrity="sha384-gtEjrD/SeCtmISkJkNUaaKMoLD0//ElJ19smozuHV6z3Iehds+3Ulb9Bn9Plx0x4" crossorigin="anonymous"></script>
       
   </body>
</html>


Edit the settings.py file of your project. Add login and logout fields to tell Django where to redirect after the successful operation. 

LOGIN_REDIRECT_URL = 'home'
ACCOUNT_LOGOUT_REDIRECT_URL = 'account_login'


Please note, all the above code is part of the project we are using. This is just to guide you on how and where to add code. The project is just a barebone project, as you can see from the last image of this article. Because of this, understanding and integrating in your project wouldn’t complicate too much.

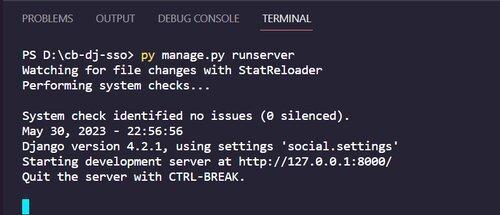
Step 9: Finally, run Django development server. Now, it’s a good time to test email and social logins. For this, run this command: 
python manage.py runserver

project run command

sign in

You can now visit the '/accounts/login/' and '/accounts/signup/' URLs to access the login and signup views offered by allauth. Users can create accounts with their email addresses or use their social network profiles to sign in.

Frequently Asked Questions

Can I use both email and social logins in my Django project?

Yes, you can integrate both email and social logins in your Django project. Packages like Django-allauth and Django-social-auth provide support for multiple login methods, allowing users to choose their preferred authentication method.

How can I customise the templates for email and social logins?

Django-allauth provides default templates for login, registration, and password reset views. To customise these templates, you can copy them from the Django-allauth package to your project's template directory and modify them according to your design requirements. This allows you to match the look and feel of your website.

Is email verification supported by Django-allauth?

Yes, Django-allauth supports email verification out of the box. By configuring an email backend in your project's settings and enabling the necessary settings in Django-allauth, you can ensure that users verify their email addresses during the registration process.

Conclusion

This article covered how you can add Email + Social Logins in Django. It is something that will be used often in your project. We began the article by understanding Email + Social Logins in Django and then moved to its implementation. 

Recommended Readings:


Check out some amazing Guided Paths on topics such as Data Structure and AlgorithmsCompetitive ProgrammingBasics of CBasics of Java, etc., along with some Contests and Interview Experiences only on Coding Ninjas Studio

Do check out The Interview Guide for Product Based Companies, as well as some of the Popular Interview Problems from Top companies like AmazonAdobeGoogle, etc., on Coding Ninjas Studio.

Cheers!

Live masterclass