Table of contents
1.
Introduction
2.
Sending mails using Flask
3.
Sending messages
3.1.
index.html
4.
Frequently Asked Questions
5.
Key Takeaways
Last Updated: Mar 27, 2024
Career growth poll
Do you think IIT Guwahati certified course can help you in your career?


Introduction

Flask is a framework used to create web applications written in Python. It is a microframework because it does not need specific tools or libraries to develop the applications. Flask provides and supports extensions that help keep the application simple with cool features without complex codes. The files that use flask code are saved with an extension .py and executed using a python server. Let’s discuss how to send mails using Flask further in this article.

Sending mails using Flask

An application with many subscribers and followers often needs to send emails to notify them about new features, offers, newsletters, etc. But a person can't send them manually to everyone even if they use techniques like mail merge. So what could be the best solution to this problem? Yes, you guessed it right. They need some technology and few APIs which can automate this work. But which framework provides us with this functionality? This brings us to our topic, FLASK. 
Flask can automate sending emails for us through its extensions. The Flask-Mail extension makes it easy for developers to establish a simple interface with any email server. So to enable this extension, we need to install Flask. Run the following command using pip in your terminal to install Flask.

pip install Flask-Mail

Source

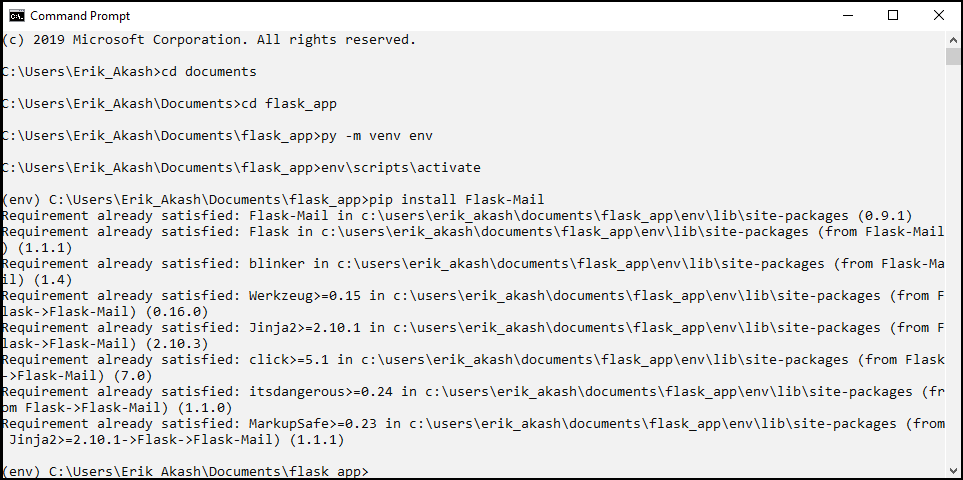
This installs the Flask-Mail and all the extensions and packages we need. We have to configure the Flask-Mail by setting the values for a few standard parameters to use it. Let’s explore what these parameters are.

  1. MAIL_SERVER - Name/IP address of the email server. The default server is localhost
  2. MAIL_PORT - Port number of the server. The default value is 25.
  3. MAIL_USE_TLS - Enable/disable Transport Security Layer encryption. The default value is false.
  4. MAIL_USE_SSL - Enable/disable Secure Sockets Layer encryption. The default value is false.
  5. MAIL_DEBUG - Debug support, The default support is app.debug.
  6. MAIL_USERNAME - User name of the sender, default username is None
  7. MAIL_PASSWORD - password of the sender, default password is None
  8. MAIL_DEFAULT_SENDER - sets the default sender for the mail; the default sender is None.
  9. MAIL_MAX_EMAILS - Sets maximum mails to be sent; the default value is None.
  10. MAIL_SUPPRESS_SEND - Sending is suppressed if app.testing is set to true
  11. MAIL_ASCII_ATTACHMENTS - If set to true, attached filenames are converted to ASCII. The default value is false.

Let’s learn how to set few important parameters among these.

app.config['MAIL_SERVER']= ’example.gmail.com’
app.config['MAIL_PORT'] = 25 // default value
app.config['MAIL_USERNAME'] = 'codingninjas@gmail.com'
app.config['MAIL_PASSWORD'] = 'xxxxx'
app.config['MAIL_USE_TLS'] = False // default value
app.config['MAIL_USE_SSL'] = False // default value
You can also try this code with Online Python Compiler
Run Code

The mail class or instance manages the emails and their requirements. The Mail has to be imported from Flask before using it in our code as shown below.

from flask_mail import Mail

app = Flask(__name__)
mail = Mail(app)
You can also try this code with Online Python Compiler
Run Code

All the emails are sent using the configuration values of the application passed to the Mail constructor. We can also set the mail instance at the configuration time by writing the code as follows:

from flask_mail import Mail

mail = Mail()
app = Flask(__name__)
mail.init_app(app)
You can also try this code with Online Python Compiler
Run Code

We use the init_app() method to set the mail instance at configuration time. This is useful if multiple applications run in the same process with different configurations. The emails will be sent using the current application’s configuration. 
The mail class has three important methods they are

  1. send() - Sends the contents of Message class object
  2. connect() - establishes a connection with the mail host
  3. send_message() - Sends the message object

Now that we learned about mail class and configuration let’s learn how to send messages.

Sending messages

We need to create a Message instance or class first to send messages.

from flask_mail import Message

@app.route("/")
def index():

    msg = Message("Hello",
                  sender="sender@gmail.com",
                  recipients=["recipient@gmail.com"])
You can also try this code with Online Python Compiler
Run Code

We created a message instance with the message, sender, and recipients set according to our requirements in the above code. You can also set the default sender in the configuration without having to set it always. You can set the message recipients while creating the instance or set it later individually.

msg.recipients = ["codingninjas@gmail.com"]
msg.add_recipient("me@gmail.com")
You can also try this code with Online Python Compiler
Run Code

The first method sets a recipient to the mail, and if we need more recipients, we can add them using the msg.add_recipient() method. Now let’s create the body of the message.

msg.body = "body"
msg.html = "<b>body</b>"
You can also try this code with Online Python Compiler
Run Code

You can add the body of a message in the two ways cited above. You can just set the text to msg.body or set an HTML text to msg.html instead and send the mail using mail.send() method.  
Now let’s see the complete code.

from flask import Flask
from flask_mail import Mail, Message

app =Flask(__name__)
mail=Mail(app)

app.config['MAIL_SERVER']= 'example@.gmail.com'
app.config['MAIL_PORT'] = 25 #default value
app.config['MAIL_USERNAME'] = 'codingninjas@gmail.com',
app.config['MAIL_PASSWORD'] = 'xxxxx'
app.config['MAIL_USE_TLS'] = False #default value
app.config['MAIL_USE_SSL'] = False #default value

mail = Mail(app)

@app.route("/")
def index():
   msg = Message("Hello",
                  sender="sender@gmail.com",
                  recipients=["recipient@gmail.com"])
   msg.body = "body"
   mail.send(msg)
   return render_template('index.html') 

if __name__ == '__main__':
   app.run(debug = True)
You can also try this code with Online Python Compiler
Run Code

index.html

<!DOCTYPE html>  
<html>  
<head>  
    <title>index</title>  
</head>  
<body>  
<form method = "POST">  
Email: <input type="email" name="email">  
<input type = "submit" value="Submit">  
</form>  
</body>  
</html> 
You can also try this code with Online Python Compiler
Run Code

You can run this code in a python shell by saving it with a .py extension and see the output in the localhost. It displays an input field with a label Email. The email will be rendered and sent by the flask code written above.  
The above method can send emails to few people, but what if you want to send mails to a hundred people or more. We can send them by doing slight modifications to our code. All the configuration and the template of the code will be the same; only the working logic should be changed to send bulk emails.

with mail.connect() as conn:
    for user in users:
        message = '...'
        subject = "hello, %s" % user.name
        msg = Message(recipients=[user.email],
                      body=message,
                      subject=subject)

        conn.send(msg)
You can also try this code with Online Python Compiler
Run Code

In the above code, we imported the mail.connect() method as conn and looping through the users to send them the mails. After all the emails are sent successfully, the connection to the email host is disabled.

Now you might have a doubt on how to add attachments to the mail while sending. Let’s see how to add them.

with app.open_resource("image.png") as fp:
    msg.attach("image.png", "image/png", fp.read())
You can also try this code with Online Python Compiler
Run Code

We can add the attachments to mail using the msg.attach() method and set the file to read mode. If you want the recipient to access the attachment and edit it, you can set it to write mode based on your requirements. 
So this is how all the applications automate sending emails to customers by using the extensions and APIs provided by Flask.

Want to learn about , PHP For Loop click here

Frequently Asked Questions

  1. What does Flask-Mail do?
    Flask-Mail is an extension that can be imported from Flask to automate sending emails to many people at a time with similar content. It provides us with a simple interface with fewer lines of code. 
     
  2. How do I import Mail into Flask?
    You can import the Mail from flask_mail and use it in your code by writing the following statement in your code.
    from flask_mail import Mail, Message
     
  3. What is a Flask API? 
    Flask is a web application framework written in Python. The API in Flask is software used to access data, server software, or other applications. They can also automate work and offer us all the services necessary for our application.

Key Takeaways

We have discussed Flask mail extensions, methods, configuration, and how to send emails using Flask with a detailed code in this article. 
Hey Ninjas! Don’t stop here; check out Coding Ninjas for more unique courses and guided paths. Also, try Coding Ninjas Studio for more exciting articles, interview experiences, and fantastic Data Structures and Algorithms problems.

Live masterclass