Do you think IIT Guwahati certified course can help you in your career?
Introduction
Puppet is a software configuration management tool. Puppet manages the set-up, infrastructure, and configuration of servers. It does this through a combination of Master/Server and Agent nodes.
The master node - or the Puppet Server, is where the developers enter the desired configuration of all the agent nodes. It is then the Puppet Server's job, to propagate all the changes to all the agent nodes in the network. Puppet handles the intricacies and details of managing different hardware and OSes in the agents.
Let's now look at how we can install Puppet Agent and Puppet Server (also known as Puppet Master), and test to know how they work.
System Requirements
As with any software, certain requirements must be met before installing it.
Let us see what those are for Puppet.
Hardware Requirements
Puppet Agent is versatile and can be installed on nearly any platform using any hardware. The weakest specifications tested successfully have had 2.4 GHz Processors with only 0.5-1 GB RAM.
Puppet Server, on the other hand, is resource intensive. It has to handle multiple agent nodes and configure changes across them. It must be installed on a robust and dedicated server
The minimum hardware requirements given by the Puppet team are: 2 cores, with 1 GB RAM, for dozens of agent nodes 2-4 cores, with 4 GB RAM, for thousands of agent nodes. A reserved code cache of 512 MB is also needed in this case.
Software Requirements
Operating Systems
Puppet Agent supports the following OSes and versions:
Debian - 9, 10, 11
Fedora - 34 (64-bit package only), 36 (x86_64)
macOS - 10.15 Catalina, 11 Big Sur (64-bit packages only), 12 Monterey (64-bit packages only), 12 (M1)
Microsoft Windows - 10 Enterprise, 11 Enterprise (x86_64)
Microsoft Windows Server - 2012R2, 2016, 2019, 2022
Red Hat Enterprise Linux, including: - Amazon Linux v1 (using RHEL 6 packages) ,Amazon Linux v2 (using RHEL 7 packages), 6, 7, 8, 8 Power, 9
If an official package manager, such as apt-get, or yum is being used - it will install all the dependencies along with Puppet. However, if Puppet is being installed without an official package - it is important to install the following dependencies:
Ruby 2.5.x
Facter 2.0 or above
Optional tools such as hiera-eyaml, hocon,msgpack,ruby-shadow,etc.
Network Requirements
Time-Keeping
It is important to synchronize time between server and agent nodes. NTP (Network Time Protocol), or an equivalent service is suggested. If time drifts out of sync, then it can cause issues like outdated certificates being issued to agents. NTP keeps precise global time, with an accuracy of 50ms
Name Resolution
The agents must be able to identify the master/primary server. It needs to be ensured that the master server can be reached by all current and future agents. This can be accomplished easily by using a CNAME record, with the hostname puppet. (if this sounds confusing, don't worry. We will be doing this in the installation section)
Firewall
Primary and Agent nodes must be able to connect to each other via TCP on Port 8140.
Installation Guide
For our installation guide, we will be using 2 AWS EC2 instances - that both run Ubuntu. One will be our master, the other will be the agent. You can read about EC2 instances and how to launch them here. We assume that you have 2 such instances (or any other similar computers) running and that they satisfy the requirements listed above. (Don't forget to open up Port 8140 if you're on AWS or any other Cloud Provider)
We need to open the Terminal in both of them to execute commands. This is generally done via SSH, and the method to do that varies depending on where your instances are hosted. We will start from the steps after the Terminal is active. Our tutorial will be based on Ubuntu instances, but most steps are similar for other OSes - with just the implementation varying.
1. We have both Master and Agent nodes on the Terminal. In the first step, we will run some basic setup on both. The following steps must be performed on both master and agent nodes:
Run the command
sudo apt-get update
in the terminal. This updates all the existing packages in the instance.
Enable the Puppet platform repository: This makes the components needed to install Puppet available on our system. First, we will need to identify the URL of the Puppet package we want. The list of available packages is present in repositories such as yum.puppet.com or apt.puppet.com. We are using apt, and we have identified the URL as https://apt.puppet.com/puppet7-release-focal.deb, where puppet7-release-focal.deb is the name of the file we will install
wget fetches the necessary files from the URL, and dpkg depackages, or unzips them so that they can be used.
2. Now, we will set up puppet-server, or puppet-master first.
In the master node terminal, run
sudo apt-get install puppet-master.
You should see a screen like this:
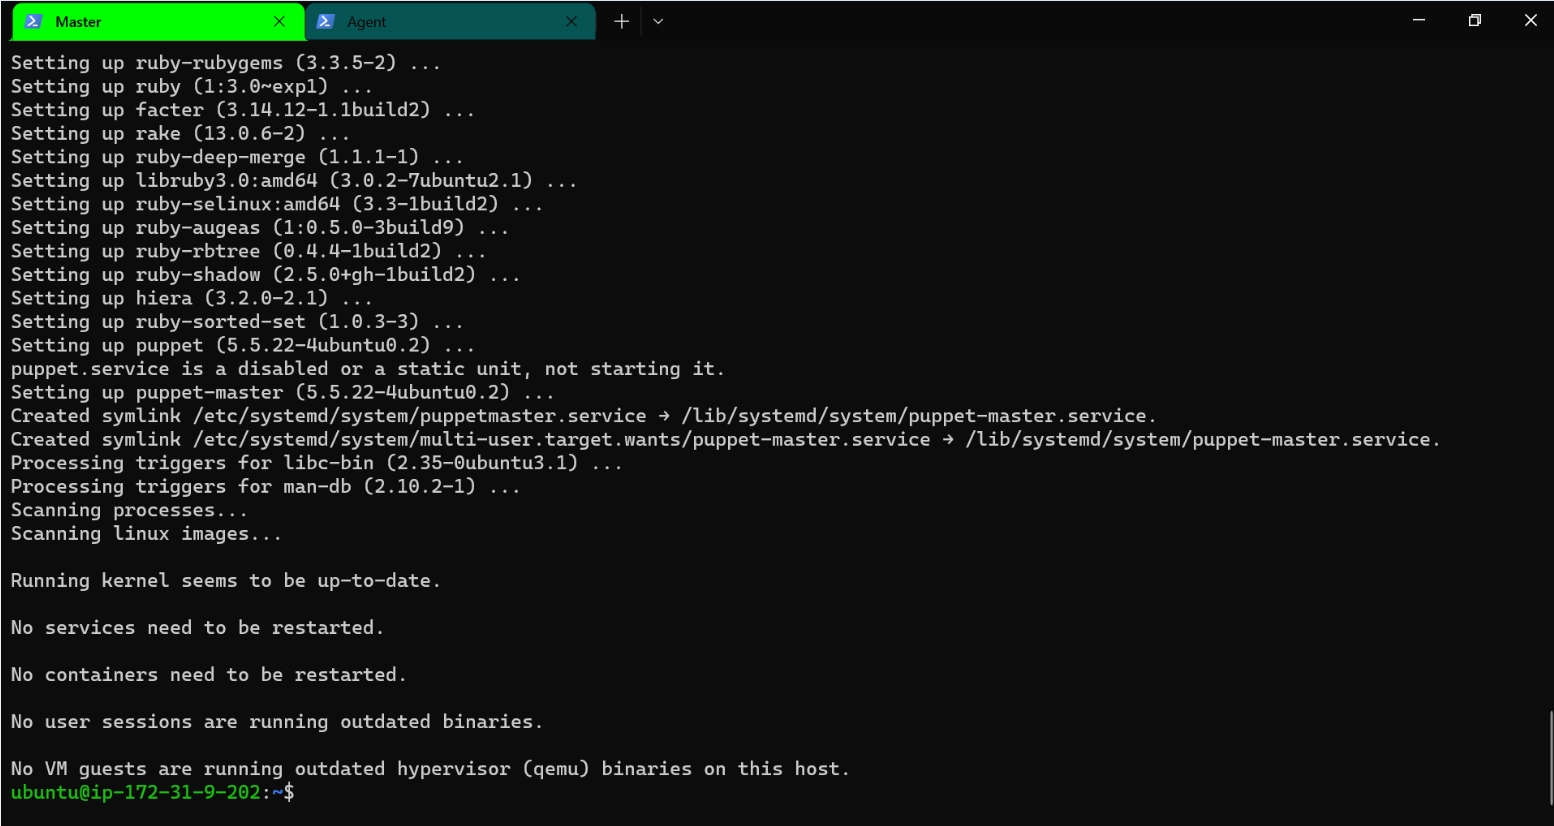
Type Y, and wait for the installation to finish. The terminal will look like this:
Restart the terminal, or run
exec bash -l
so that we can use puppet commands immediately.
3. Puppet server, by default, is created to use 2 GB of RAM. If your needs do not meet this, or if you are just testing it out, this much won't be necessary. So we will make a change in the Puppet configuration.
Run the command
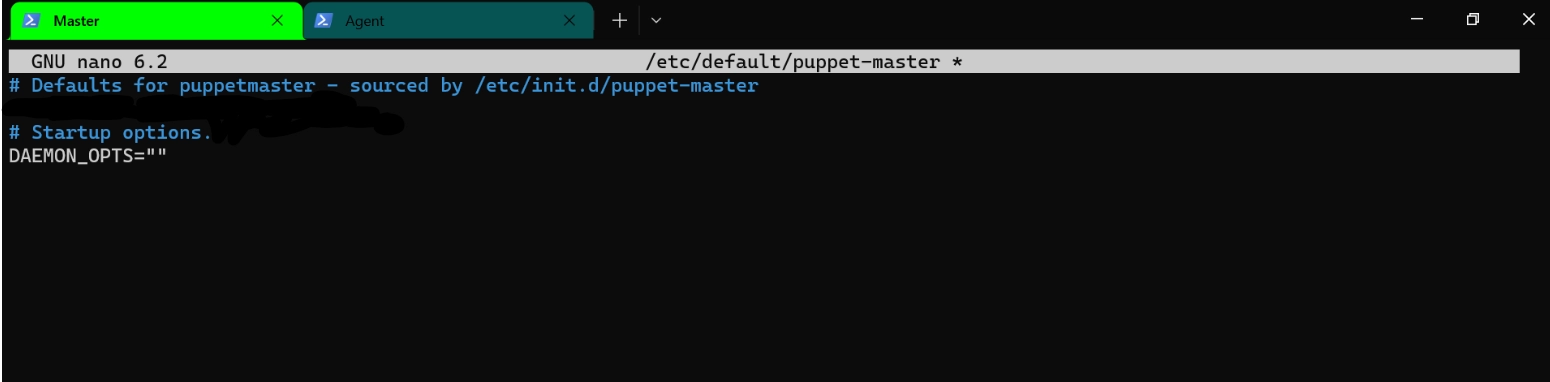
sudo nano /etc/default/puppet-master
This will open up a file in the nano text editor. You can also use vim if you prefer. The file should look like this:
Add the line
JAVA_ARGS="-Xms512m -Xmx512m"
anywhere in the document. This configures Puppet to use 512 MB of RAM. For 1GB, you can write
JAVA_ARGS="-Xms1g -Xmx1g".
Save the file and exit the text editor - use Ctrl+X, Y and Enter for nano. Use :wq for vim
Restart puppet server to load using the new configuration - run the command :
sudo system-ctl restart puppet-master.
4. Let's check if we have been successful so far. Run the command
sudo systemctl status puppet-master
We see that puppet-master server is running and active!
5. Allow 8140 on the firewall of the instance (this has to be done again even if you configured it in the instance network settings earlier).
Run the command:
sudo ufw allow 8140/tcp
You should see this:
Then, run the command:
sudo ufw enable
and type Y if prompted.
This enables the firewall, and sets it to only allow TCP over 8140.
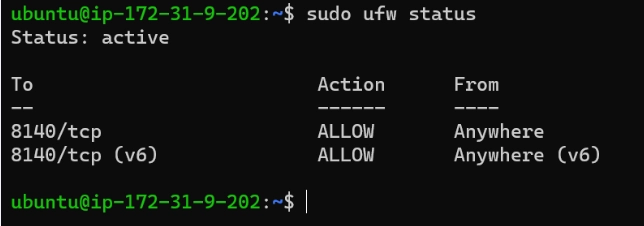
To verify, run the command:
sudo ufw status.
If any more entries are listed, you can check and remove them according to your needs.
6. Now, we are ready to configure the agent. Go to the agent terminal, and run the command:
sudo apt-get install puppet.
Type Y if prompted, and let the installation finish.
7. Before we run puppet agent, we must make sure it can contact the master server. We do this by adding the IP address of the master server to our hosts file - in both master and server instances. The hosts file lists names and IP addresses common throughout the OS. E.g., localhost is 127.0.0.1 for all programs running on a system. The following steps need to be done on both master and agent nodes:
Run the command:
sudo nano /etc/hosts
In the file that opens, add the line <IP Address> puppet anywhere, where <IP Address> is the IP address of your master node.
Save and exit
8. In the agent node, run the command:
sudo systemctl start puppet.
This will start the agent node.
Run the command:
sudo systemctl enable puppet.
This will make sure that puppet can start if the instance is switched off and on.
Puppet Agent and Puppet Server have now been installed. Now, let's configure and check them.
Configuration
When we do all this, a lot of stuff happens behind the scenes.
The Agent node will send a request to the Master node to request a master certificate from it. This is done so that the Agent can verify that the master node is actually the master
The Master node sends the certificate to the Agent and requests a slave certificate from it
The Agent sends the slave certificate to the master.
The master signs the slave certificate, and sends it back to the agent.
So, let's go to the master node and check if the agent has sent any certificate to sign. Go to the master node, and run the command:
sudo puppet cert list.
We get this result. We can verify this is from the agent node, as the IP matches.
Let's sign it and send it back.
Run the command:
sudo puppet cert sign -- all
in the master node. This signs all pending certificates.
Testing
Now, let's test if Puppet works.
We will configure Puppet master to create a file and verify that the file has been created in the agent node.
This file should be a text file, in the /tmp directory, with the name test.txt.
It should contain the line - The agent IP is <AGENT IP>, where <AGENT IP> would be the actual IP of the Agent.
Save it, and exit.
Restart puppet master by running the command:
sudo systemctl restart puppet-master.
Now, go to the Agent node. Since Puppet is based on pulling, we will have to request new configurations from the master manually.
Run the command:
sudo puppet agent -- test
This is the result. Let's verify if our file contains what it should. Go to the tmp directory by running
cd /tmp
and see all the files in it by running
ls
We do have a test.txt here! Let's see what it contains.
Run the command:
cat test.txt
It contains the correct IP of the Agent node. Thus, we see, Puppet has correctly configured our Agent node.
Frequently Asked Questions
Do developers have to pull configuration files manually?
No, a background program called a daemon is run in real-life situations. This program fetches files from the master server periodically, thus eliminating the need for humans to do it manually.
What if my system configurations aren't mentioned in Puppet Server list?
Puppet Server can be run on any x86_64 Linux system with JDK 8 or 11 installed. It will have to be downloaded and compiled from the source code. Dependencies, upgrades and verification of certificates will also have to be manually managed. If your system isn't x86_64 Linux, sadly Puppet server won't run on it.
Are communications between Master and Agent nodes safe?
Yes - they are! All communications between Puppet Server and Agent nodes are encrypted with TLS. Puppet manages issuing, verification and renewal of TLS certificates so that we don't have to worry about it.
Conclusion
This blog has explored how we can install Puppet. We have seen the necessary system requirements, including software, hardware and network. We have gone through the steps of installing Puppet and tested that the installation works.
We hope you leave this article with a broader knowledge of Puppet, Internet architecture and networks. We recommend that you explore our different articles on these topics as well, such as :


 6+ registered

