Mount
The mount method renders the entire DOM, including the children of the parent component on which the tests are being run. When there are components that directly interfere with the DOM API or React's lifecycle methods, this is a better option. However, this comes at a higher price in terms of execution time.
- The constructor, render, and componentDidMount methods are all called by a simple mount.
- componentWillReceiveProps, shouldComponentUpdate, componentWillUpdate, render, and componentDidUpdate are all methods called by mount + setProps.
- Call the componentWillUnmount method when mounting + unmounting.
Arguments
The following are the arguments of mount(node[, options]) => ReactWrapper:
- node (ReactElement): The node to render
- options (Object [optional]):
- options.context: (Object [optional]): Context to be passed into the component
- options.attachTo: (DOMElement [optional]): DOM Element to attach the component to.
- options.childContextTypes: (Object [optional]): Merged contextTypes for all children of the wrapper.
- options.wrappingComponent: (ComponentType [optional]): A component that will render as a parent of the node. It can be used to provide context to the node, among other things. WrappingComponent must render its children.
- options.wrappingComponentProps: (Object [optional]): Initial props to pass to the wrappingComponent if it is specified.
Returns
ReactWrapper: The wrapper instance around the rendered output.
Shallow
To render the single component that we are testing, we use the shallow method. It is not capable of rendering child components. The shallow method does not have access to lifecycle methods in Enzyme versions lower than 3. However, we now have this capability in Enzyme version 3.
- The constructor, render, and componentDidMount (in Enzyme version 3) methods are all called by shallow.
- The componentWillReceiveProps, shouldComponentUpdate, componentWillUpdate, render, and componentDidUpdate (in Enzyme version 3) methods are called by the shallow + setProps method.
- componentWillUnmount is called by shallow + unmount method.
Shallow and Mount Example
Let us look at the difference between shallow and mount through a coding example. In the following example, we will see that the web page has a form where two numbers are added.
1. Create a new component named Form.js:
Open the "testing-demo-app" project. In the testing-demo-app/src/components folder, create a new component named Form.js with the following content.
import React, { Component } from 'react';

class Form extends Component {

   constructor(props) {
       super(props);
       this.state = {
           firstNumber: '',
           secondNumber: '',
           componentState:'default'
       };

       this.handleFirstNumber = this.handleFirstNumber.bind(this);
       this.handleSecondNumber = this.handleSecondNumber.bind(this);
   }

   componentDidMount() {
       this.setState({ componentState: 'mounted' });
   }

   handleFirstNumber(event) {
       this.setState({ firstNumber: event.target.value });
   }

   handleSecondNumber(event) {
       this.setState({ secondNumber: event.target.value });
   }

   handleAdd(){
       const { firstNumber, secondNumber } = this.state;
       this.displayResult(parseInt(firstNumber) + parseInt(secondNumber))
   }

   displayResult(result){
       alert(result);
   }

   render() {
       const { firstNumber, secondNumber } = this.state;
       const { operator } = this.props;
       return (
           <form className='form-group'>
               <fieldset className='form-group'>
                   <label className='form-label'>
                       First Number:
                   </label>
                   <input type="text" id="number1" className='form-input' value={firstNumber} onChange={this.handleFirstNumber}/>
               </fieldset>
               <fieldset className='form-group'>
                   <label className='form-label'>
                       Second Number:
                   </label>
                   <input type="text" id="number2" className='form-input' value={secondNumber} onChange={this.handleSecondNumber}/>
               </fieldset>
               <div className='form-group'>
                   {operator === '+' &&
                   <button id='formButtonAdd' className='btn' type="button" onClick={() => this.handleAdd()}>Add</button>
                   }
               </div>
           </form>
       );
   }

}

export default Form;
2. Modify Add.js component:
Add the following content to the Add.js file in testing-demo-app/src/components.
import React, { Component } from 'react';
import Form from './Form';

class Add extends Component {
 render() {
   return (
       <div>
         <h1>Add Function</h1>
         <Form operator='+'/>
       </div>
   );
 }
}

export default Add;
<h1> and <Form> are child components of <Add>.
3. When you type npm start to start the server, you should see something like this.
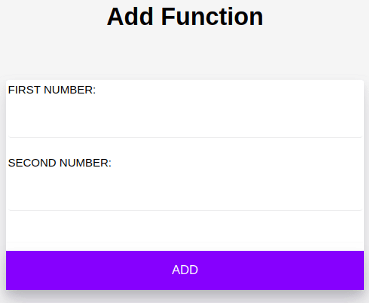
Click the ADD button after entering two numbers in the FIRST NUMBER and SECOND NUMBER fields. The result of the addition of entered numbers should be displayed in a JavaScript alert.
4. Test for Add component:
Modify Add.test.js in testing-demo-app/test with the following content.
import Add from '../src/components/Add';
import Form from '../src/components/Form';
let wrapper;
beforeEach(() => {
   wrapper = shallow(<Add />);
});
describe('<Add /> rendering', () => {
   it('should render one <h1>', () => {
       expect(wrapper.find('h1')).toHaveLength(1);
   });
it('should render one <Form>', () => {
       expect(wrapper.find(Form)).toHaveLength(1);
   });
it('should render 2 <label>s', () => {
       expect(wrapper.find('label')).toHaveLength(2);
   });
});
To run the tests in the Add.test.js file, open a terminal in the project directory and type the following command.
npm test Add.test.js
Your test will now fail as shown below.
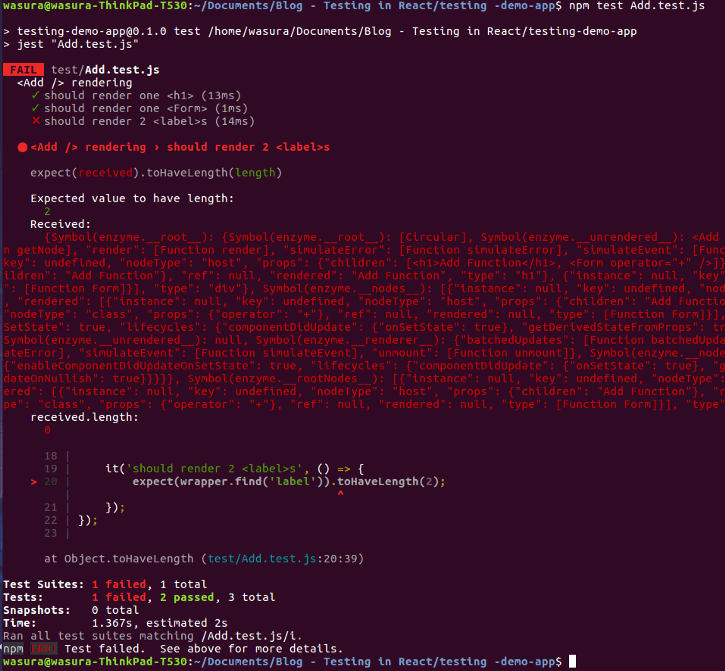
Why did this fail?
- Two tests, which check the rendering of the <h1> and <Form> components, have passed.
- However, the test to see if the <label> elements were rendered correctly failed.
- The child components of the <Add> component are <h1> and <Form>. (Which is exactly what we're doing right now).
- <Label> elements, on the other hand, are child components of <Form>.
- This test fails because the shallow method does not render label elements inside the <Form> component.
So how should we solve this problem?
To mount the test, change the shallow method in Add.test.js to mount and run it again.
beforeEach(() => {
   wrapper = mount(<Add />);
});
As a result, the test should now pass.
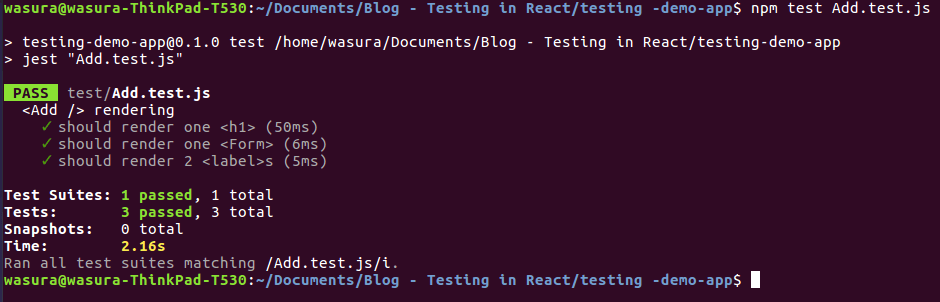
The reason for this is that mount renders the entire DOM in the parent component, including the child components. As a result, we now have a fully rendered <Form> with <label>s, which is exactly what we were looking for.
So when should we use shallow and mount?
- Because unit tests should be isolated as much as possible, it is recommended to use shallow as much as possible.
- When running a single test, we don't need to check the units (components) within a unit (component).
- You are automatically exposed to the logic of all the units (components) in your render tree when you use mount, making it impossible to test just the component in question.
- Because mount necessitates the use of JSDOM, it takes longer to execute.
Render
Another function, similar to shallow and mount, is render. This is capable of rendering static HTML. The children are rendered. However, this lacks access to React lifecycle methods.
FAQs
-
What is the difference between static and full rendering?
Full rendering, unlike shallow or static rendering, actually mounts the component in the DOM, which means that tests that use the same DOM can affect each other.
-
When should we prefer shallow over mount?
Because unit tests should be isolated as much as possible, it is recommended to use shallow as much as possible. When running a single test, we don't need to check the units (components) within a unit (component).
-
What is the drawback of mount?
You are automatically exposed to the logic of all the units (components) in your render tree when you use mount, making it impossible to test just the component in question.
-
When would an Enzyme mount and render be useful?
If you want to test componentDidMount or componentDidUpdate, use mount. Mount can be used to test component lifecycles and children's behaviour. Use render if you want to test children rendering with less overhead than mount and don't care about lifecycle methods.
-
What should you install before using enzyme?
Before using Enzyme, you need to install enzyme-adapter-react-16
Key Takeaways
In this article, we have extensively discussed mount rendering (full DOM rendering) with enzyme.
We hope that this blog has helped you enhance your knowledge regarding mount rendering and if you would like to learn more, check out our articles on Coding Ninjas Studio. Do upvote our blog to help other ninjas grow. Happy Coding!


 8+ registered

