Do you think IIT Guwahati certified course can help you in your career?
Introduction
Testing is a very crucial part of any application or website. ACCELQ makes testing easier. It is a browser-based solution for web testing and API testing. ACCELQ is powered by AI and is wholly based on cloud technology. It automates the testing. We do not need to code to test the API or web service.
Through this article, we will learn what is project branching in ACCELQ, project merging in ACCELQ, why we need it and how it is achieved.
We will also discuss various aspects related to project merging in ACCELQ when the work for branching is over and project branching in ACCELQ.
What is Project Branching
Consider Project Branching in ACCELQ as making a copy of the existing project but in an optimized way, i.e., instead of making an actual copy, it only keeps track of changes occurred. Multiple teams can work independently on the development of tests for various features or releases thanks to branching.
Testing teams can make copies (Branches) of projects in test development to work on multiple versions simultaneously thanks to branching. You might keep the original (Master) while working on the Branch, or you might change both differently.
ACCELQ enables extensive branching and merging features in a fully functional and codeless paradigm. No integration with an external version control system is necessary because test assets are controlled locally. Now that we have understood project branching in ACCELQ. We’ll see how to create a branch.
Creating a Branch
We need to have the Tenant Admin Privilege to create a project branch. Read more about the profile privilege in ACCELQ in this article. The steps to create a branch are as follows:
Check for the tenant admin privilege and then log in with the same privilege.
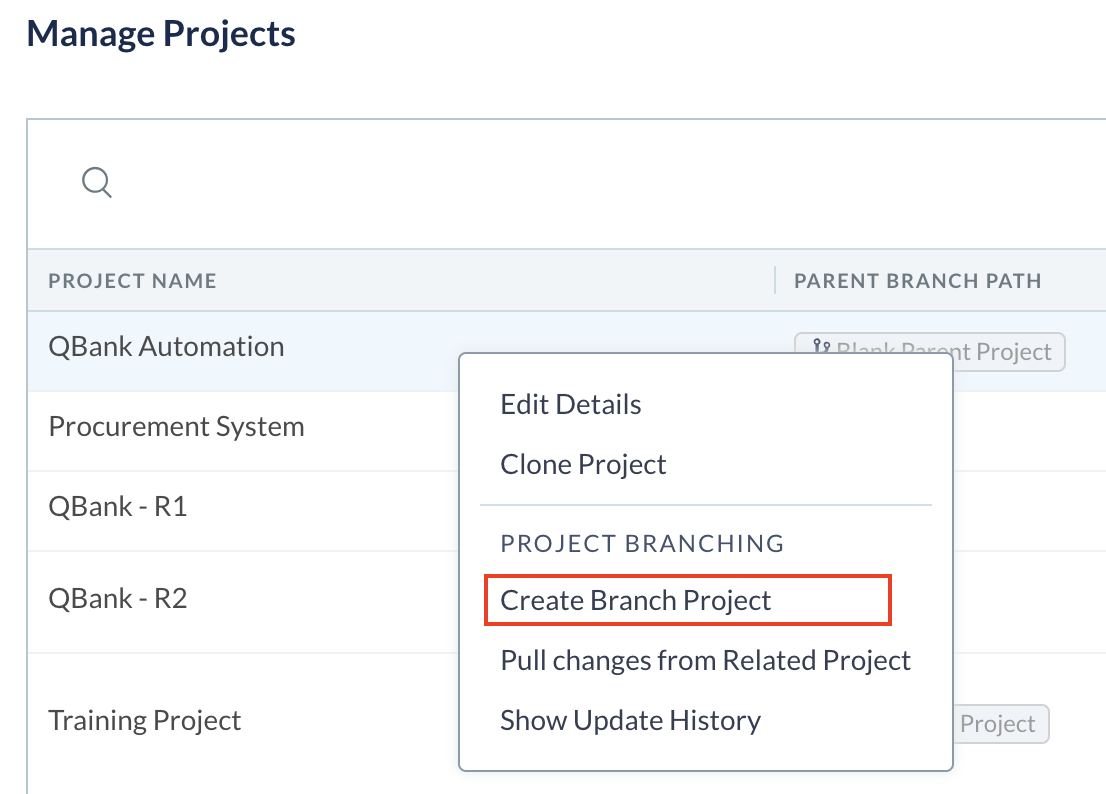
Open the Manage Project tab.
We will have all the projects listed in the space now. Make right-click on the project name and then select Create Branch Project.
Credit: www.accelq.com
After these steps, we will have a branch for the project which works exactly like a project. We can perform all the activities which we perform on the project. The project branch has the same user privilege and configuration as the original one.
Updating Test Assets From Related Projects
Now that we have created a hierarchy in the project, we need to update the test assets for the project. We update the test asset for a project and also the projects that are related to it. To understand this, we can pull changes in the parent project and accordingly make changes in the child project.
In ACCELQ, we have the liberty to pull changes between any of the related projects, but we prefer to pull changes from either parent or child projects.
Also, we need permission as a Project Admin or Tenant Admin to update the test asset.
If we have the privilege of a Project Admin, click on the Branching Information tab in the Project information window. Click on Pull changes from related project to update the test asset in the project.
Credit: www.accelq.com
If we have the privilege as a Tenant Admin, move to the Manage Projects and then select the project that needs to be updated.
Now that we know we need to pull changes to make updates in the project, let us now see how we can select the project from where we need to add updates.
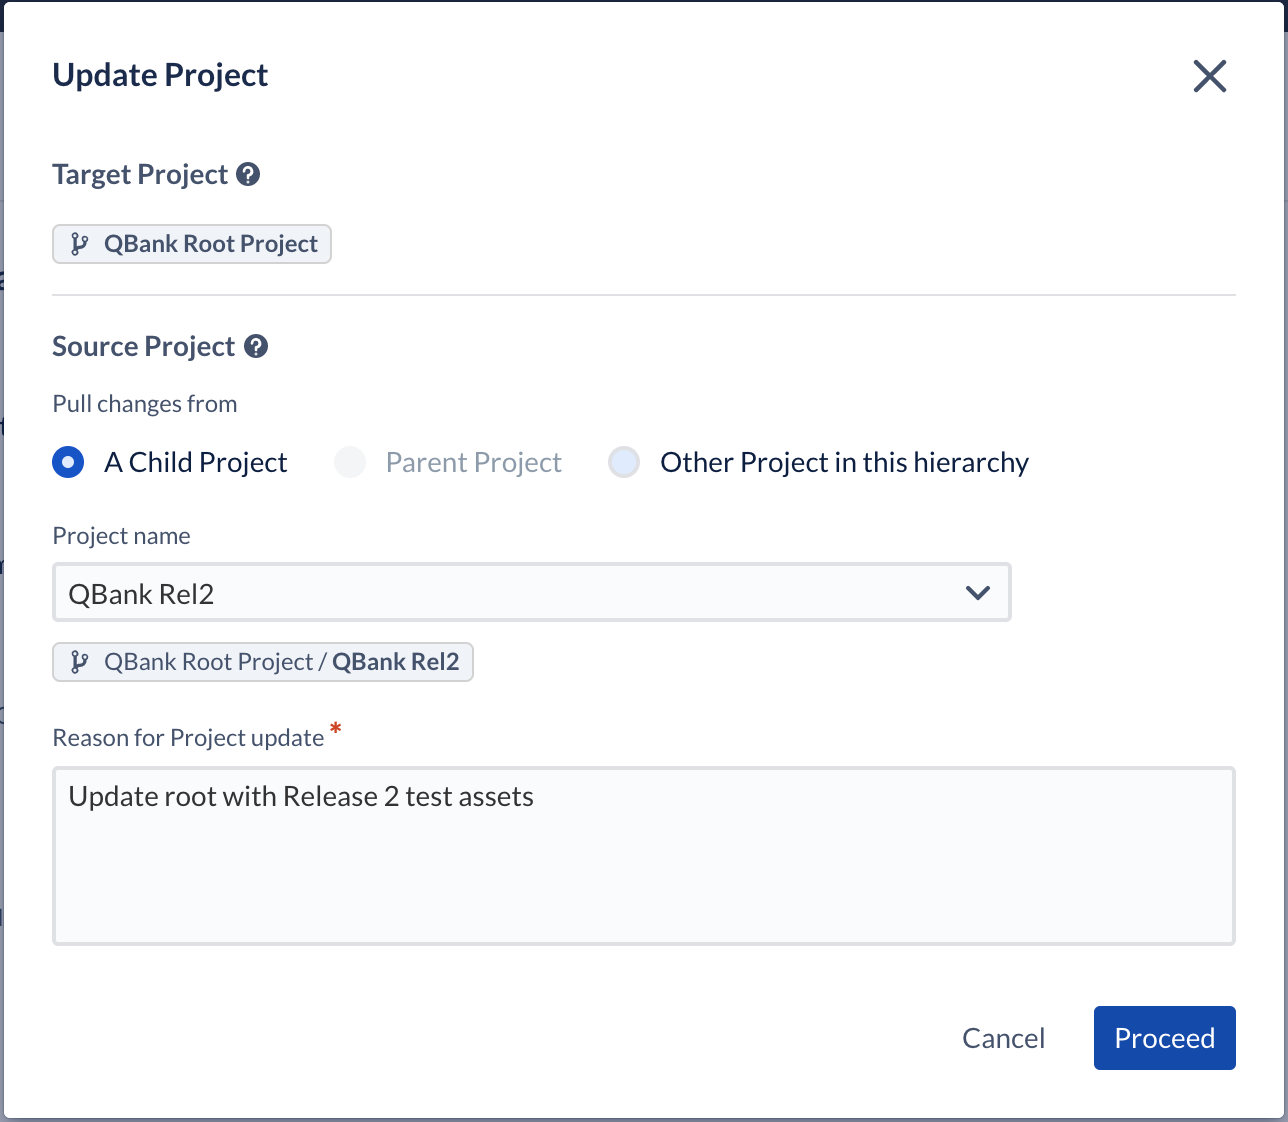
Selecting the Project to Update From
We can choose the project from which the updates have to be pulled. We can choose any related project to pull the change. But we prefer to pull the change from the parent or child project. The window where we choose the project is given below.
Credit: www.accelq.com
Merge Wizard
Merge Wizard helps us view the updates we choose to pull in the project. The window displays a two-column format. We can easily view the differences between the two projects and decide whether to accept or reject the change. The two projects which we are considering are:
Target Project: This is the project we are updating the changes.
Source Project: This is the project we are pulling the changes from.
The merge wizard window where we can see the two projects for comparison is given below:
Credit: www.accelq.com
Reviewing the Changes
In the merge wizard, we review the change for the source project. We review these changes to decide if the changes are to be accepted or rejected in the target project.
Categorization of Changes
The changes which occur are of 5 categories:
Modified: This category represents the changed entities in the source project. We can accept or reject these changes for the target project.
Added: It has the newly added changes in the source project.
Deleted: This has the changes which are now not present in the source project. We can either delete it from the target project or keep it.
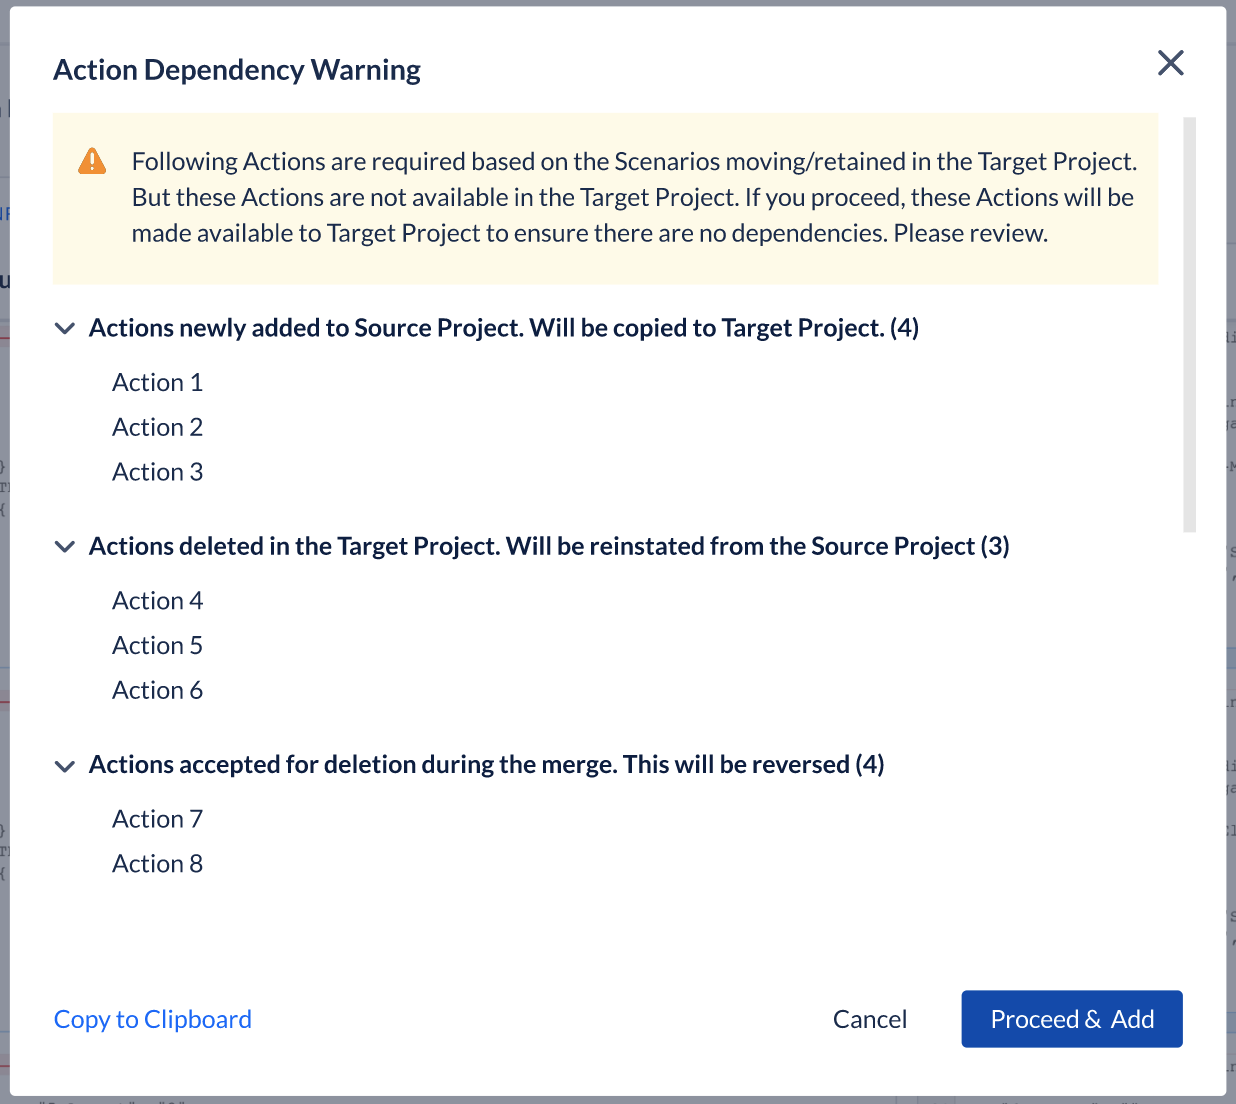
Added: Auto Accepted: We make some changes in the target project with action dependency in the source project. ACCELQ adds these extra dependencies by itself, and these changes come under this category.
Deleted: Auto Recovered: ACCELQ auto recovers any dependencies which might have been deleted, and after making the changes, we might again need it. ACCELQ recovers those by itself and places them in this category. We get a prompt to add all the dependencies like:
Credit: www.accelq.com
Handling Project Configuration Changes
Let us see how we handle the different changes in the Merged Process:
Status Fields: The status fields in the source project are automatically added to the target project.
Custom Fields: Additions in the project are made automatically, but whatever modification happens is left for the user to accept or reject.
Execution Parameters: The extra parameters are added to the project automatically.
App Environments: Same happens with the environment. Newly added ones are updated in the project automatically.
Merging the Views
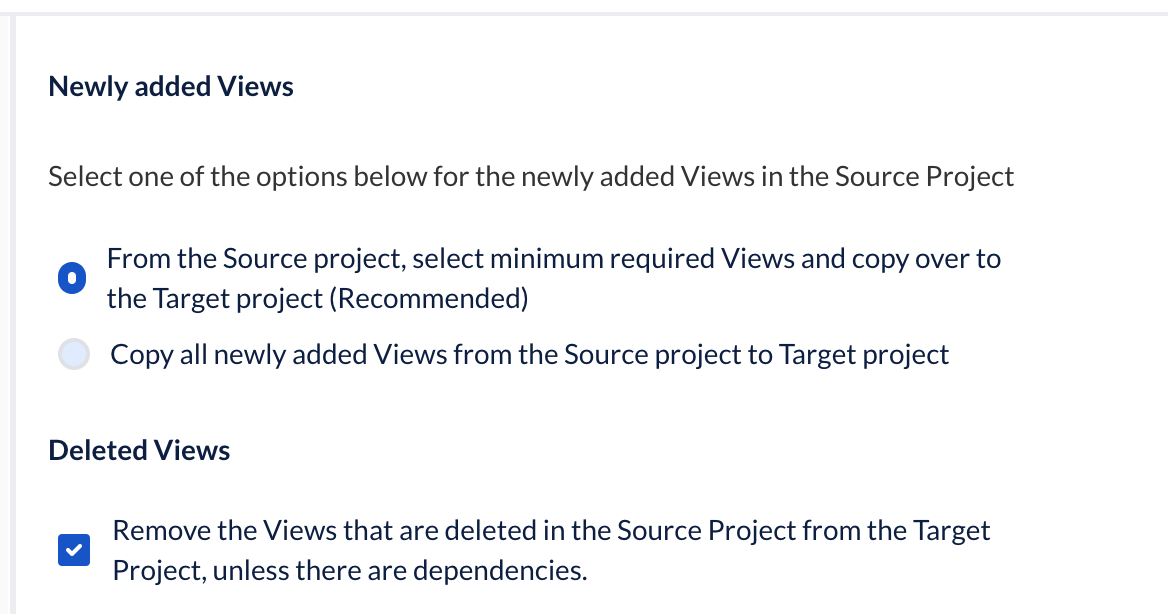
Project Merging in ACCELQ is about merging the branches that we have created. For example, Views are the visual part of the application. It defines how the application will look to the user while using the application. We get two options for merging the views: either we can add only the minimum and required views copied or all the new views to the target project.
Credit: www.accelq.com
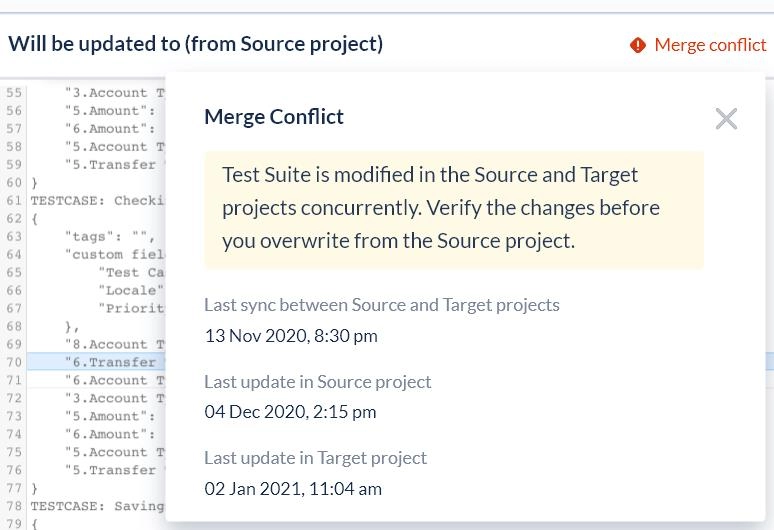
Merging the Conflicts
Project merging may also involve merging conflicts. That’s why, ACCELQ provides a merge conflict flag. It indicates that the changes are updated in both the source and target projects. In this, we need to carefully review the changes and decide if the changes are done correctly or not. We can open the entity from the merge wizard window if we need to review or change something.
Credit: www.accelq.com
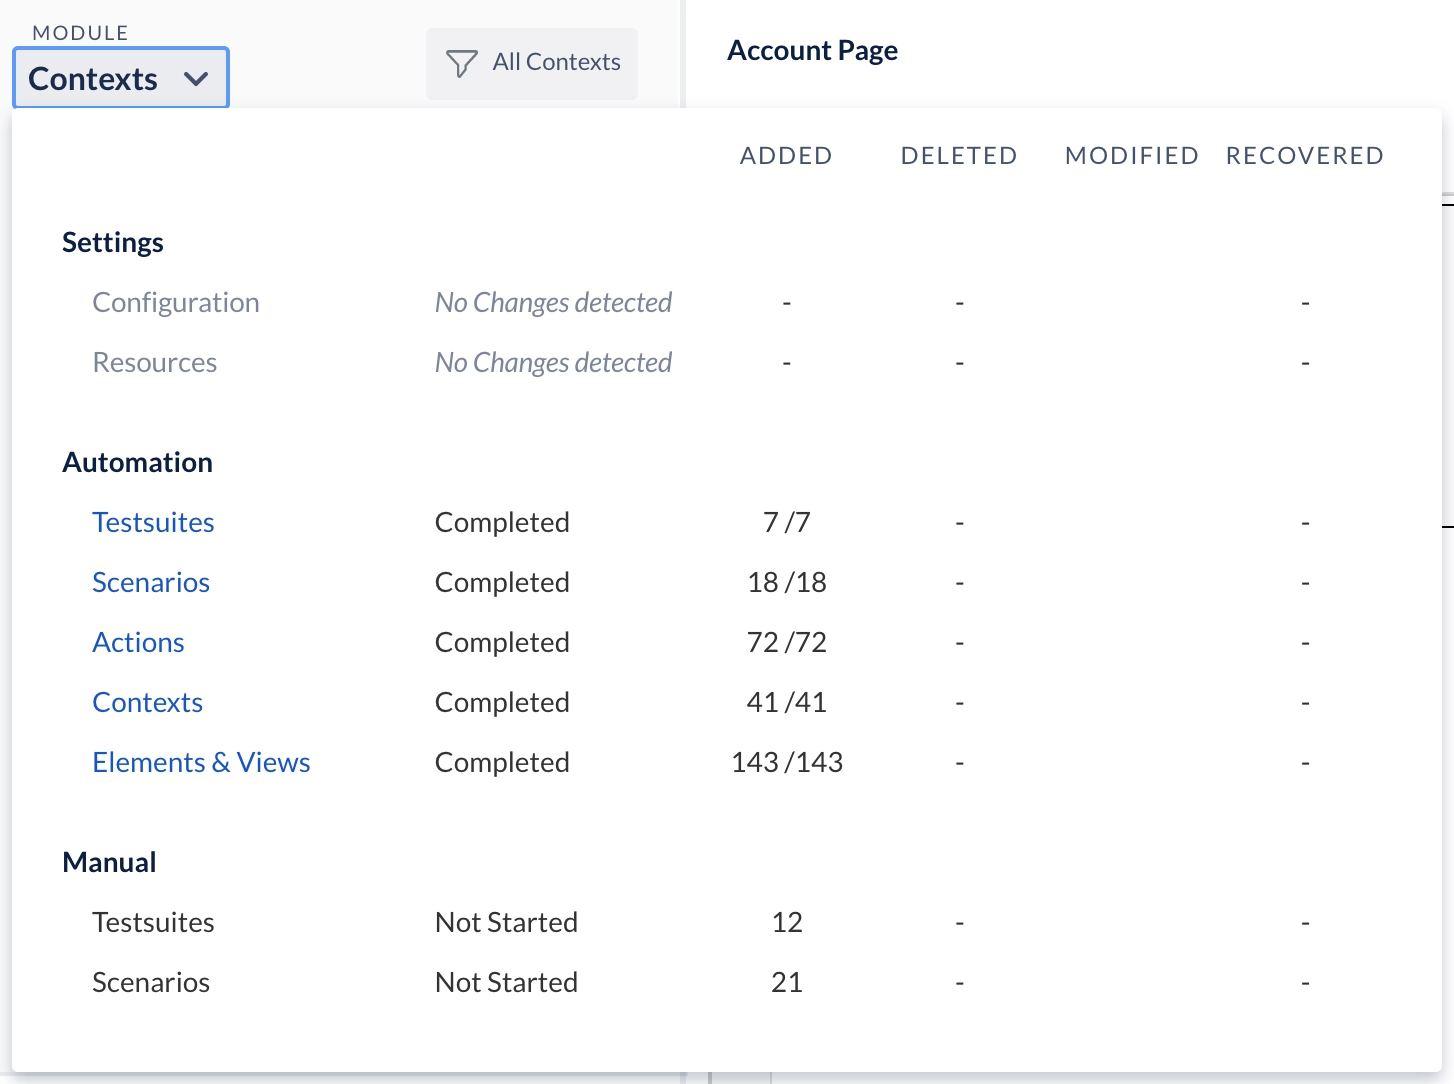
Reviewing the Summary of Merge Operation
ACCELQ provides a feature to see the accepted or rejected status by clicking on the module.
Credit: www.accelq.com
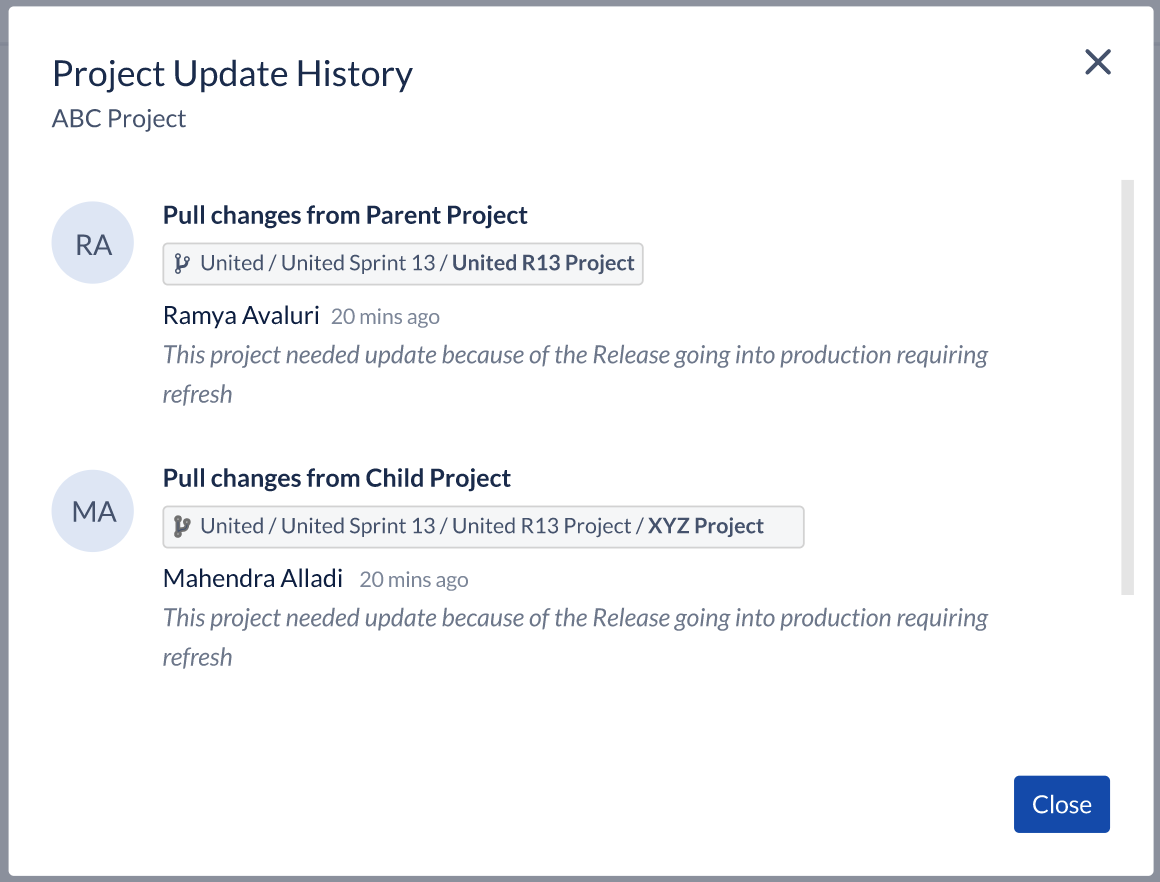
Viewing Update History
After completing all the updates and merges, we can view the final history of the merge made.
Credit: www.accelq.com
Frequently Asked Questions
What is ACCELQ?
ACCLEQ is a browser-based solution for web testing and API testing. ACCELQ is powered by AI and is wholly based on cloud technology. It automates the testing.
What does ACCELQ's context mean?
A context in your app is a placeholder that denotes a specific state of the app or one that serves as a container for functionality that is relevant to that state.
What are the source and target projects?
The source project is the one from which the changes are being pulled. The target project is the one in which the changes are being made.
Can we make changes in the project while merging the branches?
Yes, we can make changes while the merge is being done, but it is not advised to do so.
Conclusion
In this article, we learned about project branching in ACCELQ and project merging in ACCELQ. How is branching useful, and how do we merge them after branching a project to get the final project? Because ACCELQ is an automated testing tool that uses no code to perform the activities, all of this is done without writing a line code. We have different tabs and windows from which we can select the change and accept or reject it.
Project branching in ACCELQ and Project merging in ACCELQ aren’t the only features of ACCELQ. Check out other articles like creating manual tests in ACCELQ and running manual tests in ACCELQ. To learn more about Automation Testing Tools, visit Automation Testing Tools.


 9+ registered

