Building a basic Automatic Form Filler
Let’s say we are trying to automate filling the form like this -> Basic Form that looks like this.
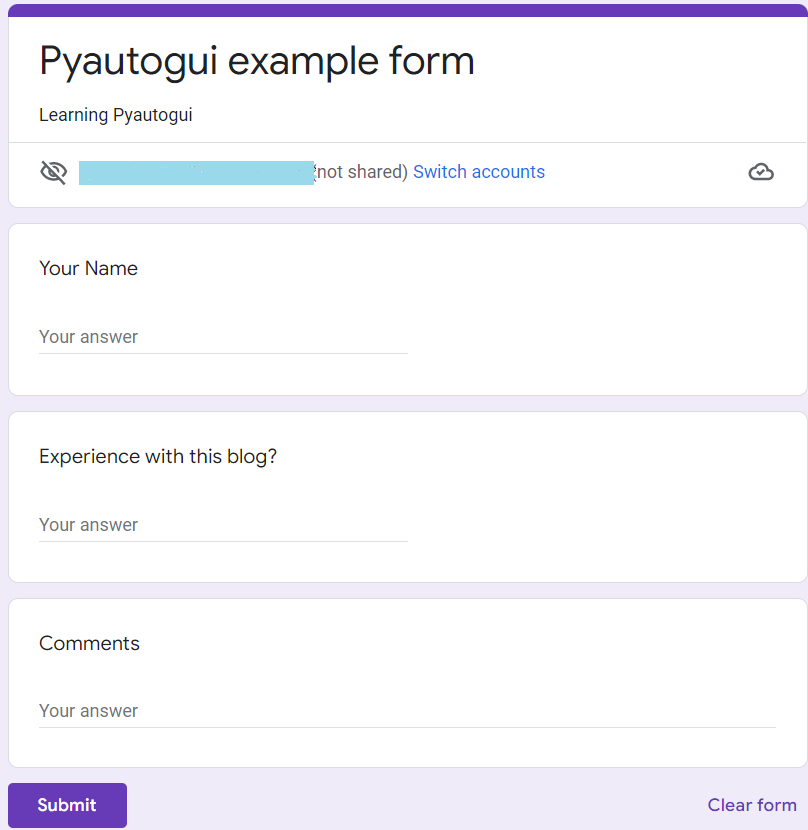
First, we need to figure out what fields are present in the form, and then we need to locate the fields and types of the fields, etc.
For example,
NameFeild is at (648, 319) # according to the computer on which it is opened, etc.
Then we figure out the whole process that looks like:
- First, Click the name field, type the Name, and press TAB to move to the next field.
- Click the Experience field, type the content, and press TAB to move to the following field.
- Click the Comments field, type the content, and press TAB to move to submit button.
- At last, press ENTER key to click the submit button to submit the form.
formFiller.py
# First, we need to import the packages pyautogui and time.
import pyautogui, time

#tell the user to press ctrl+c to kill the script.
print(‘Press CTRL-C to stop’)

#setting the coordinates, this will be different to your computer.
nameField = (648, 319)
submitButton = (651, 817)
submitColor = (75, 141, 249)  #this color will say whether the form is submitted or not.

#Take the person data; you can add multiple persons here and loop through this.
personData = {‘name’ : ‘vamsi’, ‘experience’ : ‘Best’, ‘Comments’ : ‘One Of the Best Blog’}

pyautogui.PAUSE = 0.5

#Check or wait until the form page has loaded
while not pyautogui.pixelMatchesColor(submitButton[0], submitButton[1], submitColor):
	time.sleep(0.5)
print(‘Entering the info of %s…’ %(personData[‘name’]))
pyautogui.click(nameField[0], nameField[1])  #Clicking the name field.
pyautogui.typewrite(personData[‘name’] + ‘\t’)

#the above statement will write the name of the person and press the tab to move to the next field.

#this below conditional statements will fill the experience field
if personData[‘experience’] == ‘Good’:
	pyautogui.typewrite([‘down’, ‘\t’])
elif personData[‘experience’] == ‘Better’:
	pyautogui.typewrite([‘down’, ‘down’, ‘\t’])
elif personData[‘experience’] == ‘Best’:
	pyautogui.typewrite([‘down’, ‘down’, ‘\t’])

#Filling the comments section
pyautogui.typewrite(personData[‘Comments’], ‘\t’)

#Click Submit by pressing the ENTER button
pyautogui.press(‘enter’)
print(‘Clicked Submit’)

You can also try this code with Online Python Compiler
Here this formFiller will fill the basic form.
FAQs
-
Which versions of Python will support the Pyautogui package?
Both Python version 2x and Python 3x will support Pyautogui. It would be best if you had pip installed regarding your version to install pyautogui. As it is a cross-platform tool, it will support Windows, Linux, and macOS.
-
How to press the keys in pyautogui?
Pyautogui will provide a beautiful method called pyautogui.press() function that accepts a string from pyautogui.KEYBOARD_KEYS such as esc, enter, f1. You can go through their official documentation to learn more about it.
-
How do I click on pyautogui?
pyautogui.click() method will allow you to pass a virtual mouse click on your computer screen. This method will accept the x and y coordinates of the location where the click is to be done.
-
What is Pyautogui in Python?
Pyautogui is a python automation tool that will automate the boring stuff. Pyautogui will send virtual mouse clicks and virtual keypresses to windows, macOS, and Linux.
Key Takeaways
Pyautogui is a simple python automation tool to automate the boring stuff such as filling forms etc.
In this form, we have used,
- pyautogui.typewrite(‘content’) method will write the content to the form or screen.
- pyautogui.click(‘entity’) method will click the particular entity represented by their coordinates. Or this method will send a virtual mouse click to the computer.
- pyautogui.press() method will be a mouse event that will be handled with other methods.
- pyautogui. pixelMatchColor() method will return true if the pixel at the given x and y coordinates on the screen matches the given color.
You can search for more useful methods and play around with them by using their official documentation PyAutoGUI.
Hey Ninjas! You can check out more unique courses on machine learning concepts through our official website, Coding Ninjas, and checkout Coding Ninjas Studio to learn through articles and other important stuff to your growth.
Happy learning!


 9+ registered

