Do you think IIT Guwahati certified course can help you in your career?
Introduction
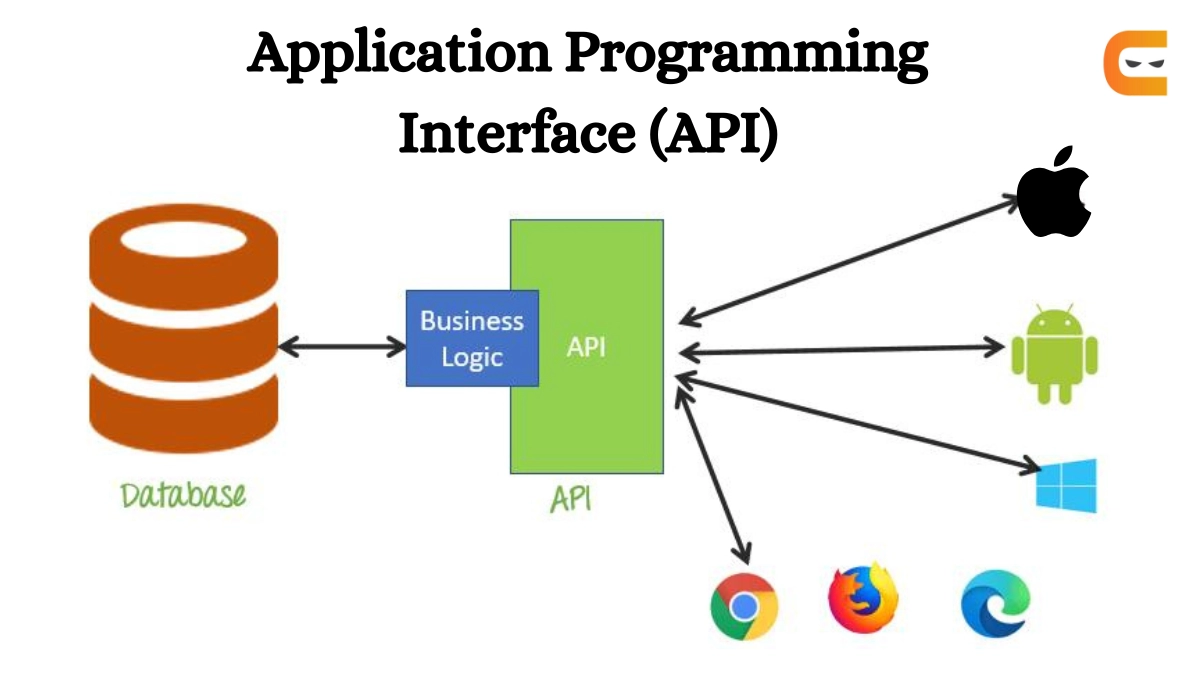
API stands for Application Programming Interface, which allows two or more computer applications to communicate with one another. It is a software interface that provides a service to other software programs. An API specification is a document or industry standard that outlines how to create or use a connection or interface of this type.
In this blog, we will learn how to run virtual services in Ready API. But before discussing how to run virtual services in Ready API, let’s get familiar with Ready API first.
What is Ready API?
ReadyAPI is a user-friendly tool for no-code API testing intended to make your testing processes more efficient. It helps to scale and automate your end-to-end testing for many API types. It runs compatible load testing with your functional tests and enables virtualization to give your development teams quick and dependable integrations.
Let’s now discuss how to run virtual services in Ready API on different machines and in different formats, such as:-
Running Virtual Services on Local Machines
Running Virtual Services on Remote Computers
Deploying Virtual Service In WAR Format
Automating Virtual Service Runs
Running Virtual Services on Local Machine
In this section, we will discuss how to run a Virtual Service on a local computer where Ready API is installed.
There are multiple ways to start a virtual service on a local machine. Let’s discuss each of them one by one.
Using Virtual Service Editor
We can use a virtual service editor to start a virtual service on a local machine. To do so, follow the given steps:-
Select the type of virtual service in the Navigator panel and open it for editing.
To run the service, click on button in the toolbar.
Using Dashboard
We can use the Dashboard and run the virtual service from the Virtual APIs tile.
Using Virtual Service Main Menu
To start a virtual service using the main menu, follow the below steps:-
Choose a virtual service from the Navigator menu.
Then select Virtual Service > Start on the main menu.
Using Test Cases
We can run the virtual service using the functional test cases. You can do this by adding the Virtual Service Runner test step. You have to put the Virtual Service Runner test at the beginning of your test case to run the virtual service before the test sends any request to it.
Using Command Line
To run a virtual service through the command line, you can use the VirtRunner.bat/.sh file.
Running Virtual Services on Remote Computers
Many developers and QA engineer often creates virtual services on their local computers but prefer to run on remote computers/servers. Running the virtual services on remote servers has several advantages:-
It decreases the workload on local computers.
It makes the virtual APIs run 24×7.
You can use VirtServer (a server-side tool designed for running virtual services) to run virtual services on remote computers. There are multiple ways to start a virtual service on remote computers using VirtServer. Let’s discuss each of them one by one.
Using ReadyAPI Navigator
To run virtual services on VirtServer, perform the following steps:-
Install VirtServer on a remote computer, activate its license, and create an account on it.
Deploy the virtual service that you have created on the remote machine.
Finally, run the virtual service and test it.
You can also perform steps 2 and 3 using the ReadAPI Navigator editor.
Using VirtServer Web Interface
You can also run a virtual service on VirtServer using its web interface. To run the virtual service using the web interface of VirtServer, follow these steps:-
In any browser, open the VirtServer web interface. The URL will look like this:-
https://virtserver-ip-or-name:9090/virtserver
Sign in to VirtServer, and then click the button to start the service.
Using Test Cases
We can run the virtual service on the VirtServer computer using the functional test cases. To do this, follow the steps given below:-
You have to put the Virtual Service Runner test at the beginning of your test case to run the virtual service before the test sends any request to it.
Mention the VirtService address in the step properties and the type of virtual service you want to run.
Using Client-Side Command Line
You can run the virtserver-cli.bat command-line utility on the client’s system and use it to deploy virtual services to the remote VirtServer.
Deploying Virtual Service in WAR Format
Another possible way to run a virtual service is by saving them in WAR format (Web Application ARchive) and deploying and running them on a servlet like tomcat.
There are multiple ways to save a virtual service in WAR format. Let’s discuss each of them one by one.
Using ReadyAPI Interface
To save a virtual service in WAR format, follow the below steps:-
Put a value in the virtual service’s path property. The path value is used by the webserver to form the service address on the server. Also, you have to specify the property value by selecting the Navigator panel on the left and specify a value for that property using the editor panel on the right.
To save the file as a WAR file, choose any virtual service in your project and choose Project > Save as WAR from the main menu.
Once you save the file as WAR, the following dialog box will appear :-
In the dialog box, you have to configure settings to generate the WAR file.
After setting the required values, click OK to generate the WAR file.
Using Command-Line Wargenerator
To execute the ReadyAPI load test using the command line, you can use Wargenerator. The Wargenerator is located in the <ReadyAPI>/bin folder. The name of the file is wargenerator.sh (Linux and macOS) or wargenerator.bat (Windows).
The Wargenerator command line has the following syntax:-
wargenerator.bat <arguments> <test-project-file>
We have learned how to save the virtual services as a WAR file. Let’s discuss how to deploy the WAR file to the Tomcat servlet.
Deploying the WAR File to Tomcat
To deploy the WAR file to the Tomcat servlet, follow the below steps:-
Copy the given WAR file to the Tomcat web application directory and restart Tomcat.
After restarting Tomcat, tomcat will run the WAR file automatically.
There is also an alternate method to deploy the WAR file to Tomcat; here, you can use the Tomcat Web Application Manager to upload your WAR file to the Tomcat server.
Automating Virtual Service Runs
In this section, we will discuss how to start your virtual service automatically. It is helpful to run the virtual services automatically before sending requests to it or after your test code is made with a Continuous Integration(CI) system like Bamboo.
There are multiple ways to automate virtual services. Let’s discuss each of them one by one.
Using Test Cases
The easiest way to automate virtual services is to use the Virtual Service Runner test step. You have to call the Virtual Service Runner test at the beginning of your tests before any request is sent to the virtual service. Also, you can add one more instance of Virtual Service Runner to stop your virtual services automatically. For this, you have to call the Virtual Service Runner test at the end of your tests.
Using Command Line
To run a virtual service through the command line, you can use the VirtRunner.bat/.sh file. This can be used only in those computers where ReadyAPI is installed.
Using Continuous Integration Systems
You can also run your virtual services using Continuous Integration (CI) system like Bamboo or Jenkins. Almost every CI system allows you to run any executable. So, you can utilize this functionality to automate test runs and run tests with the command-line utilities included with ReadyAPI.
Frequently Asked Questions
What is an API?
API stands for Application Programming Interface, which allows two or more computer applications to communicate with one another.
What is Ready API?
ReadyAPI is a user-friendly tool for no-code API testing intended to make your testing processes more efficient. It helps to scale and automate your end-to-end testing for many API types.
What is the Ready API Dashboard?
ReadyAPI Dashboard is an easily accessible site where you may view up-to-date information about the tests you've run. It contains interactive tiles to which you may apply different filters to analyze your data thoroughly.
What is REST?
REST stands for Representational State Transfer and is a standard protocol for public APIs.
What is SOAP?
SOAP stands for Simple Object Access Protocol and defines a strongly typed messaging system using XML and schemas.
Conclusion
In this article, we have extensively discussed how to run virtual services in Ready API and multiple methods to run virtual services. I hope you enjoyed reading this article on Running Virtual Services in Ready API.


 6+ registered

