


Introduction
Ready API aims to help user test applications more efficiently. It lets advanced tech teams such as Agile and DevOps development teams enhance API quality. It empowers software teams to share projects and artifacts and report and fix errors from the testing IDE directly.
There comes three modules on a single platform. These are:
- ReadyAPI Test Module
- ReadyAPI Performance Module
- ReadyAPI Virtualization Module
The Test Engine is a part of the ReadyAPI Test module. You can virtualize your service and continue its testing despite being in development.
Let's dive into the article to learn more about Test Engine in Ready API.

Test Engine in Ready API
As the name suggests, Test Engine in Ready API is used for test executions. It helps accelerate the API testing process by automating SoapUI and ReadyAPI tests. It lets you run functional and security tests even without installing ReadyAPI. Thus, there is no compulsion to install ReadyAPI on each agent for running tests.

The Restful API provided helps you run tests as per your preference. That means you can schedule a test and run it automatically or manually. Also, you will have plenty of Operating System options available. Test engines can run on Windows, macOS, Linux, and Headless Machines.
Before starting, you must have a separate license to work with Test Engine. If you do not have these, visit their website and mark a request.
Features
Some of the most prominent features of Test Engine in Ready API are listed below.
- It speeds up the testing process by running tests simultaneously.
- It supports both centralized and distributed execution models.
- It permits you to run large and shorter tests resulting in minimal infrastructure requirements.
- It deploys very easily and can be integrated with existing workflows.
- It reduces the load on system resources by letting you queue requests and adjusting itself as per demands.

Limitations
The limitations of Test Engine in Ready API are listed below.
- It is based on Groovy Scripting, which has limitations on writing data to properties and files.
- It does not permit running virtual services. As a result, you won’t be able to run functional tests with the following.
SOAP VirtResponse
REST VirtResponse
Virtual Service Runner
- It does not support loading tests.
Installation
There are numerous ways to install Test Engine in ReadyAPI. The process is similar for Windows, macOS, and Linux. But, there is a different process for headless machines. We will discuss them all further.
Pre-preparation
As part of pre-preparation, ensure that you own the license mentioned earlier. Also, check whether your computer meets certain system requirements. Use the requirements table below for the same.
Criteria |
Requirements |
| Operating System | Windows 8, Windows 10 (64-bit), Windows Server 2012 - 2019, macOS 10.13 - 10.15, 64-bit Oracle Linux 6 - 8, 64-bit Red Hat Enterprise Linux 6 - 8, 64-bit Suse Linux Enterprise Server 12 - 15, Ubuntu Linux 18.04 - 20.04. |
| Processor |
Recommended- Intel Core i5 or i7 (the 3rd generation or later) or an equivalent AMD processor. Minimal- Intel Core i3 (the 3rd generation or later). |
| RAM |
Recommended- 4 GB of RAM or more. Minimal- 2 GB of RAM |
| Free disk space |
Recommended- 500MB of free disk space for installation. Minimal- 500MB of free disk space for installation. |
Note that if you are installing Test Engine on Ubuntu, you must run the following command before running the installation package. This way, you can avoid an error that may arise during installation.
sudo apt-get install fontconfig
Typical Installation (Windows, macOS, and Linux)
For a Typical installation, follow the steps mentioned below.
- Download the Test Engine installer using the official website.
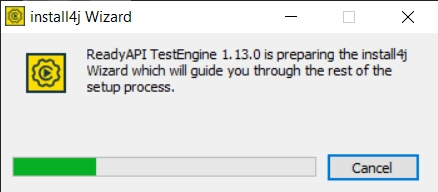
- Run the installation package you downloaded. The installer starts unpacking the files and continues installation in command-line mode.
- A dialog appears. Click on Next.
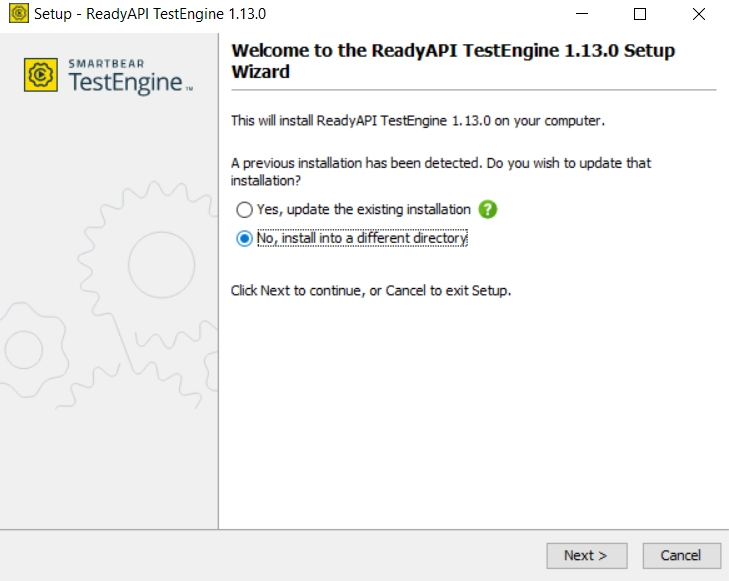
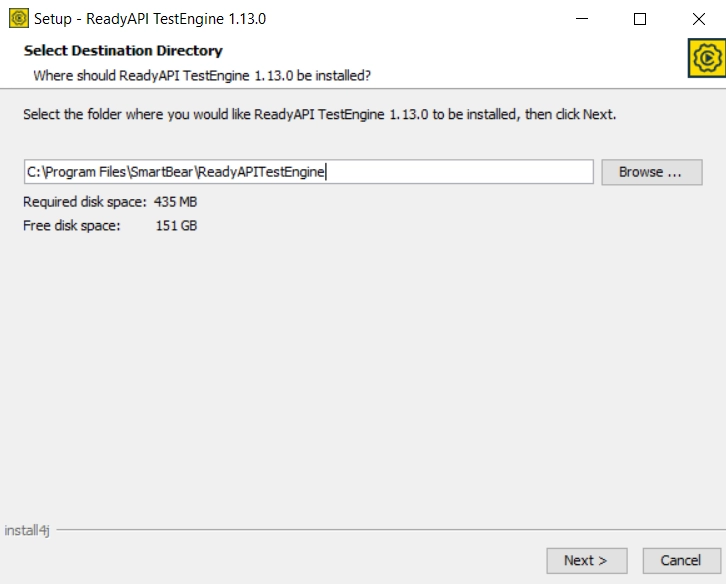
- Mention the particular installation directory and click on Next.
- Now, the wizard will ask if you require a few additional components. These are optional but may be needed to run a few tests.
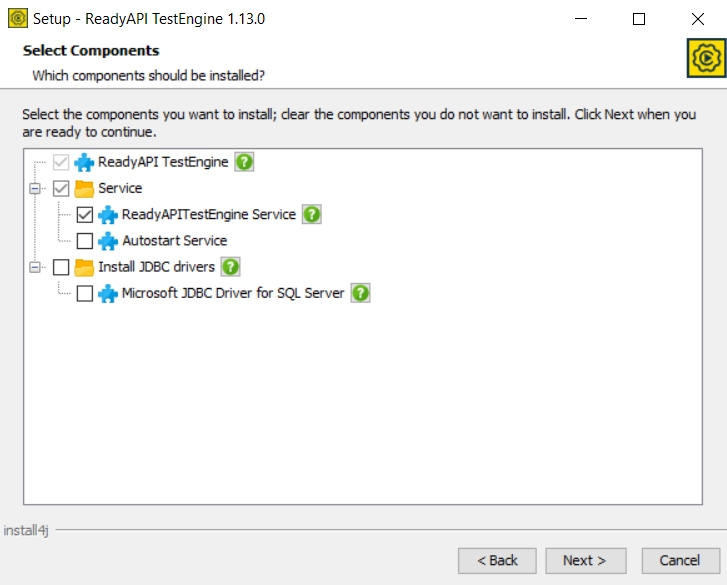
Refer to the table below to learn more about these components.
Component |
Description |
| ReadyAPITestEngine Service | This component demands the wizard to install Test Engine as a Windows Service. This way, you can run the test on the system where it is installed, even if no user is logged in. |
| Autostart Server | This component lets the operating system run services automatically upon startup. This saves time. |
| Microsoft JDBC Driver for SQL Server | Microsoft provides this driver. It is needed while testing when you work with databases and SQL servers. It is advisable to install it if you are planning to run data-driven API tests. |
- Click on Next and wait for the process to complete.
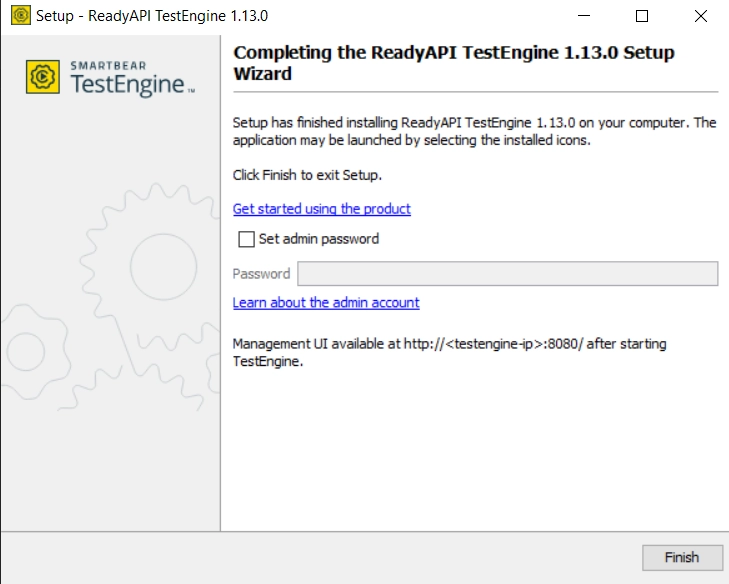
-
Click on Finish to complete. Specify the following operations if needed.
Allow test steps connecting to databases using JDBC
This option enables JDBC connections from the test job. You can configure this option later using Settings.
Set admin password
You can set a password for the default admin account using this option.
Installation Process for Headless Machines
To install the Test Engine in Headless Machines, follow these steps.
- Download the Test Engine installer using the official website.
- Grant required permissions to the installer for execution.
- With the c- argument in its command line, run the installer. For Windows computers, use the following command.
start /wait ReadyAPITestEngine1.26.0.exe -c
- The installer starts unpacking the files and continues installation in command-line mode.
- Mention the particular installation directory and click on Next.
- Now, the wizard will ask if you require a few additional components. Click on Next.
- Wait for the process to complete. Click on Finish to complete.
Updation
If you want to update the Test Engine in Ready API:
- Download the new version from the official website.
- Stop the current engine run and run the downloaded installer.
- Install this version into the same directory as the previous one.
- Run the Test Engine.
Also read - AMD vs Intel

 8+ registered

