Do you think IIT Guwahati certified course can help you in your career?
Introduction
Solutions in Microsoft Dataverse transport apps and components from one environment to another or involve a set of customizations to existing apps. A solution can include one or more apps and other components such as site maps, processes, web resources, choices, tables, flows, and more. Solutions are the means for implementing application lifecycle management (ALM) in Power Apps and other Power Platform products, such as Power Automate.
Working with solutions in Power Apps
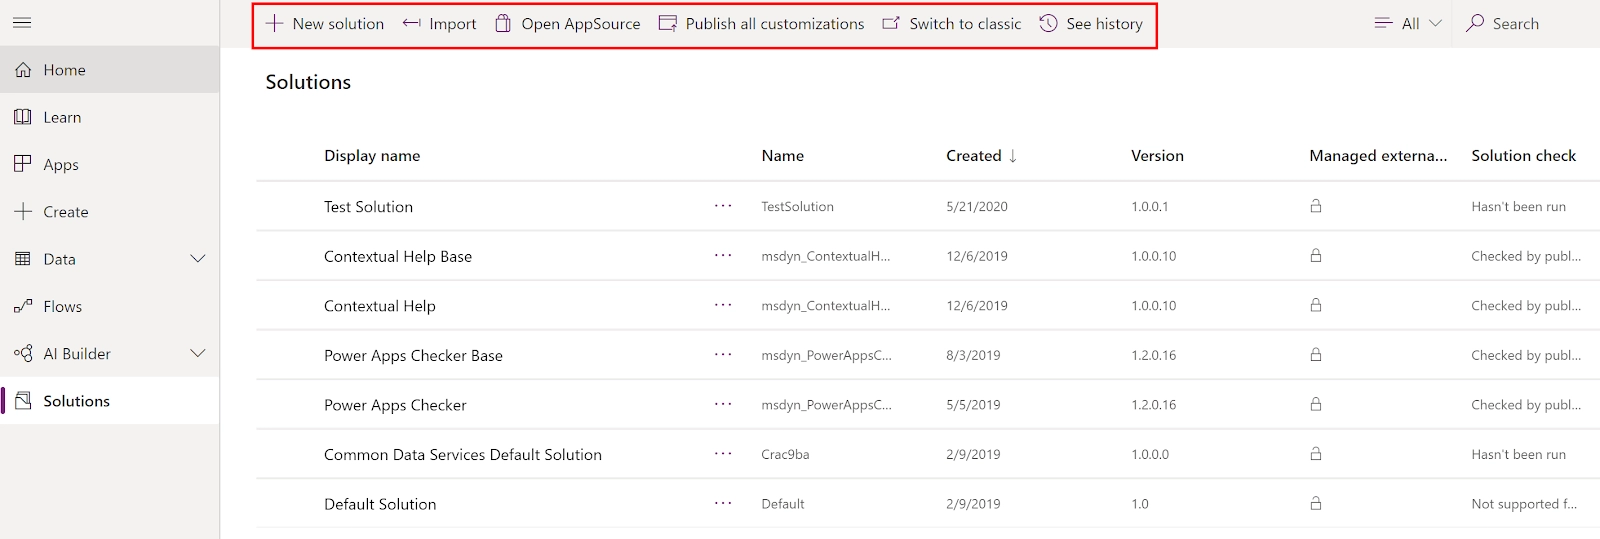
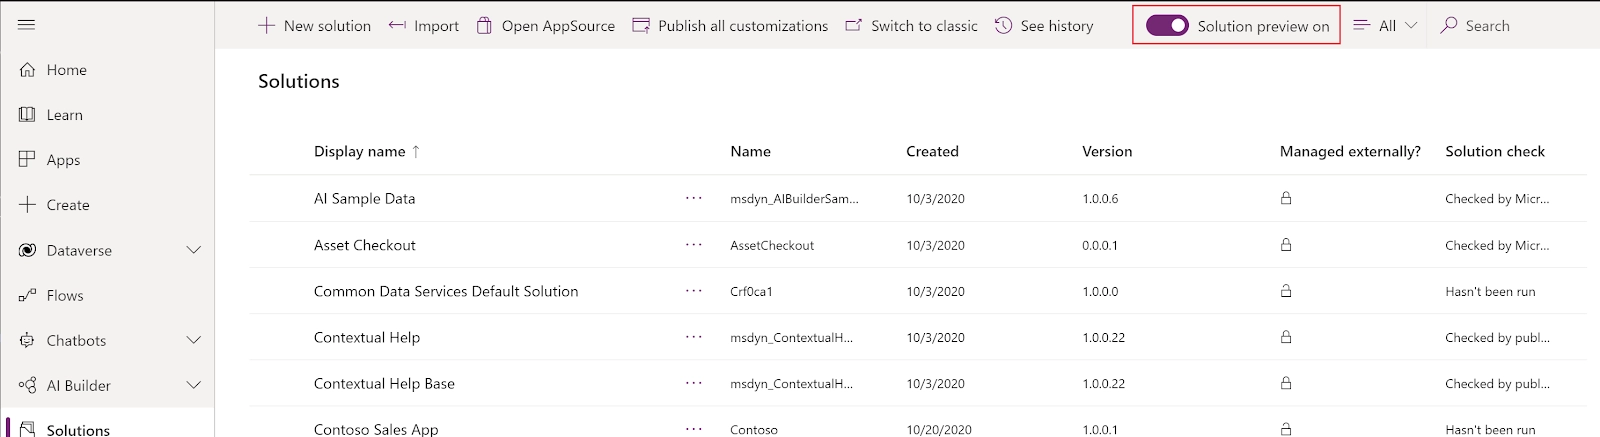
Within Power Apps, you can consider a list of solutions by choosing Solutions in the left navigation. You can execute these solution tasks:
A new solution: To work and locate with just the components you've customized, create a solution, and do all your customization there. Then, you can efficiently distribute your solution to other environments.
Import: Import a solution into your environment.
Open AppSource: MS Appsource is where you can go to get solutions tailored to your industry that works with the products you already use.
Publish all customizations: Publish all functional customizations in your environment.
Switch to a classic: Open the classic solution explorer.
See history: View details about solution operations over time, such as Export, import, and uninstall.
Choose a solution from the Solutions area to view all its components.
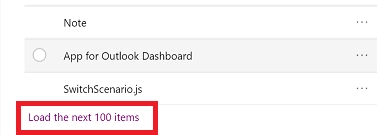
You can scan through all the components in a solution by scrolling through the items. If there are more than 100 items in the list, you can choose Load the following 100 items to see more.
Search and filter in a solution
You can also search for a particular component by its name.
Or filter all items in the list by the component type.
Contextual commands
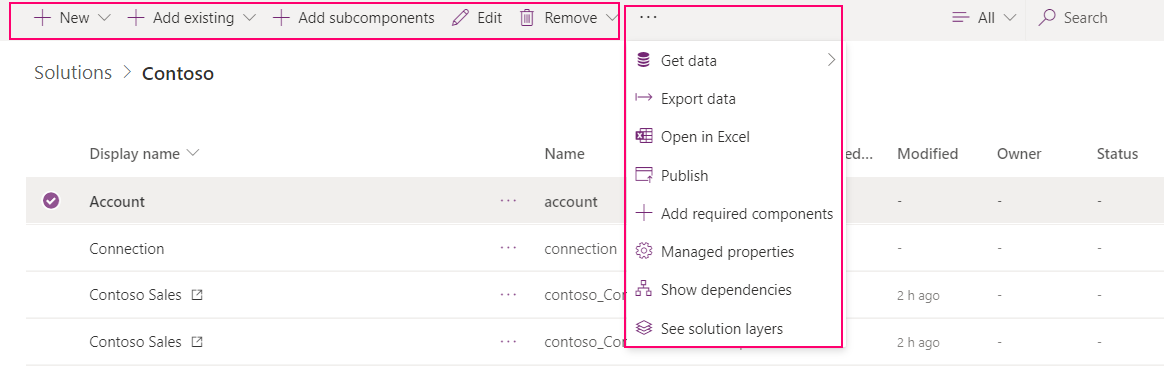
As you select each component, the actions in the command bar will vary depending on the type of component you picked and if the solution is the managed or default one.
When you don't select any component, the command bar will display actions applied to the solution.
With unmanaged solutions or the default one, you can utilize the New or Add Existing command to add or create different types of components.
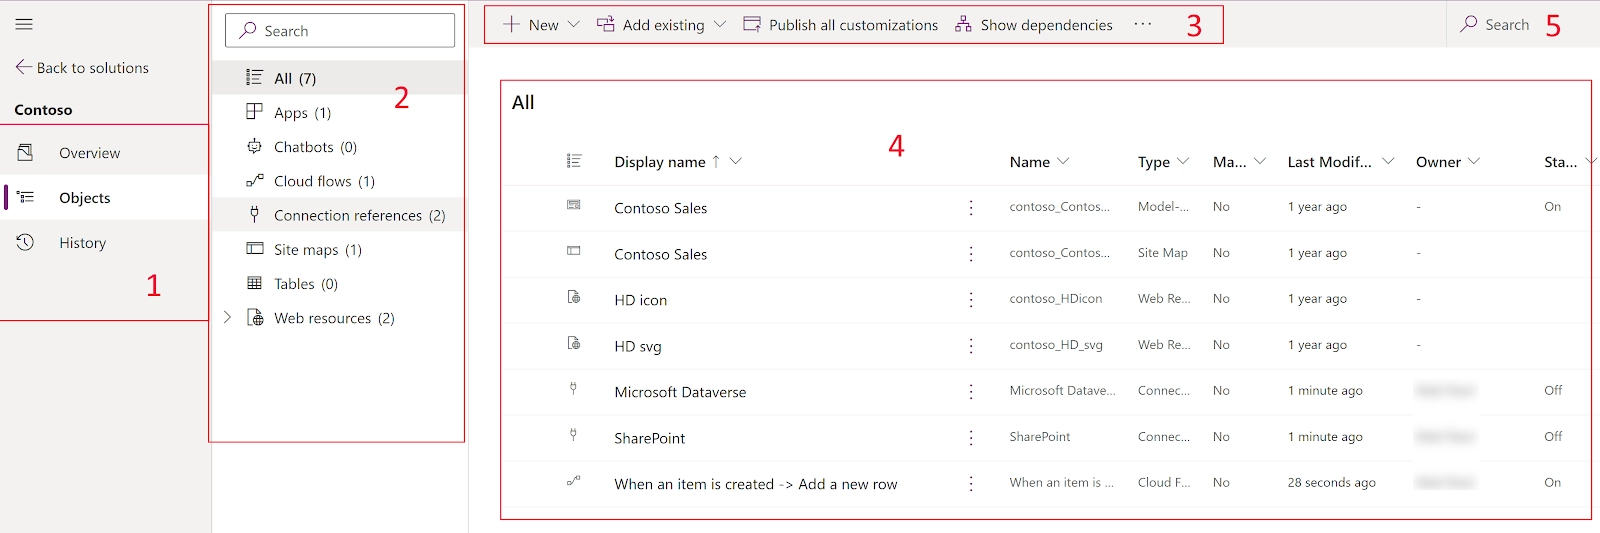
Solution view
Panes- The left navigation pane contains the subsequent areas:
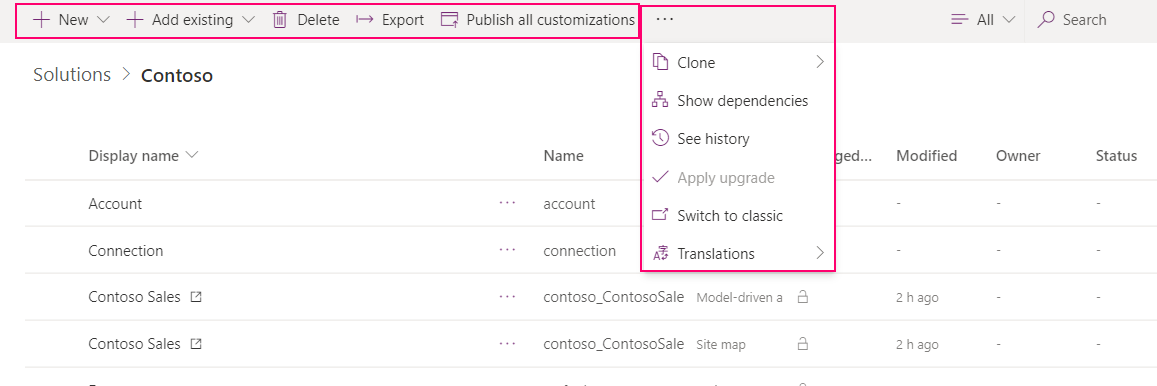
Overview. It gives details about the solution, such as display name, created on date, version name, managed or unmanaged, publisher, description, and whether the solution is a patch. Also, solution health information and actions are available on the command bar, such as ExportExport, clone, upgrade application, and translations.
Objects. It shows a tree view of all objects inside the solution. Choose an object from the objects list (4) to view or edit.
History. It presents the solution operations completed on the solution. An operation can be a solution Export, import,or uninstall. The solution history shows the solution version, type of operation, solution publisher, operation start and end time, and operation result status.
Tree view- From the Object pane, the tree view displays a list you can browse to find an object to open or one of the object's subcomponents. Search for subcomponents and objects that are in the solution.
Command bar- The contextual command bar performs actions on the objects, solutions, or subcomponents.
Objects list- It Displays information and components that can be viewed and opened for editing the selected object from the Objects pane. Add existing objects and subcomponents or create new ones for unmanaged solutions.
Search- It is used to filter the list of subcomponents for the currently selected object—filter on any of the subcomponent's properties. For example, filter on only Lookup data types or whether a column is Required by entering those strings in the Search box.
Disable the modern solution view
By default, the modern solution view is enabled. To disable, switch Solution preview on to off from the Solutions area.
Export solutions
We can manually export solutions using the steps in this article. It is suggested to make an unmanaged solution to export your customizations and then export them periodically so that we have a backup in case anything happens. You can't export default or managed solutions.
Export from Power Apps
Sign in to Power Apps and select Solutions from the left navigation.
Then select the unmanaged solution you want to export in the list of solutions, and then select Export.
Before you export, right pane appears. Select from the given options, and then select Next:
Publish all changes. Notice that only published components are exported when you export an unmanaged solution. It is recommended that you select Publish all changes to ensure all components are present in the exported solution.
Check for issues. We then run the solution checker against the solution to detect performance and stability issues.
The Export this right solution pane appears. Select from the given options, and then select Export:
Version number: Power Apps automatically increases your solution version while showing the current version. You can enter your own version or accept the default version.
Export as: Then, select the package type, either Unmanaged or managed.
The Export can take few minutes to complete. Once it is finished, the export .zip file is available in the download folder specified by your web browser.
Export using the classic experience
Sign in to Power Apps and pick Solutions from the left navigation. Then, select Switch to classic.
In the list, choose the solution you want to export.
In the Publish Customizations step, you will be shown that you will have the choice to Publish All Customizations prior to selecting Next.
If your solution contains any required components, you will notice the Missing Required Components step. You can ignore this warning only if you intend to import this as an unmanaged solution into the original environment. Else, follow the instructions in the dialog to cancel the Export and add the required components.
In the Export System Settings (Advanced) step, you can select specific system settings to fit in your solution. If your solution relies on any of the groups of system settings, choose them and do Next.
Notice Settings options for solution export below for details about the settings contained with each option.
In the Package Type step, you must select whether to export the solution as managed or unmanaged.
The next step lets you to select a target solution for a specific version. This option is typically utilized by ISVs who may want to export a solution compliant with a prior version. Unless you plan to import this solution into an environment that is not upgraded to the same version as the environment version you are utilizing, carry the default.
Choose Export to download the solution file.
Frequently Asked Questions
What is a dataverse in Microsoft?
Dataverse allows you to securely manage and store data that is used by business applications. Data inside Dataverse is stored in a set of tables. A table is a set of rows and columns (formerly referred to as fields/attributes).
Why should we use Dataverse?
Easy to manage – Both the metadata and data are stored in the cloud. You don't need to worry about the details of how they're stored.
Easy to secure – Data is securely stored so that users can see it only if you grant them access. Role-based security allows you to control access to tables for different users within your organization.
Access your Dynamics 365 Data – Data from your Dynamics 365 applications is also stored within Dataverse, allowing you to quickly build apps that use your Dynamics 365 data and extend your apps with Power Apps.
Rich metadata – Data types and relationships are used directly within Power Apps.
How can we integrate data into Dataverse?
We can do so by- Scheduled integration with other systems, Transform and import data using Power Query, and One-time import of data.
How do you interact with tables in dataverse?
When you create an app, you can use custom tables, standard tables, or both. By default, Dataverse provides standard tables. These are designed, to capture the most common concepts and scenarios within an organization.
Conclusion
I hope this article helps you provide some meaningful insights working with columns in Microsoft dataverse.


 8+ registered

