Do you think IIT Guwahati certified course can help you in your career?
Introduction
Hey Ninjas, you must have thought about which framework we can use to make our websites secure and maintainable at the same time. And which framework can handle complex databases? The answer to all these queries is Django.
In this blog, we will learn Detail View: Class Based in Django. But before starting our topic, let's first see what Views are in Django.
Views in Django
Views in Django are Python functions or classes that receive a web request and return a web response in the Django framework. A basic HTTP response, an HTML template response, or an HTTP redirect response that transfers a user to another page are all possible responses. Django views provide the logic required to return data to the user in any manner. The logic that deals with views should be kept in the 'views.py' file as a best practice in a Django app.
We are now familiar with the View in Django. It's time to check out what Detail View is. Let's have a look.
Detail View in Django
The Django Detail View is a view that displays a single instance from the model table. It is used to display information of a single item from the database and perform various tasks on that instance. The detail view method shows the data for a particular database record. It is used to view or display multiple data types on a single page, such as a user's profile.
Class-Based Detail View
In the class-based detail view, we can use separate methods rather than conditional branching to organize the code relevant to various HTTP methods (GET, POST, etc.).
Mixins (Multiple Inheritances) and other object-oriented approaches are used to factor the code into reusable components. In multiple forms, you can additionally display selected fields based on the type of usage required. The slug is frequently used to define the detail view rather than the id.
This blog focuses on the class-based detail view in Django, which includes Django Models. We will work on a project with models and multiple instances to display the class-based detail view.
Before moving on to the sample project, let's first discuss where we can use the class-based detail view.
Usage of Class-Based Detail View
Django has several generic views, like classes, to help with common tasks. Class-Based Detail View is one of them. If we want to view the details of a single model instance, we should use the Detail View. We should not use Detail View if the page contains a form and the object has been created or updated. Form View, Create View, and Update View are suitable for working with forms and creating or updating objects.
Now we have brushed up on all the key concepts required for this blog. Let's now move to the sample example to show the class-based detail view.
Sample Example
In this section, we will see a simple example of a "detail view" in Django.
Step 1: Before proceeding, ensure you have installed Django in your system. If not, you can follow the Django installation blog.
Step 2: In this example, we are going to create a project with the name codingninjas and under the project, we will create an app having the name school. Follow the commands to do so.
The below command will create a project.
django-admin startproject codingninjas
The below command will take you inside the project.
cd codingninjas
Run the server using:
python manage.py runserver
The below command will create an app.
django-admin startapp school
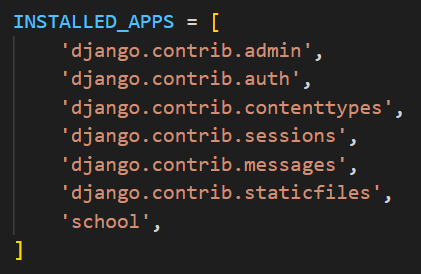
Step 3: After creating the app, go to settings.py in the project, and add your app in the 'INSTALLED_APPS'.
Step 4: Now, we will create a model in the app under school/models.py.
from django.db import models

# Create your models here.
class Student(models.Model):
    name = models.CharField(max_length=100)
    roll = models.IntegerField()
    course = models.CharField(max_length=100)
You can also try this code with Online Python Compiler
Step 7: Let's create a super admin to add the list of students. To do this, run the below command.
python manage.py createsuperuser
It will ask you to create a username and password. After successfully creating the username and password, go to the login page and log in using the username and password.
A page like this will come after the login. Here, we can see our app (school) and the class (Student). Click the add button parallel to the Students, as shown in the diagram above.
You can add multiple students by clicking the ''Save and add another'' option. After adding all the students, click on the ''Save'' button.
Step 8: Coming back to the coding part, go to the school/views.py and add the below code.
from django.shortcuts import render
from .models import Student
from django.views.generic.detail import DetailView
from django.views.generic.list import ListView

class StudentDetailView(DetailView):
    model = Student
    template_name = 'school/student.html'

class StudentListView(ListView):
    model = Student
You can also try this code with Online Python Compiler
Step 9: We will now add the path of the two classes we created in the last step. To do so, go to urls.py under the project.
from django.contrib import admin
from django.urls import path
from school import views

urlpatterns = [
    path('admin/', admin.site.urls),
    path('student/', views.StudentListView.as_view(),
        name = 'studentlist'),
    path('student/<int:pk>', views.StudentDetailView.as_view(),
        name = 'studentdetail'),
]
You can also try this code with Online Python Compiler
Step 10: Our next task is to create a template to render on the browser screen. So, create a folder with the name templates\school under the app, i.e., school.
Now, inside this folder, create an HTML file with the name student_list.html. Here, we will display the list of students.
<!DOCTYPE html>
<html lang="en">
  <head>
    <meta charset="UTF-8" />
    <meta http-equiv="X-UA-Compatible" content="IE=edge" />
    <meta name="viewport" content="width=device-width, initial-scale=1.0" />
    <title>Detail View in Django</title>
  </head>
  <body>
    <h1>Welcome to Coding Ninjas</h1>
    <h2>List of Students</h2>
    {% for stu in student_list %}
    <li><a href="{% url 'studentdetail' stu.id %}">{{stu.name}}</a></li>
    {% endfor %}
  </body>
</html>
Step 11: Now, to display the details of the selected student, we will create a new file or HTML page under the same folder templates\school, with the name student.html.
Note: After following the above steps, your file structure should look like this.
Frequently Asked Questions
How many forms of detail views does Django have?
Function-based detail views and class-based detail views are the two forms of detail views in Django.
What are the differences between class-based List View and class-based Detail View?
The class-based list view is a single template having multiple objects - e.g., a list of to-dos or a list of products available in the shop. And on the other hand, the class-based detail view is a single template with one object, detailed - e.g., the product page.
What comprises Django's architecture?
Django uses MVT architecture which is Model, View and Template.
What is the terminal command to start a server in Django?
We can do "python mange.py runserver" in the terminal to start a server.
What is the difference between Django Project and Django App?
A Django Project is used for making the entire web application, and a Django App is used for managing a particular section of the website.
Conclusion
This article discusses the topic of the Class-Based detail view. In detail, we have seen the definition of views, detail view, and class-based detail view. We also saw the usage and a working example of the class-based detail view.
We hope this blog has helped you enhance your knowledge of the Class-Based detail view. If you want to learn more, then check out our articles.
But suppose you have just started your learning process and are looking for questions from tech giants like Amazon, Microsoft, Uber, etc. In that case, you must look at the problems, interview experiences, and interview bundles for placement preparations.
However, you may consider our paid courses to give your career an edge over others!
Happy Learning!
Live masterclass
Prompt Engineering: Must-have GenAI Skill for 30L+ Roles at Amazon
by Anubhav Sinha
16 Jul, 2026
12:30 PM
Using Netflix Data to Master Power BI
by Ashwin Goyal
13 Jul, 2026
12:30 PM
Top GenAI Skills to crack 30L+ CTC at Amazon & Google
by Sumit Shukla
14 Jul, 2026
11:30 AM
JioHotstar Sports Analytics using IPL Dataset
by Prerita Agarwal
15 Jul, 2026
12:30 PM
Prompt Engineering: Must-have GenAI Skill for 30L+ Roles at Amazon


 9+ registered

