Do you think IIT Guwahati certified course can help you in your career?
Introduction
Django is one of Python's most popular, trusted, and reliable web development frameworks. With Django, we can quickly create web applications without worrying about installation or dependency problems that we usually find with other frameworks.
In this article, we will learn the Class-Based Generic views in Django. They are the advanced set of Built-in views that can be used to implement the CRUD operations such as retrieve, create, update, and delete. We can easily handle GET, POST requests for a view using Class-Based Generic Views.
Class-Based Generic Views
We can use Class-based Generic views instead of function-based views. The operations are handled using Python objects. Class-based Generic views provide some excellent features over function-based views. They can efficiently perform CRUD operations.
It follows Django's DRY ( Don't repeat yourself ) convention.
Using Mixin, we can extend class-based generic views and add more functionalities according to our requirements.
It allows using the class's inheritance features, which can be helpful in various use cases.
Django CRUD (Create, Read, Update, Delete) Using Class-Based Generic Views
This section will learn how to create and use CRUD views using examples. For the examples in this article, we will consider a project with an app named employe.
Class-Based Generic Views
Class-based generic views allow us to handle different HTTP requests using separate class instance methods. This is in contrast to function-based views which handle different HTTP requests by using conditional branching within a single view function. Below is an example of both code to handle HTTP GET requests.
Function-based view
#Importing necessary modules from Django
from django.http import HttpResponse
from django.views import View

#Defining a function-based view called CodingNinjaFunctionalView
def CodingNinjaFunctionalView(request):
# Conditional Branching to check if the request method is 'GET'
if request.method == 'GET':
# View logic will go here
return HttpResponse('result')
Class-based view
#Importing necessary modules from Django
from django.http import HttpResponse
from django.views import View

#Defining a class-based view called CodingNinjaClassView
class CodingNinjaClassView(View):
# Defining the get method that handles GET requests
def get(self, request):
# View logic will go here
return HttpResponse('result')
CRUD Ninja App
Now we are creating a crud project to store data of some ninjas registering on our website.
Step 1: Create a project by typing the below code.
django-admin startproject crud
The above command starts a new Django project with the name "crud." This will create a new folder called "crud" that includes some required files and directories to start a new Django project.
Step 2: Now we move into the crud folder by typing the below code.
cd crud
Step 3: Now we run the server to check if the Django python is setup or not properly.
Step 4: Now we create a new Django app named "employee" within your Django project.
python manage.py startapp employee
Step 5: Now, we create models inside the employee.
from django.db import models

# Define a Django model named "Ninja"
class Ninja(models.Model):

    # Define the fields of the "Ninja" model
    eid = models.CharField(max_length=20)  # Character field for employee ID
    ename = models.CharField(max_length=100)  # Character field for employee name
    eemail = models.EmailField()  # Email field for employee email address
    econtact = models.CharField(max_length=15)  # Character field for employee contact information

    # Define a string representation for the "Ninja" model
    def __str__(self):
        return "%s " %(self.ename)

    # Define the meta properties of the "Ninja" model
    class Meta:
        db_table = "employee"  # Specify the database table name for the "Ninja" model as "employee"
Step 6: Now we create form.py. The below code state the Django form with the name NinjaDetails. It is based on the Ninja model. Where forms.ModelForm class is used as a base class for the NinjaDetails form, which provides a way to create a form based on a model.
from django import forms
from employee.models import Ninja
from django.forms import fields

class NinjaDetails(forms.ModelForm):
    class Meta:
        model = Ninja
        fields = "__all__"
Step 7: Now we set up views.py. The below code you will see defines several views that interact with the Ninja model and the NinjaDetails form to implement a basic CRUD (Create, Read, Update, Delete) application.
from django.shortcuts import render
from django.shortcuts import render, redirect
from employee.forms import NinjaDetails
from employee.models import Ninja

def emp(request):
    if request.method == "POST":
        form = NinjaDetails(request.POST)
        if form.is_valid():
            try:
                form.save()
                return redirect('/show')
            except:
                pass
    else:
        form = NinjaDetails()
    return render(request,'index.html',{'form':form})
def show(request):
    employees = Ninja.objects.all()
    return render(request,"show.html",{'employees':employees})
def edit(request, id):
    employee = Ninja.objects.get(id=id)
    return render(request,'edit.html', {'employee':employee})
def update(request, id):
    employee = Ninja.objects.get(id=id)
    form = NinjaDetails(request.POST, instance = employee)
    if form.is_valid():
        form.save()
        return redirect("/show")
    return render(request, 'edit.html', {'employee': employee})
def destroy(request, id):
    employee = Ninja.objects.get(id=id)
    employee.delete()
    return redirect("/show")
Step 8: Now we set URL to route the links where we want to. It is very simple. The below url.py file is from the crud folder where we include the employee.url.
from django.contrib import admin
from django.urls import path
from django.urls.conf import include

urlpatterns = [
    path('admin/', admin.site.urls),
    path('',include('employee.urls'))
]
Below is the url.py file from the employee folder where we have routed everything.
from django.contrib import admin
from django.urls import path
from employee import views

urlpatterns = [
    path('admin/', admin.site.urls),
    path('emp', views.emp),
    path('show',views.show),
    path('edit/<int:id>', views.edit),
    path('update/<int:id>', views.update),
    path('delete/<int:id>', views.destroy),
]
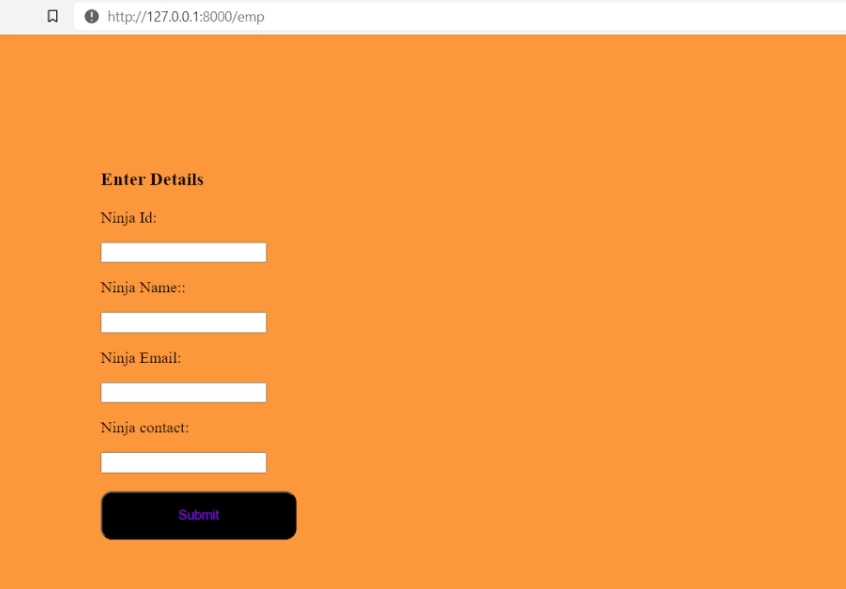
Step 9: Now, create a templates folder for the frontend part. I will not be explaining the fronted part in deep because it will kill your time as well if you are learning crud you suppose to be aware of the simple frontend thing.
Python manage.py makemigrations is a command used in the Django web framework to create new database migration files based on changes to the models (database tables) defined in the code.
Python manage.py migrate is a command used in the Django web framework to apply those migration files to the database, updating the schema and data accordingly.
Step 11: Create a Static folder for style.css, below is the file structure and code.
NOTE: Make sure you add your employee app in the setting.py file in the section of INSTALLED_APP by typing 'employee'
Output
Frequently Asked Questions
What are Mixins in Django?
Mixins are classes in Django that provide additional functionality to Class-Based Generic Views. They allow us to add new functionalities to existing views without repeating the code and provide a way of code reusability.
What are the advantages of class-based views over function-based views?
Class-Based views have a lot of advantages over function-based views. The most significant advantage of the class-based view is inheritance. We can also extend class-based views and add more functionalities with Mixins. It has Built-in class-based generic views.
What are some disadvantages of Class-based Generic views?
There are a few disadvantages of class-based generic views. It becomes harder to read the codes in the parent class as not all the codes are available in a single location.Also use of view decorators require extra import or method override.
State some differences between Class-based views and Function-based views?
Function-based views are easy and simple to implement, have explicit code flow, and have straightforward usage of decorators. With Class-based views, we can easily extend and reuse codes using inheritance and built-in class-based generic views.
What are the advantages of using Class-Based Generic Views over function-based views in Django?
Class-Based Generic Views provide several advantages over function-based views, such as DRY convention, inheritance, mixins, and efficient handling of CRUD operations using Python objects.
Conclusion
In this article, we have discussed the class-based generic views and how they are different from function-based views. We also implemented the CRUD operations using the in-built views.
If you want to rock in your tech interviews, you have to practice various questions, and let me share with you the Coding Ninjas Studio platform where you can find questions asked in all big-tech giants.


 9+ registered

