


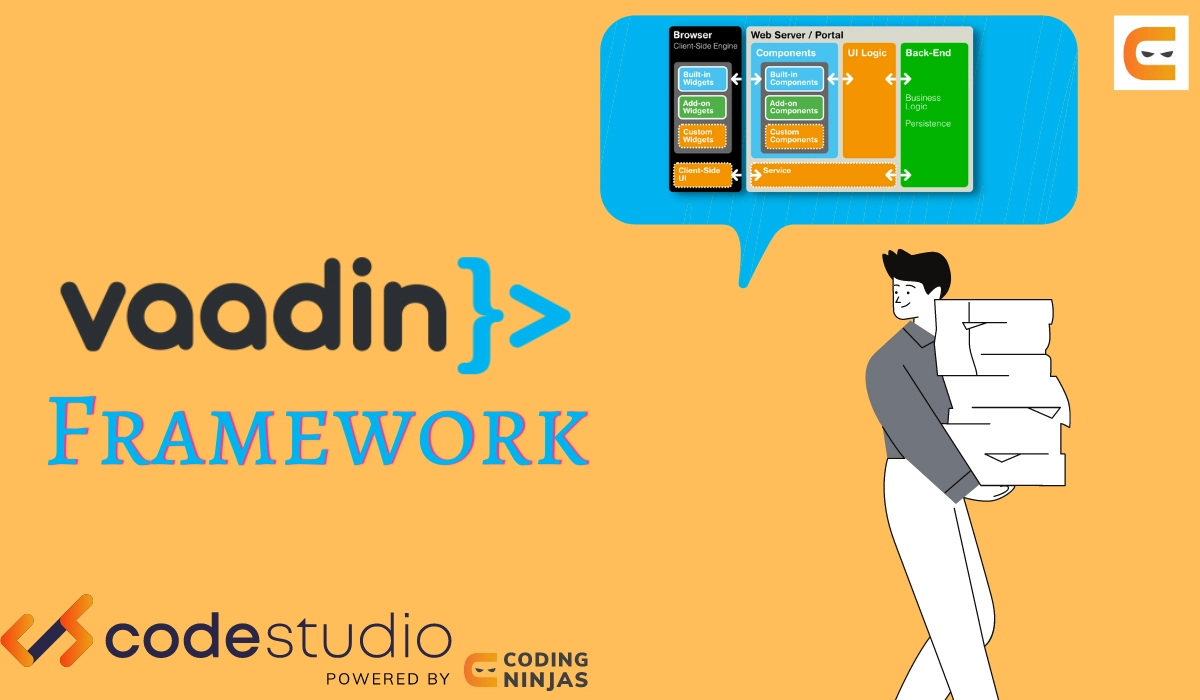
Introduction
In this article, we show you how to Create an embedded Vaadin application—an application that can be added to another website. Vaadin offers the WebComponentExporter class to make it possible to embed apps utilizing Web Components. Micro frontends and embedded applications both have similar names. They are discrete, independent chunks of code that may be maintained by several groups using various frameworks.
So let's see how to create an embedded Vaadin Application, but before beginning with creating an embedded Vaadin Application, I need your 100% Concentration and focus here.
Creating an Embedded Vaadin Application
You must make the following in order to embed a Vaadin application:
- A place of entrance. Making a WebComponentExporter for the Vaadin Component you wish to embed will do this.
- To manage requests to your web component, use a VaadinServlet. The servlet may be deployed independently as a standalone WAR file or defined in a non-Vaadin application.
Our scenario employs:
-
one specialized servlet to manage the primary application logic;
- much of the content shown by the servlet is static;
- Whether or not a user is logged in determines how the material is different.
- a Vaadin Component that may be embedded to construct a login form
Note: The application includes a VaadinServlet. However, its mapping is different from the main servlet mapping.

The MainAppServlet Servlet Class should be Created.
The static page that includes our login form as a web component is served by this servlet.
@WebServlet(urlPatterns = {"/example"})
public class MainAppServlet extends HttpServlet {


    @Override
    protected void doGet(HttpServletRequest req, HttpServletResponse response)
            throws ServletException, IOException {
        response.setContentType("text/html;charset=UTF-8");


        Object authToken = req.getSession().getAttribute("auth_token");
        boolean isAuthenticated = authToken != null;


        try (PrintWriter out = response.getWriter()) {
            out.println("<!DOCTYPE html>");
            out.println("<html><head>");
            out.println("<meta http-equiv='Content-Type' content='text/html; "
                    + "charset=UTF-8'>");


            if (!isAuthenticated) {
                out.println("<script type='text/javascript' "
                        + "src='/vaadin/VAADIN/build/webcomponentsjs/"
                        + "webcomponents-loader.js'></script>");
                out.println("<script type='module' src='/vaadin/web-component"
                        + "/login-form.js'></script>");
                out.println("<script type='text/javascript' "
                        + "src='/log-in.js' defer></script>");
            }
            out.println("</head><body>");
            if (isAuthenticated) {
                out.println("<h1>Welcome "
                        + UserService.getInstance().getName(authToken)
                        + "</h1>");
            } else {
                out.println("<login-form userlbl='Username' pwdlbl='Password'>"
                        + "</login-form>");
            }
            out.println("</body>");
            out.println("</html>");
        }
    }
}
Let's examine the HTML content MainAppServlet produced:
-
This line loads the polyfill for the web component:
<script type='text/javascript'
        src='/vaadin/VAADIN/build/webcomponentsjs/webcomponents-loader.js'>
</script>
-
It loads the following web component:
<script type='module'
        src='/vaadin/web-component/login-form.js'>
</script>
-
Both src attributes for the script begin with / vaadin/. Use this URI to connect to the Vaadin servlet.
-
The usual URI to use to import the web component is the second portion of the link, /web-component/login-form.js. It comprises the login-form.js web component file and the hard-coded web component portion. Based on the settings made in the exporter, Vaadin generates the web component file.
- In our example, the web component's name must be "login-form." Both the exporter's super function Object() and the HTML code where the web component is placed must use this name. In our illustration, this is immediately after the body> tag:
<login-form userlbl='Username' pwdlbl='Password'>
</login-form>
- Userlbl and PWDlbl are the two attributes of the "login-form" web component. These values are sent from the HTML to an instance of the web component.

Create a VaadinServlet Instance.
@WebServlet(urlPatterns = { "/vaadin/*" })
public class WebComponentVaadinServlet extends VaadinServlet {
}
- As was already explained, the VaadinServlet can handle requests for web components thanks to the /vaadin/* mapping. Any URI may be used, but it must be the same URI in both the import declaration and the mapping.
Note: An explicit servlet registration is not required if you are deploying your web component exporter(s) as a standalone WAR application. The "/*" mapping automatically registers a servlet instance.
1.Build the component class for the LoginForm.
public class LoginForm extends Div {
    private TextField userName = new TextField();
    private PasswordField password =
            new PasswordField();
    private Div errorMsg = new Div();
    private String userLabel;
    private String pwdLabel;
    private FormLayout layout = new FormLayout();
    private List<SerializableRunnable> loginListeners =
            new CopyOnWriteArrayList<>();


    public LoginForm() {
        updateForm();


        add(layout);


       Button login = new Button("Login",
                event -> login());
        add(login, errorMsg);
    }


     public void setUserNameLabel(
            String userNameLabelString) {
        userLabel = userNameLabelString;
        updateForm();
    }


    public void setPasswordLabel(String pwd) {
        pwdLabel = pwd;
        updateForm();
    }


    public void updateForm() {
        layout.removeAll();


        layout.addFormItem(userName, userLabel);
        layout.addFormItem(password, pwdLabel);
    }


    public void addLoginListener(
            SerializableRunnable loginListener) {
        loginListeners.add(loginListener);
    }


    private void login() {
        Optional<Object> authToken = UserService
                .getInstance()
                .authenticate(userName.getValue(),
                    password.getValue());
        if (authToken.isPresent()) {
            VaadinRequest.getCurrent()
                    .getWrappedSession()
                    .setAttribute("auth_token",
                            authToken.get());
            fireLoginEvent();
        } else {
            errorMsg.setText("Authentication failure");
        }
    }


    private void fireLoginEvent() {
        loginListeners.forEach(
                SerializableRunnable::run);
    }
}
-
The sample makes use of the FormLayout, TextField, PasswordField, and Button Vaadin components.
-
While the session is active, the code handles authentication and stores an authentication token in the HttpSession, making it accessible.
-
The main application servlet switches behavior and routes authorized users to the main servlet, which now displays content particular to authenticated users because it shares the same HttpSession instance. There are several methods for doing this:
-
Set the path to "/example" and run JavaScript straight from your Java code: getUI().get().getPage (). executeJs("window.location.href='/example'");.
- Design the component code in a manner similar to this example so that its logic is separated, and it is not required to be aware of the embedding environment. By using this technique, you may totally divorce the logic of an embedded component from the program that uses it. In this example, the fireLoginEvent() function calls the addLoginListener() method, which enables you to register a listener.

2. The web component exporter must be used to export the LoginForm component as an embeddable web component as the last step.
public class LoginFormExporter
        extends WebComponentExporter<LoginForm> {
    public LoginFormExporter() {
        super("login-form");
        addProperty("userlbl", "")
                .onChange(LoginForm::setUserNameLabel);
        addProperty("pwdlbl", "")
                .onChange(LoginForm::setPasswordLabel);
    }


    @Override
    protected void configureInstance(
            WebComponent<LoginForm> webComponent,
            LoginForm form) {
        form.addLoginListener(() ->
                webComponent.fireEvent("logged-in"));
    }
}
- The exporter calls the super function Object() super to declare its tag name as "login-form" ("login-form").
- The userlbl='Username' and 'pwdlbl='Password' component properties are defined using the addProperty() function to accept data from the HTML element to the web component instance. Instead of hard-coding the labels for the user name field and password field in the LoginForm component class, we specify them through HTML in this example
- The abstract function configureInstance(), which registers a login listener, is implemented by the LoginFormExporter class.
- A client-side "logged-in" event is fired by the login listener using the webcomponent.fireEvent() function. This event has to be handled in some way by the main application.
- Javascript file handle’s custom event via the line <script type='text/javascript' src='log-in.js'></script> in MainAppServlet

var editor = document.querySelector("login-form");
editor.addEventListener("logged-in", function(event) {
    window.location.href='/example';
});
- The built-in servlet uses the API provided by LoginForm through a custom event and adds an event handler to the event.
3. Run the application with mvn jetty:run. After the Jetty starts, navigate to http://localhost:8080/example.
-
Enter login details and click the "Login" button:
- Username: admin
- Password: admin


 9+ registered

