Django Installation
To download Django, visit https://www.djangoproject.com/download/, where various options to download Django will be available. Django requires pip, a package management system used to install and manage packages written in python to start the installation.
Django Installation in Ubuntu
Before Django installation, make sure pip is installed in the local system. Then install the required version with pip:
pip install django==3.2.10
Verifying Django Installation in Ubuntu
After installing Django, we need to verify the Django installation. For this, open the terminal and write python3, and press enter. It will display a python shell where we can verify the Django installation.
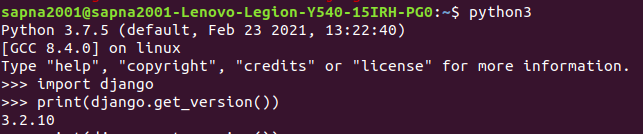
Verifying Django installation on Ubuntu
Django Installation in Windows
Django installation is effortless in python using pip. In the command prompt, execute the following command:
pip install django
Verifying Django Installation in Windows
After the installation has been completed, we can verify the Django installation by executing the following command in the command prompt:

Verifying Django installation on Windows
Database Setup
Django supports various database engines, and we can set up any of them based on our requirements after referring to the respective documentation.
Web Server
Django comes along with a lightweight web server for developing and testing applications. This server is pre-configured to work with Django, and it restarts whenever we modify the code.
However, Django does support Apache and other popular web servers such as Lighttpd.
Launch Django App
For this, create a new Django project using the following command:
django-admin startproject djangoApp
Here djangoApp is the name of the project.
Now let's verify if the Django project works. For that change into the djangoApp directory, and run the following command:
python3 manage.py runserver
The following output is seen on the terminal:
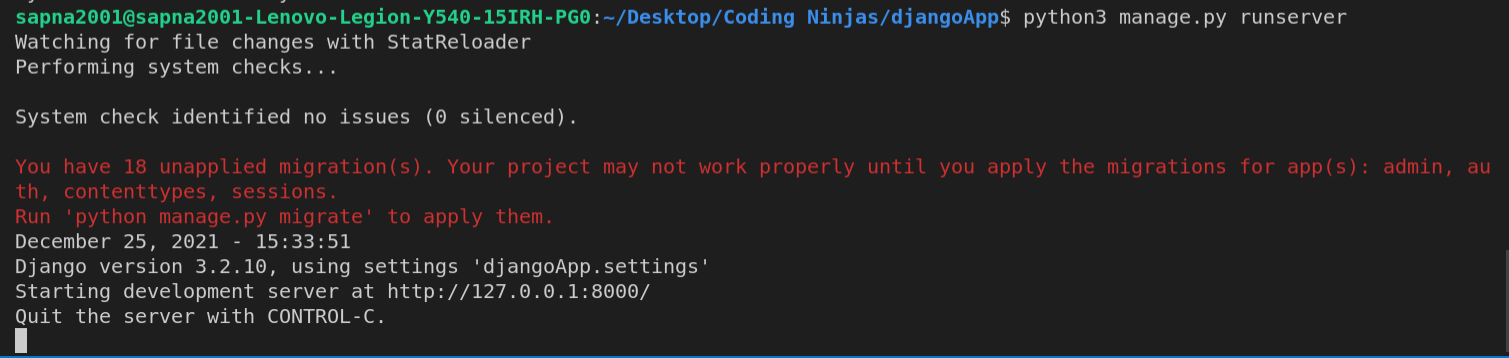
Output
We have started the Django development server, a lightweight web server written in python. Now that the server's running, let us visit http://127.0.0.1:8000/.
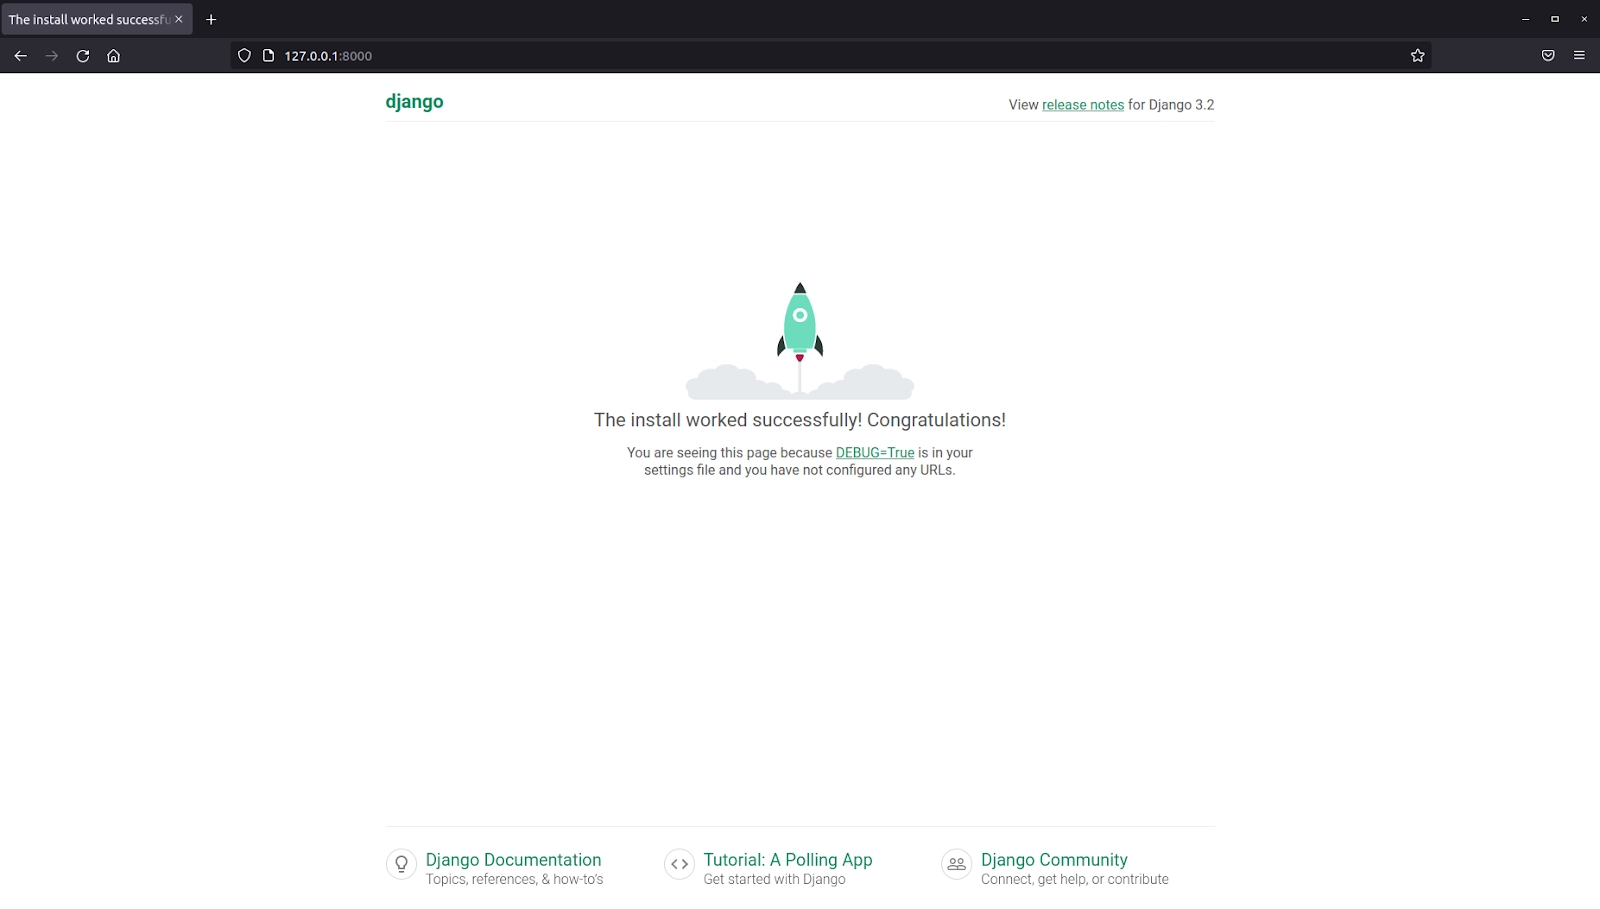
http://127.0.0.1:8000/
Frequently Asked Questions
1. Which version of python has to be installed to support Django?
Ans:- The Latest Django version requires python 2.6.5 or higher to function properly.
2. How can we get the latest development version of Django?
Ans:- The latest Django version is the one that's in our Git repository. This is mostly for experienced users who want to try incoming changes and help identify bugs before an official release. To get this, use the following shell command:
git clone https://github.com/django/django.git
3. Name a few databases supported by Django.
Ans:- MySQL, SQLite 3, PostgreSQL, Oracle, and NoSQL databases like MongoDB and GoogleAppEngine Datastore.
4. How can we change the default port in Django?
Ans:- By default, the runserver command starts the development server on the internal IP at port 8000. To change the server's port, pass the following command:
python manage.py runserver 3000
Here the server port will start at port 3000.
Key Takeaways
This blog covered the Django Installation process in depth and the other aspects like python installation, databases, and the web server. We also saw how to launch a basic Django application.
Don't stop here. Check out the blogs Best Django Books, Top 30 Basic Django Interview Questions: Part 1, and Top 30 Intermediate Django Interview Questions: Part 2.
We hope you found this blog useful. Liked the blog? Then feel free to upvote and share it.


 8+ registered

